
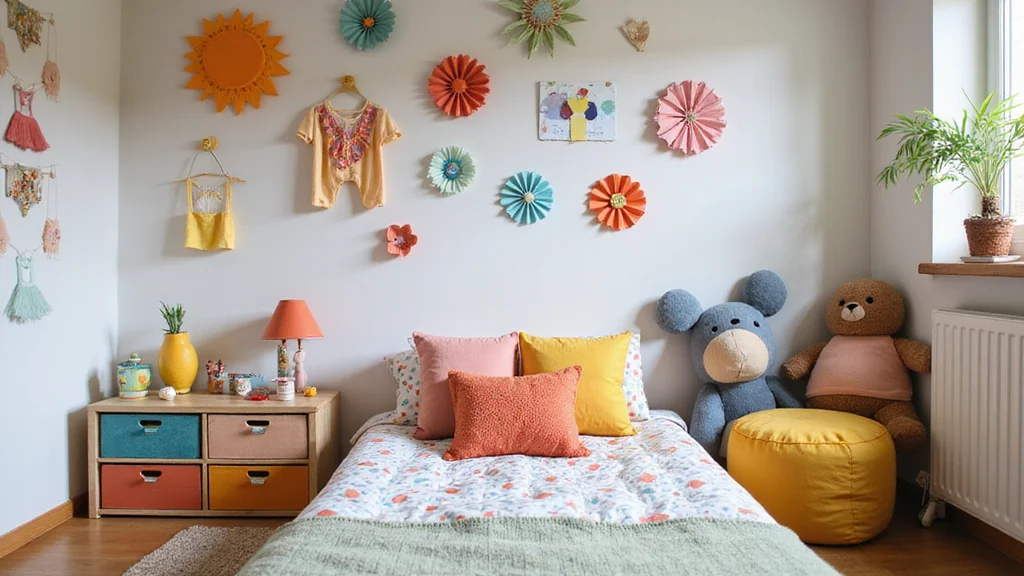
Are you looking to add a touch of charm to your child’s room without breaking the bank? I created this guide because I know how important it is for kids to have a space that reflects their personality and sparks their imagination. Fun and creative DIY room decoration projects can transform any room into a cozy haven. Plus, they offer a great way to bond with your little ones while crafting together.
This post is for parents, guardians, and anyone who wants to brighten up a child’s space with homemade decor. If you love easy craft ideas that let kids express themselves, you’re in the right place. You’ll find that these enchanting projects are not only budget-friendly but also incredibly fun to make.
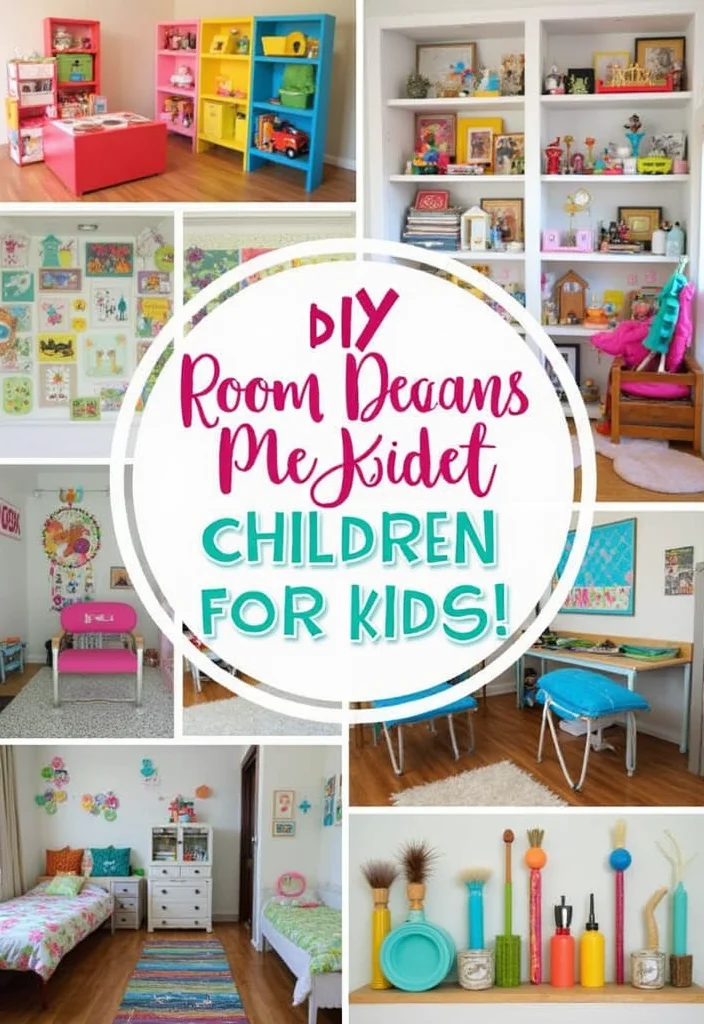
In this guide, you’ll discover 19 lovely inspirations that include everything from whimsical paper lanterns to colorful wall quotes. Each idea is designed to bring joy and creativity to any child’s room. Get ready to roll up your sleeves and dive into some delightful homemade decor projects that will make their space uniquely theirs. Let’s create a space that they will love spending time in!
Key Takeaways
– Discover 19 unique DIY room decor ideas tailored for kids, ranging from whimsical paper lanterns to colorful wall quotes.
– Each project is designed to be easy and budget-friendly, making crafting accessible for everyone.
– Create personalized spaces that reflect your child’s interests and creativity, fostering a sense of ownership and pride.
– Engage your children in the crafting process for memorable bonding time and to inspire their imagination.
– Enjoy the satisfaction of creating charming decor that adds warmth and personality to any kid’s space.
1. Whimsical Paper Lanterns
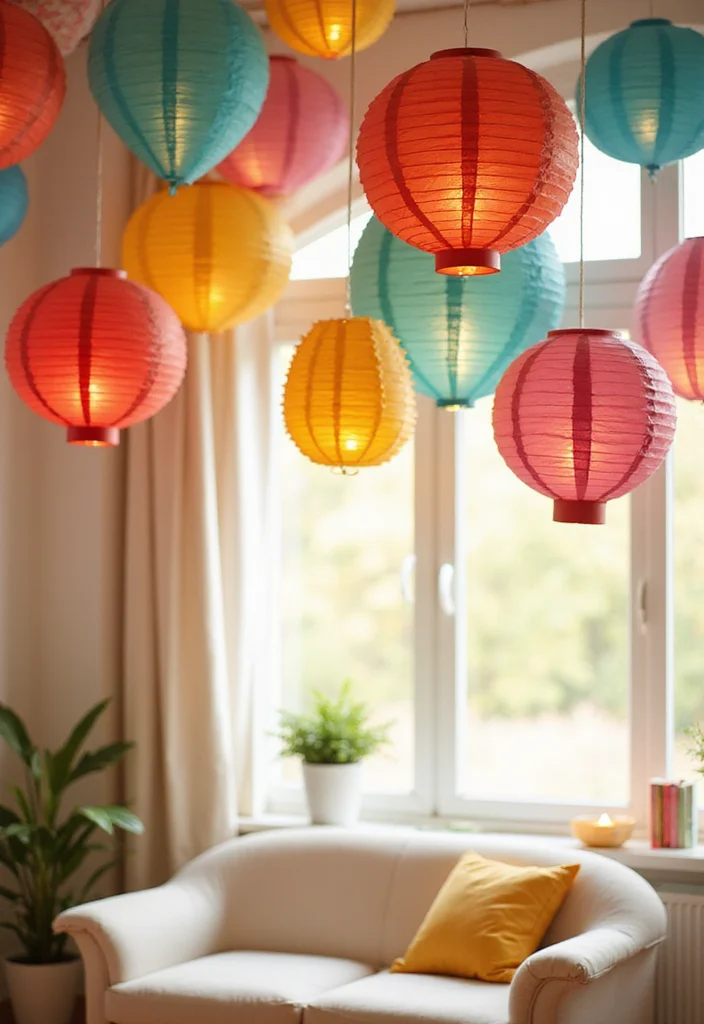
Whimsical paper lanterns brighten the room with light and playfulness. Hang them from the ceiling or in a cozy reading corner for a magical touch. Use colored paper in a rainbow mix or stick to a simple color scheme. Add glitter or stickers to boost charm, so the space feels special.
To make it real, grab affordable paper lanterns or DIY kits, plus string lights. Drape them at different heights for depth and keep cords tucked away along edges. This approach fits color-loving, budget-friendly schemes and pairs with other soft textures. It turns quiet nights into a warm, dreamy escape.
• Use colored paper lanterns in mixed sizes for whimsy
• Choose warm white string lights inside for glow
• Pick lightweight materials like kraft paper to save
• Add glitter accents or stickers for sparkle
These lanterns invite wonder and warmth into everyday play.
2. Personalized Wall Art
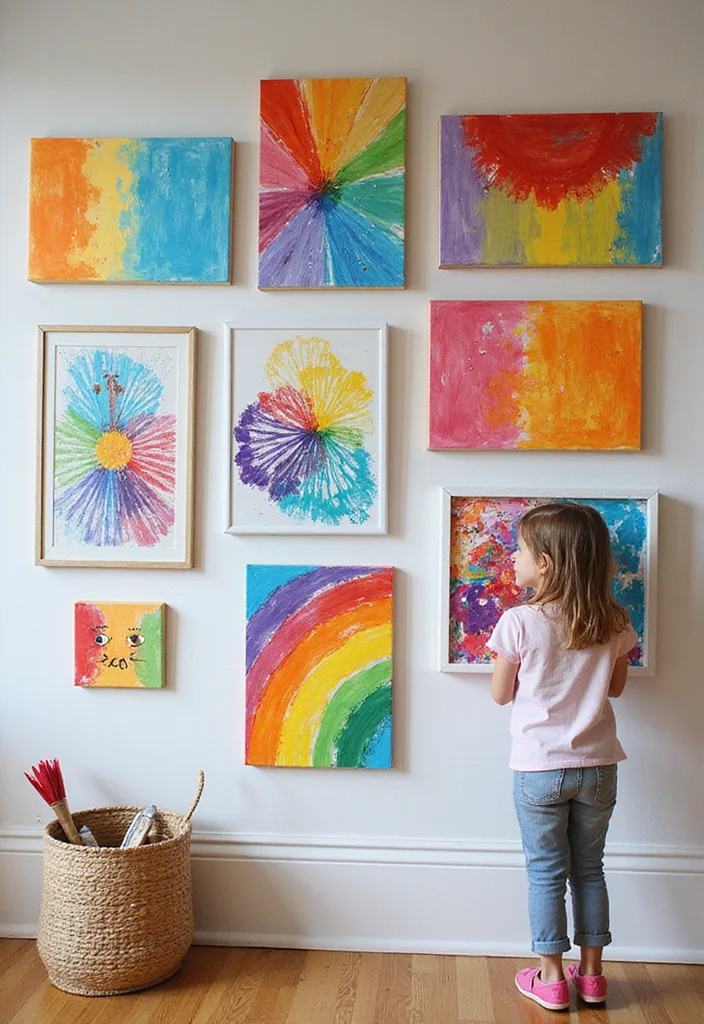
Personalized wall art makes their space feel like a tiny gallery. Create a bright display with canvases or posters. Let your child draw with paints or make collages from magazines. Framing adds polish and helps the wall feel intentional. A mix of sizes and colors keeps it lively, like a Pinterest pick.
To bring it to life, try easy frames from thrift shops and removable mounting methods. Let them choose a theme like nature or superheroes, then create pieces that fit. Mix sizes and colors for energy, and rotate art to keep the wall fresh. This project makes the room reflect your child and boosts confidence, turning a wall into a story they can tell.
• Use personalized wall art to reflect kid’s identity
• Choose thematic collections for cohesion across pieces and colors
• Pick thrift frames for budget polish and elevate display
• Add mixed sizes for visual rhythm and texture
Your child sees their story here, boosting pride and joy.
3. DIY Fabric Wall Hangings
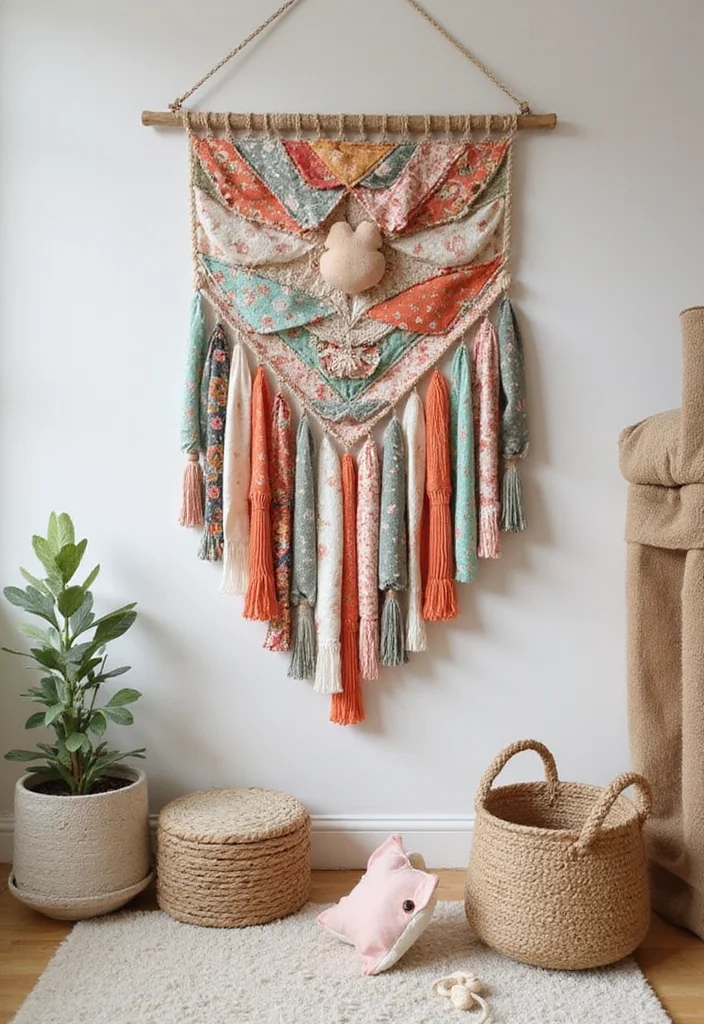
DIY fabric wall hangings add texture and warmth to a kid’s room. Use scraps of fabric and a stick to create fringe that sways with the air. Layer different fabrics for depth or keep to one color for calm. This boho-inspired craft brings a soft, cozy vibe to the wall.
To make it real, grab fabric scraps, twine, and a stick. Tie strips onto the stick and let them hang freely. Choose a color plan that matches the room, then hang above a bed or desk to set a cozy nook. Encourage your child to pick fabrics they love to make it truly theirs. This simple project builds a warm, inviting space your child will enjoy.
• Use DIY fabric wall hangings to add texture
• Choose soft cotton fabrics for warmth and softness
• Pick a color palette that blends with the room
• Add a simple stick and twine display idea
It creates a snug corner where imagination can grow.
4. Fun Painted Flower Pots
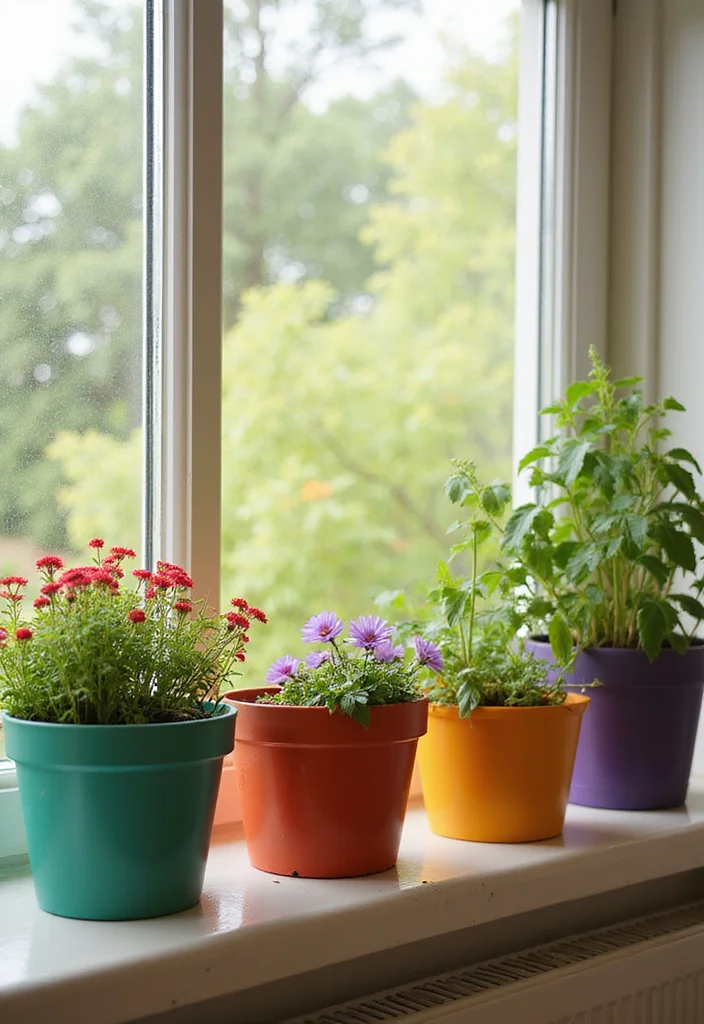
Don’t let windowsills stay bare—fill them with fun painted flower pots. This activity teaches kids about plants while they express themselves. Grab plain terracotta pots and let your child paint designs, characters, or scenes on each pot. After drying, plant flowers, herbs, or a little succulent for color and life. You can also include soil and seeds to make it an educational mini-workshop. The result is cheerful, handmade decor that grows with your child’s care and pride.
To implement, set up a small painting station with washable paints and brushes. Seal designs with a kid-safe finish, then pot in fresh soil. Choose plant types that suit your light and care level, turning a craft into a mini garden project. This keeps decor bright and meaningful as kids watch their plants thrive.
• Use painted flower pots to brighten shelves
• Choose bold colors and simple patterns for kids
• Pick terracotta pots for natural texture and warmth
• Add seeds or herb kits for learning by doing
Plants bring life and teach care while they grow.
5. Adorable Photo Wall Collage
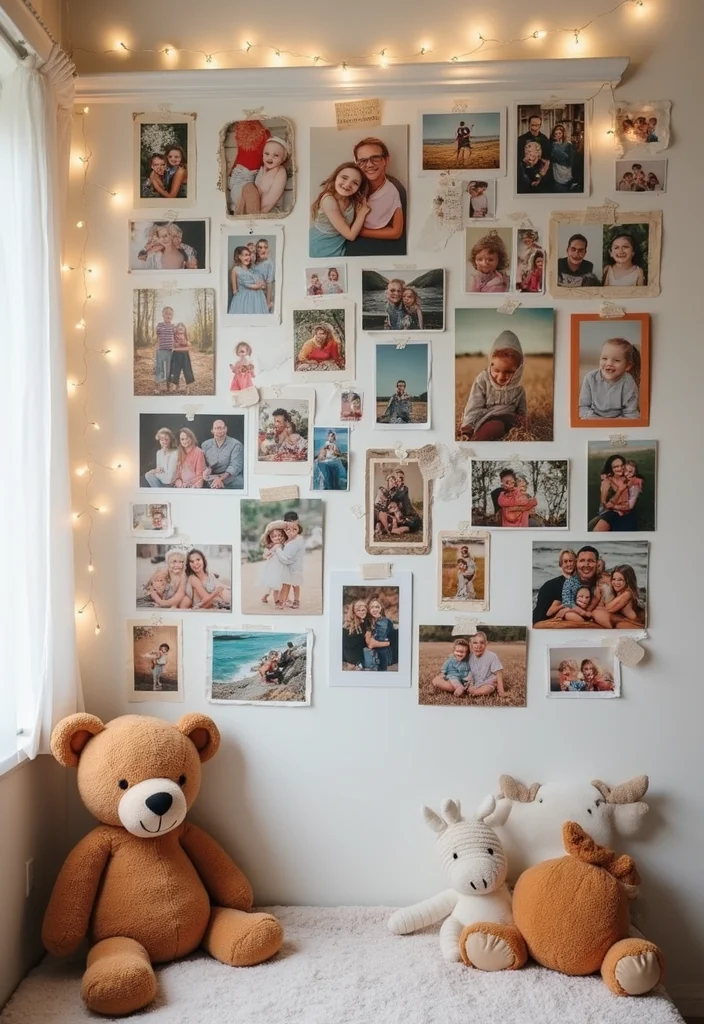
Create a heartwarming photo wall collage that captures your child’s favorite memories. Gather printed photos, postcards, and their own artwork. Use a mix of washi tape and string lights to hang them in a playful arrangement. Let your child help pick photos and decide on the layout. This project not only decorates the room but sparks conversations about fond memories. Add tiny notes or doodles to make it even more special. It becomes a living story that grows with your child and keeps memories visible.
To keep it fresh, rotate photos and add new keepsakes over time. Let your child take the lead on placement to boost pride. This visual story teaches them to value moments and share stories with family.
• Use photo wall collage to tell stories
• Choose washi tape and fairy lights for display
• Pick a mix of photo sizes for rhythm
• Add notes or doodles for personality
It’s a rotating gallery of memories you revisit with joy.
6. Colorful Rainbow Streamers

Rainbow streamers bring joy and color to any kid space. Crepe paper or fabric strips in every hue drape across the room, along shelves, or above the bed. Twist, braid, or let them hang loosely for a festive vibe. They work great for parties or as daily mood boosters, and they are friendly to small budgets. The room feels bright and magical, like a dream come alive. Kids love helping cut and arrange the streamers, making it a bonding moment.
To set up, cut strips in varied widths and lengths. Group colors to form a subtle arc or run a full rainbow across a wall. Use removable hooks or tape so you can adjust as your child’s style changes. This simple step adds movement and cheer to daily life.
• Use rainbow streamers for bright decor
• Choose crepe paper strips for easy shaping
• Pick varied widths for texture and depth
• Add braids or twists for dynamic flow
This tiny touch makes the room feel joyful and alive.
7. Cozy DIY Reading Nook
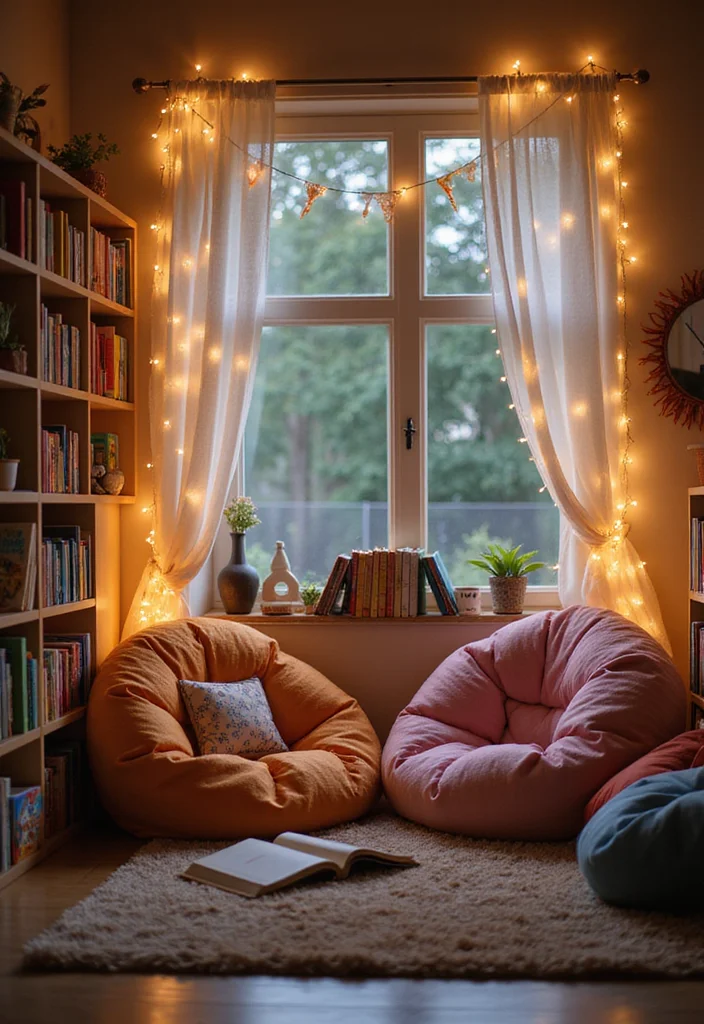
Turn a quiet corner into a cozy reading nook that invites your child to dive into stories. Start with a soft bean bag or floor cushions for comfy seating. Add fairy lights or a fabric canopy to make a warm canopy of light. A tiny bookshelf or crate filled with favorites completes the space. Personal touches like a throw pillow or a playful rug seal the charm. This nook makes reading feel magical and safe, a perfect retreat for imagination and learning.
To set it up, position the space by a window for natural light and fresh air. Use a small rug to anchor seating and a low shelf for easy access. Keep colors soft and inviting, so reading becomes a daily delight. It becomes a sanctuary for quiet time and exploration.
• Use soft cushions for comfy seating
• Choose warm string lights for soft glow
• Pick a small bookshelf or crate for storage
• Add a plush rug to anchor the space
A little retreat where stories come alive.
8. Upcycled Crate Storage
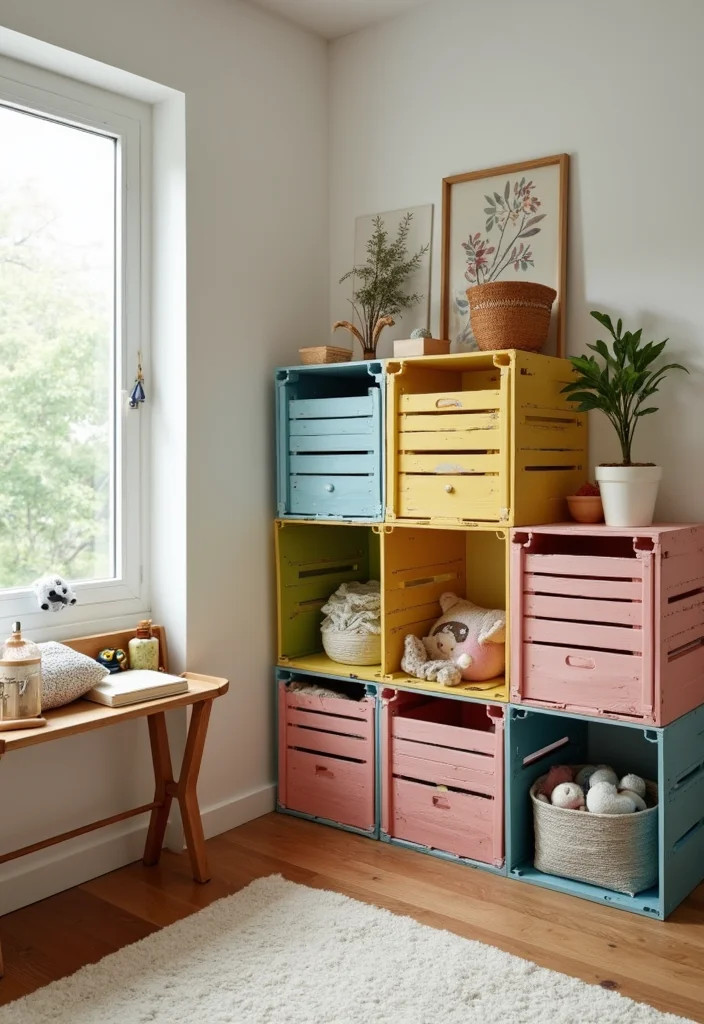
Reinvent old wooden crates into storage that looks fresh and feels warm. You can paint them or leave a natural look, then stack or place them apart to store toys, books, or art supplies. The rustic crates add character while keeping things tidy. Let your child pick colors and how to arrange them, and label crates with fun stickers to boost organization. This project shows care for the planet and creates a unique, budget-friendly space. It also makes cleanups easier and more fun.
To carry it out, thrift crates or use scraps you have at home. Try light coats of paint to keep the rustic charm, or seal for durability. Create labeled zones so kids can find and return items easily. It’s a smart, eco-friendly feature that adds personality to the room.
• Use upcycled crates for storage charm
• Choose natural or paint to suit decor
• Pick stacks or shelved layouts for access
• Add labeled stickers to guide use
Clean looks with a warm feel makes it homey.
9. Charming DIY Dream Catchers
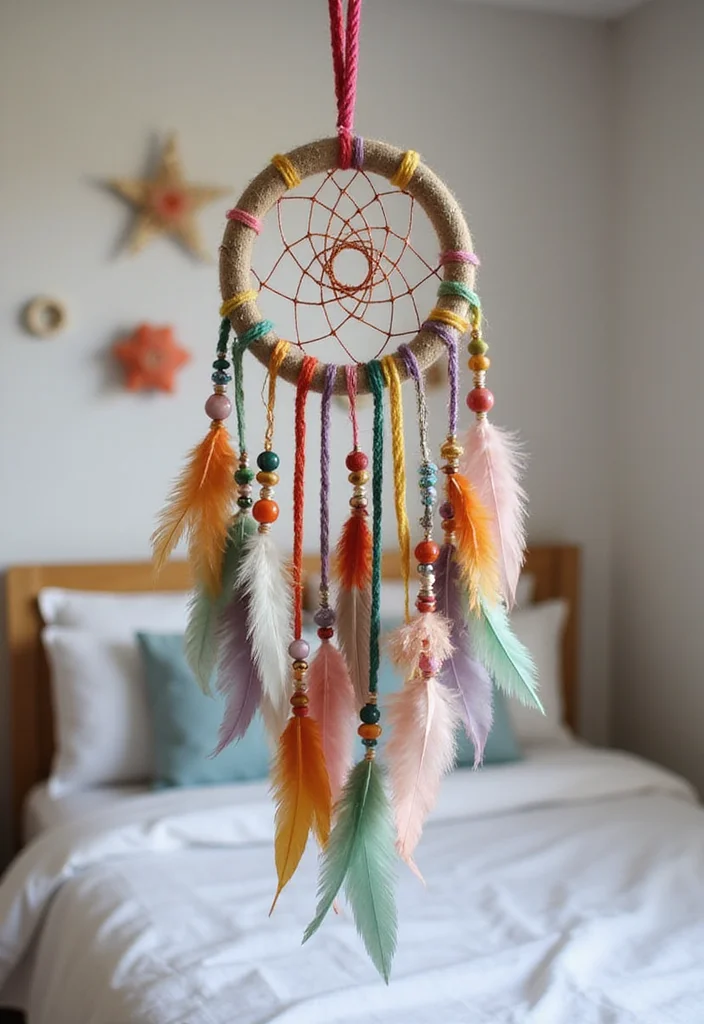
Dream catchers add a touch of magic and calm to a child’s room. Use a hoop, yarn, and beads or feathers to make a soft, swooping design. Let your child pick colors that feel soothing to them. Hang the finished piece above the bed to create a gentle, dreamy vibe. It can be part of a calming bedtime routine and a chance to explore other cultures through craft. The result is a charming charm that helps nights feel peaceful and safe.
To make it, choose natural fibers and simple designs. Keep sizes small for easy hanging, and discuss the meaning in kid-friendly terms. This project blends art, culture, and comfort in a sweet, memorable way.
• Use DIY dream catchers for magic
• Choose soft yarn colors for soothing vibe
• Pick simple hoops from sticks or metal
• Add beads and feathers for texture
A gentle charm that lulls them toward restful nights.
10. Fun Wall Growth Chart
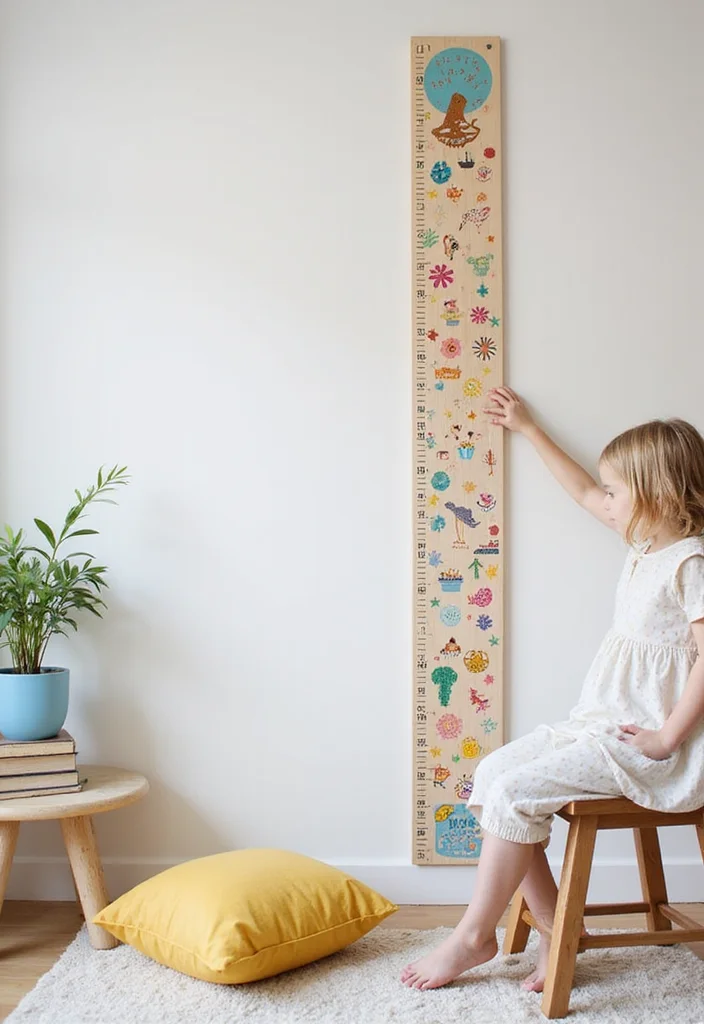
A wall growth chart marks growth and stitches memory into the room. Use a long wood strip or fabric base and add markings, numbers, and your child’s name. Draw little designs or scenes to make it a tool they love to watch. Each growth milestone becomes a small celebration, and you can swap art or stickers as they grow. It’s both a chart and a keepsake of their journey.
Set it up with easy-to-remove strips or chalk marks for zero mess. Let kids decorate with stickers or drawings to make it theirs. This project blends utility with sentiment, turning growth into a warm story they can revisit.
• Use DIY wall growth chart to track height
• Choose wood or fabric as base
• Pick big numbers for readability
• Add dates and doodles for flair
A keepsake that grows with them.
11. DIY Bead Wreaths
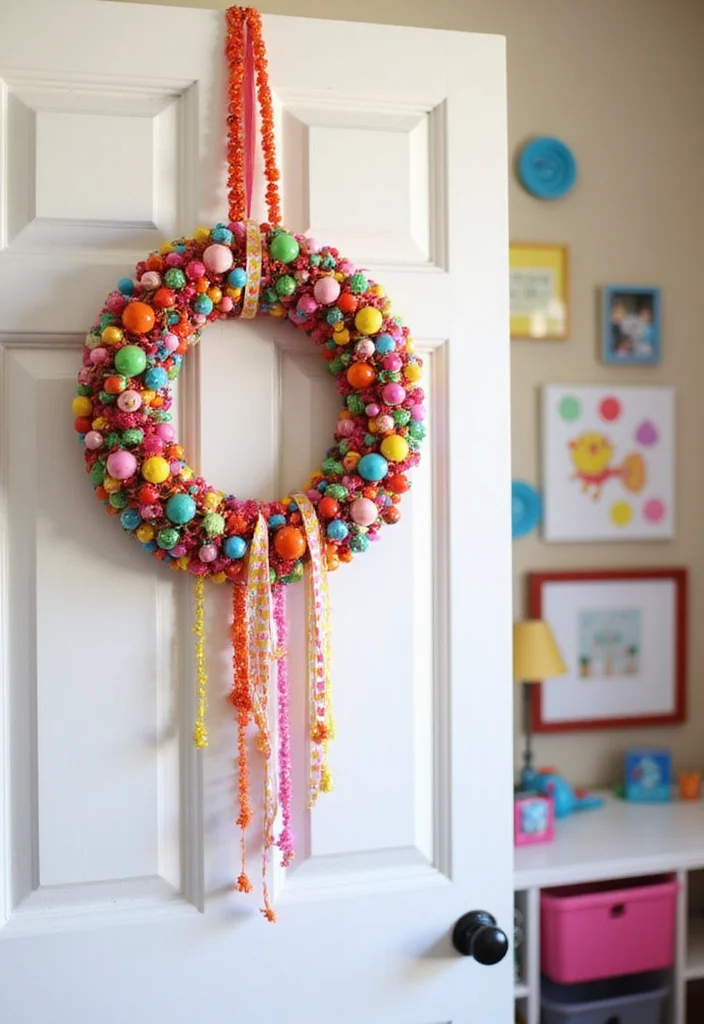
Bead wreaths bring color and joy to doors or walls. With a wire frame and lots of beads and ribbons, your child can design bright, personal pieces. Let them choose colors and patterns to learn color combos and balance. Hang wreaths in hallways or above a desk for a cheerful touch. They are fun to make and great for fine motor skills, plus they spark lots of talk and bonding time as you craft together.
To start, pick a simple wire base and safe beads. Supervise small pieces and teach knotting or threading tricks. This project yields tiny works of art your child will be proud to show off.
• Use bead wreaths for bright accents
• Choose a flexible wire frame for ease
• Pick bright beads and ribbons for playfully bold
• Add a simple backing to hang on walls
Creativity blooms and smiles shine.
12. Playful Pillow Fort
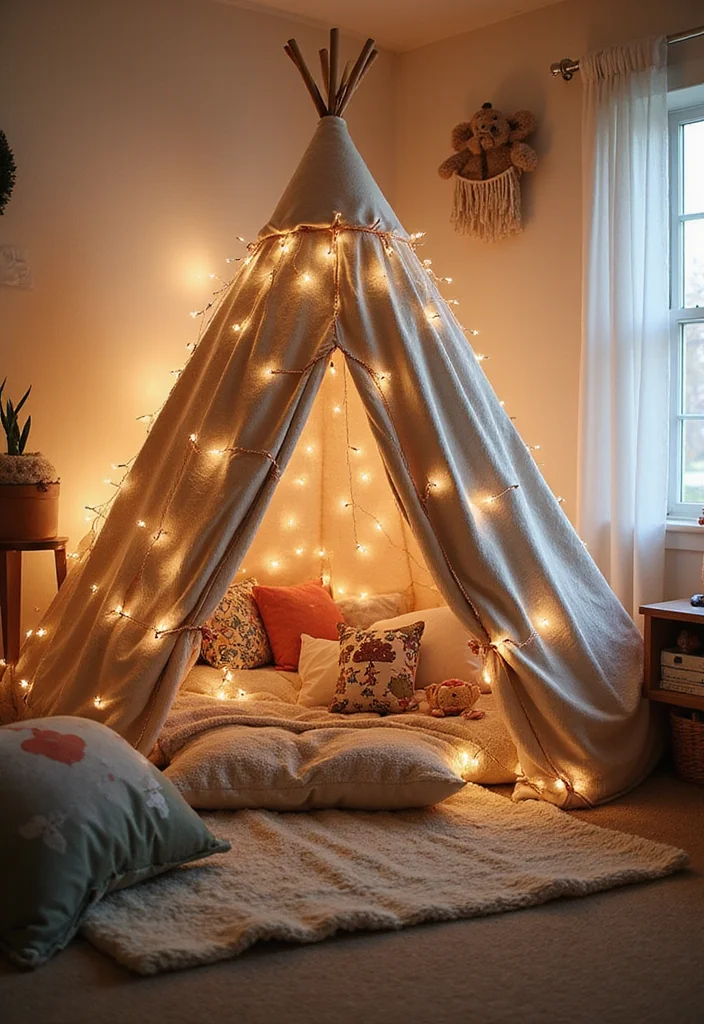
A pillow fort opens a realm of imagination. Gather pillows, blankets, and fairy lights to form a cozy hideaway for stories, plays, or quiet time. Let your child own the space by adding their toys or drawings inside. This nook invites creative play and gives the room a fun, special spot for rainy days. It also becomes a warm memory you both share.
Plan the fort in a safe, ventilated corner and keep it simple to set up. Use lightweight blankets for quick builds and bright cushions for color. The fort becomes a tiny home away from home, ready for adventures or rest.
• Use pillow fort to spark imagination
• Choose lightweight blankets for easy setup
• Pick a safe corner with good air flow
• Add fairy lights for magical glow
A secret hideaway for endless play.
13. Color Blocked Furniture
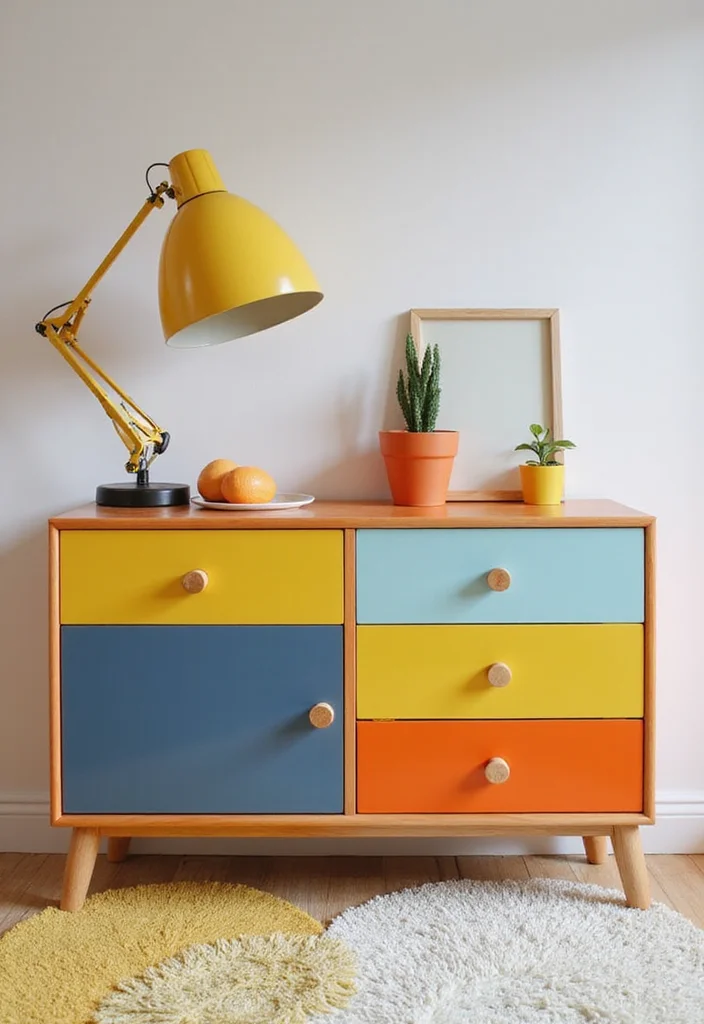
Color blocks wake up old furniture. Pick a piece like a table or chair and use painter’s tape to section it into different colors. This gives a playful pop and can transform an old piece into a bold decor item. Let your child pick the colors to boost their style. After paint dries, seal it to keep wear low. It’s a budget-friendly way to refresh and show off personality.
Start with a small, inexpensive piece to test the look. Clean the surface, sand lightly, and tape clean lines. This project invites kids to explore color and shape, making furniture feel alive and new.
• Use color blocked furniture for bold focal
• Choose kid-friendly colors and patterns
• Pick painter’s tape and brushes for clean lines
• Add clear sealant to protect paint
Fresh style that grows with their taste.
14. DIY Toy Storage with Labels
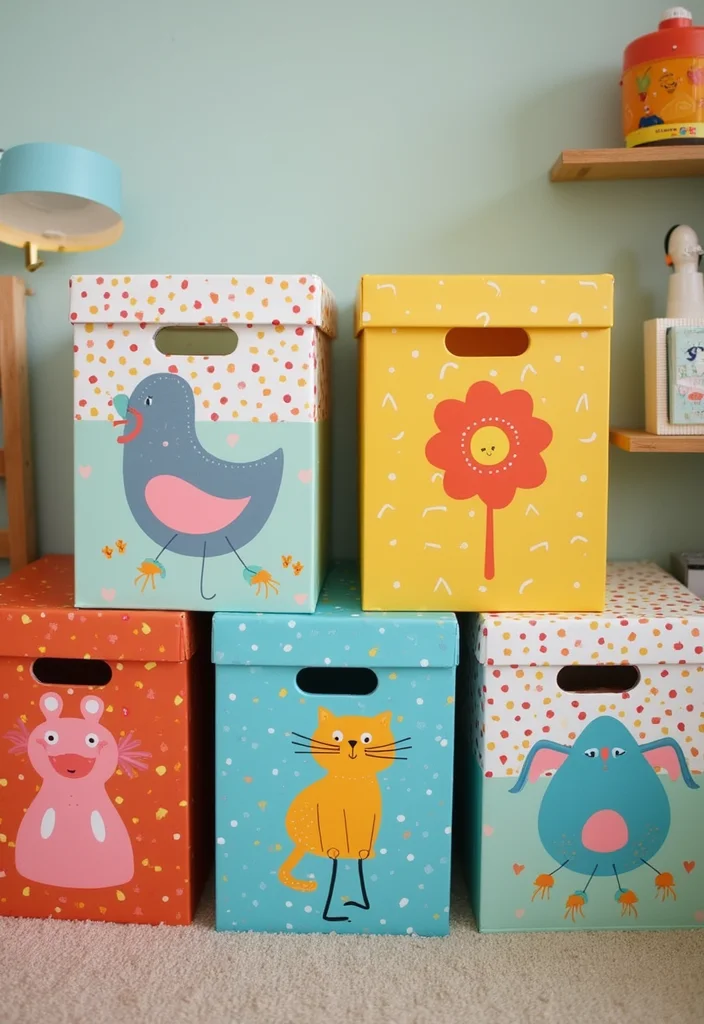
Toy storage with labels makes a playful, tidy space. Use shoeboxes or baskets and let your child decorate them with paint or stickers. Label each bin with names or colors to guide play and cleanup. A bright, kid-friendly system helps them find and return toys easily. This project combines fun with order, making the room calmer and more inviting for play.
Set up a simple labeling plan and keep supplies within reach. Use color codes or cute animal names to make it memorable. The result is a practical, decorative storage system that grows with your child’s collection.
• Use DIY toy storage with labels to organize
• Choose lids or bins with clear fronts
• Pick fun animal names for labels
• Add a simple labeling system children can manage
Cleanup becomes a fun part of play.
15. DIY Tablet Holder for Kids
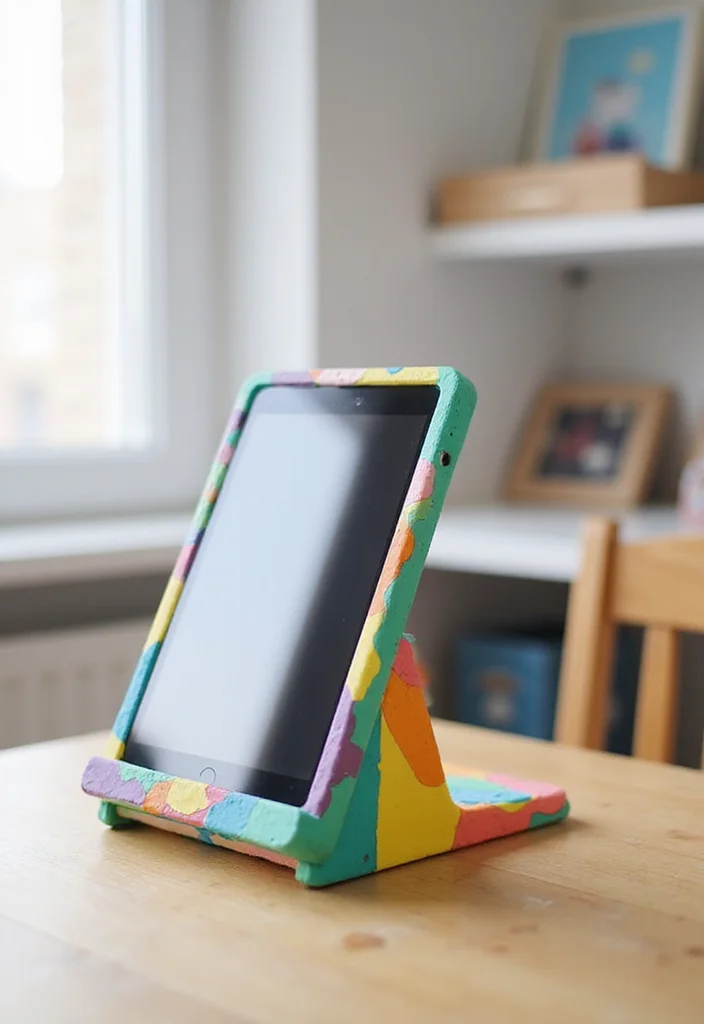
Create a DIY tablet holder that keeps devices safe and easy to reach. Use cardboard, fabric, and some creativity to shape a snug cradle. Let your child decorate it with their favorite colors, making it clearly theirs. The holder teaches basic crafting and helps manage screen time in a tidy way. It’s affordable and can suit any room style.
Build a snug fit with adjustable angles for comfort and good viewing. Secure the base so it stays steady while little hands use it. This simple tool keeps tech organized and accessible during movie time or calls with family.
• Use DIY tablet holder for hands free use
• Choose snug fits and stable base
• Pick soft fabrics to cover edges
• Add adjustable angles for comfort
A handy tool that stays tidy and ready.
16. Decorative Clipboards for Artwork
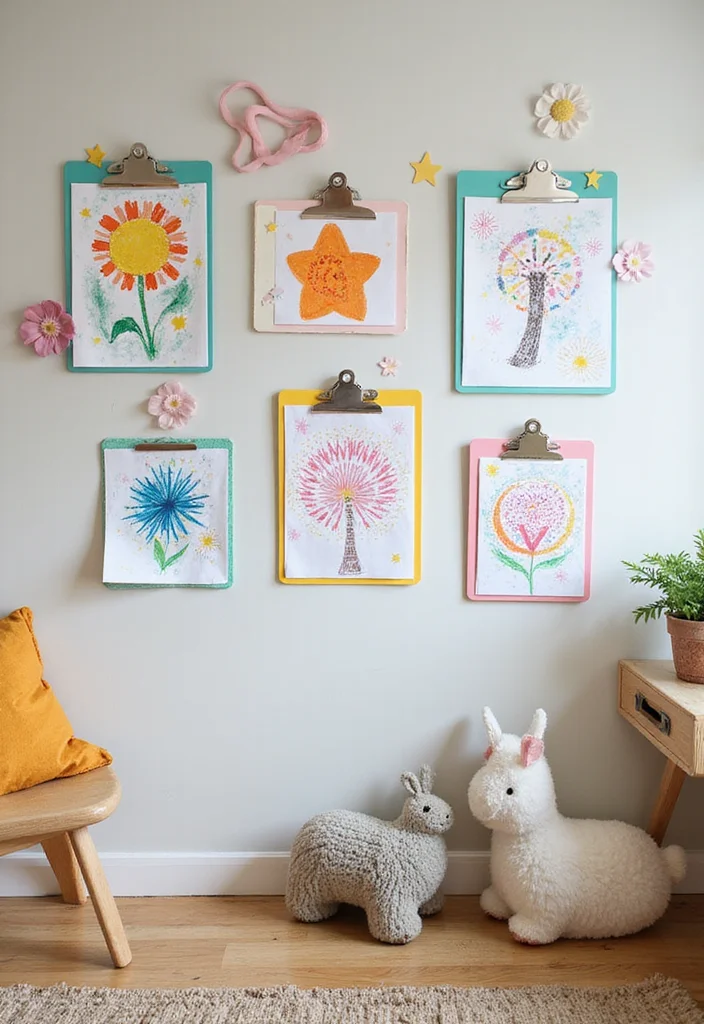
Decorative clipboards turn art into a bold wall display. Let your child paint or decorate plain boards with washi tape, stickers, or fabric. Clipboards can hang on walls or rotate artwork as new pieces arrive. This creates a dynamic gallery that grows with their skill. Add dates or titles to track their art journey. It blends organization with creativity for a cheerful room display.
Set up easy mounting and space them evenly on a wall. Encourage your child to swap in fresh work regularly. This project teaches display skills and pride in every piece.
• Use decorative clipboards for art display
• Choose bright paints and washi tape
• Pick easy mounting methods for walls
• Add dates or titles on each piece
Rotating art that lights up the room.
17. DIY Magnetic Chalkboard
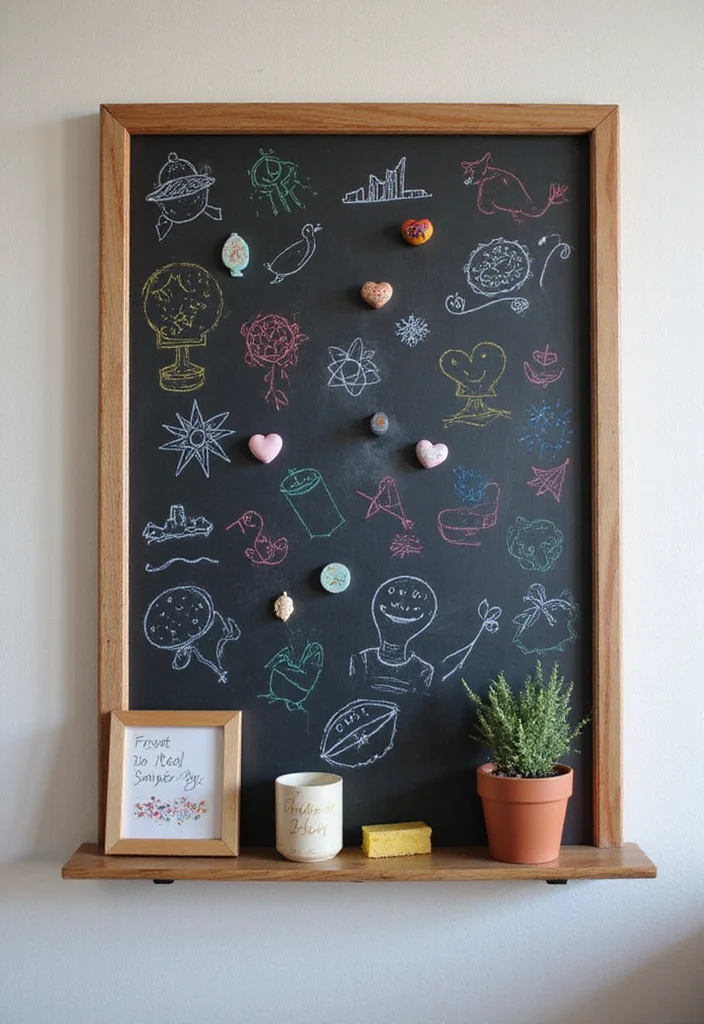
A magnetic chalkboard brings art and notes together. Paint a wooden board with magnetic paint, then add chalkboard paint for a writable surface. Your child can draw, doodle, and post notes using magnets. Involve them in painting and setting up to make it a shared project. This piece becomes a useful, interactive center for learning and creativity.
Keep magnets kid-friendly and small. Clean the surface regularly and use a soft cloth for chalk dust. It’s a practical, engaging way to encourage expression while keeping the space tidy.
• Use magnetic chalkboard for expression and organization
• Choose a wooden board to anchor the look
• Pick magnetic paint and chalkboard surface
• Add magnets to display artwork
Interactive space that invites ideas.
18. Colorful Ribbon Garland
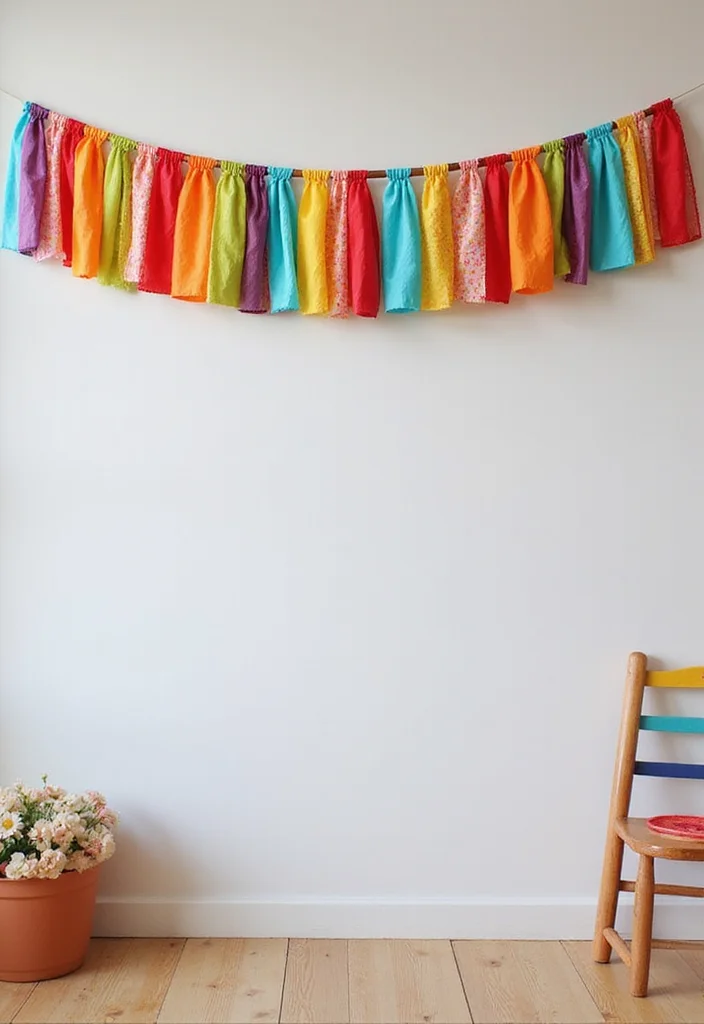
A ribbon garland brings a bright, festive vibe to any room. Let your child weave and tie ribbons of different colors to a string or twine. Drape it across doorways, shelves, or walls for movement and texture. Vary ribbon widths and textures for visual interest. This easy project invites group work and can be a party favorite. It adds life and cheer to daily spaces.
Plan a simple setup and use safe mounting. Let kids pick colors to express their taste. The garland becomes a playful feature that moves with the room’s mood.
• Use colorful ribbon garland to brighten spaces
• Choose varied textures for depth
• Pick strong string or twine to hang
• Add group effort for parties and play
Cheerful decor that dances with light.
19. DIY Colorful Wall Quotes
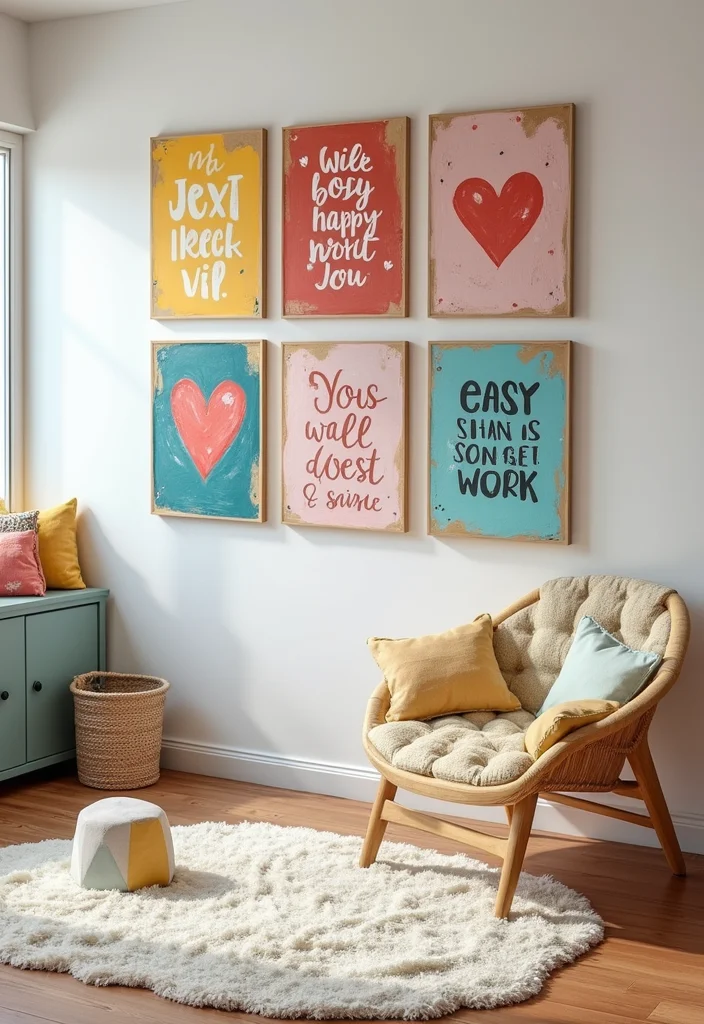
Colorful wall quotes lift the room with positive words and big feelings. Use a canvas or a wooden board as a base and paint or apply felt letters. Let your child choose phrases that match their mood or goals. These quotes brighten the space and lift their spirits while boosting self expression. It’s a simple, hopeful way to blend art with daily motivation.
Pick quotes that are easy to read and change when feelings shift. Keep colors high-contrast for legibility and install with simple mounting. This project spreads encouragement and creativity throughout the room.
• Use colorful wall quotes to inspire daily
• Choose legible fonts and colors
• Pick canvas or wood boards as base
• Add simple frames or mounts for display
Words that brighten the room and spirit.
Conclusion
Creating cute DIY room decor for kids’ spaces is a wonderful way to personalize their environments while fostering creativity.
The projects shared offer a delightful mix of fun, functionality, and artistry, making each room unique to its young inhabitant.
Whether you’re working together on crafts or allowing them to take the lead, these budget-friendly crafts will bring joy and character into their spaces. Let’s get crafting and make those rooms sparkle with personality!
Frequently Asked Questions
What Are Some Easy DIY Room Decoration Ideas for Kids’ Spaces?
If you’re looking to spruce up a child’s room, you can try simple DIY room decoration ideas like creating colorful wall art using canvas and paint or making personalized name banners with felt and string.
Crafting fun storage solutions like decorated boxes or playful wall hooks can also add charm while keeping things organized. These easy craft ideas can transform the space without breaking the bank!
How Can I Make Budget-Friendly Crafts for Home Decor?
Absolutely! Making budget-friendly crafts for home decor is all about creativity and using what you have. You can repurpose old items, like turning glass jars into cute flower vases or using scrap fabric to create cozy pillow covers.
Don’t forget to check out local thrift stores for unique finds that can be easily transformed into stunning homemade decor projects. With a little imagination, you can create beautiful pieces without spending much!
What Are Some Creative Room Makeover Tips for Kids?
When it comes to creative room makeovers for kids, consider incorporating their interests and hobbies into the design. For instance, create a themed space based on their favorite characters or colors. You can also use removable wall decals for a fun change that can easily be updated as they grow.
Adding a cozy reading nook with soft pillows or a fun DIY tent can also make the room feel special and inviting!
Can I Use Nature-Inspired Crafts for DIY Room Decor?
Absolutely! Nature-inspired crafts can bring a wonderful organic touch to your home decor. Try making leaf prints or using twigs to create unique wall hangings.
You can also collect stones to paint and use them as decorative bookends or centerpieces. Incorporating natural elements into your DIY room decoration not only looks great but also fosters a sense of calm and connection to the outdoors!
What Supplies Do I Need for Easy Craft Ideas for Kids’ Room Decor?
For easy craft ideas to decorate kids’ rooms, you’ll want to gather some basic supplies like construction paper, scissors, glue, and markers. Having a variety of paints, brushes, and canvases can also help unleash creativity.
Don’t forget to include items like washi tape, felt, and fabric scraps for more texture and dimension. With these supplies on hand, you’ll be ready to embark on fun and exciting homemade decor projects together!