
Are you tired of the same old boring decor in your room? Maybe you’re looking for a way to express your style and personality without breaking the bank. If that sounds like you, then this post is just what you need! Creating a space that truly reflects who you are is exciting and fulfilling, especially during your teenage years when self-expression is so important.
This collection of 25 cute crafts for teenagers offers a variety of DIY room decor ideas that are not only fun to make but also add a splash of personality to your space. Whether you’re into artsy vibes, boho charm, or minimalist chic, there’s something here for everyone. These projects are perfect for anyone who loves to be hands-on and wants to bring a personal touch to their environment.
You’ll find that these crafts are easy to follow and don’t require fancy tools or materials. With a bit of creativity and some basic supplies, you can transform your room into a cozy haven that feels uniquely yours. Each idea is designed to inspire you and help you create decor that you can proudly display.
Let’s face it: the teenage years can be a whirlwind of emotions and changes. Having a room that feels like a safe and inviting space can make a difference in your daily life. Plus, these crafts can be a great way to bond with friends or to spend a lazy weekend afternoon.
So, grab your supplies and get ready to unleash your inner artist! These 25 cute DIY projects will not only brighten up your room but also give you a sense of accomplishment. Dive in and explore the creativity waiting for you!
1. Upcycled T-Shirt Pillows
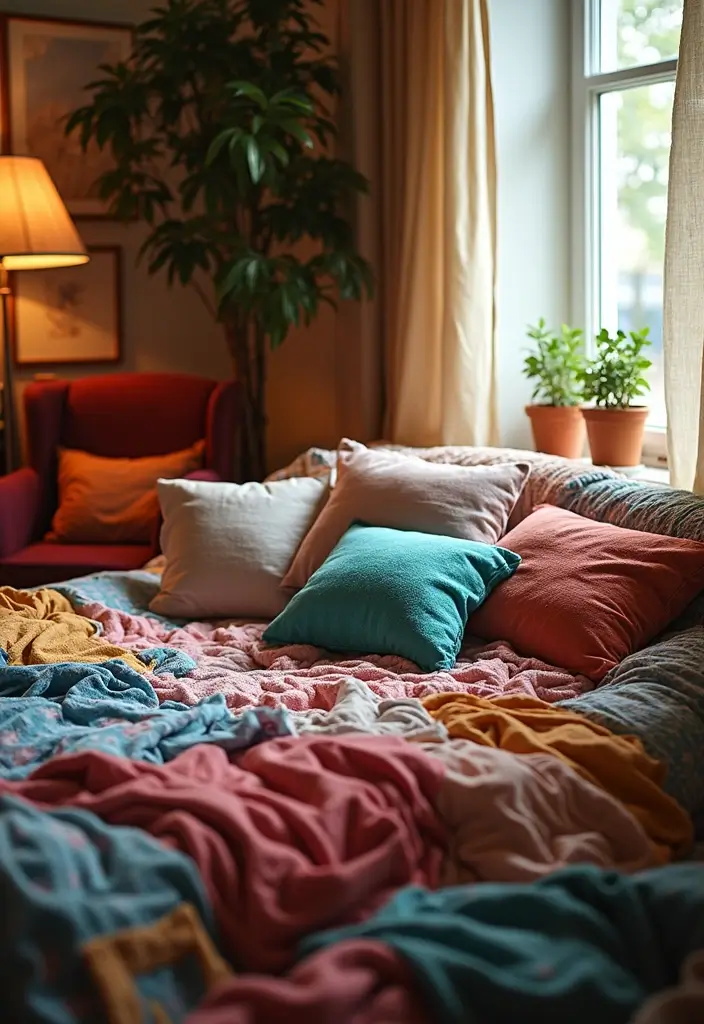
Transform your old t-shirts into trendy and cozy pillows! This DIY project not only refreshes your room but also gives your favorite tees a new purpose. Cut your beloved shirts into squares or rectangles. You can mix and match different designs for a playful vibe. Use bright colors or soft pastels to suit your style. This trend is all over Pinterest, showing how personal and fun your space can be!
To get started, sew or tie the edges of your fabric pieces, leaving one side open. Stuff them with eco-friendly filling, or even old fabric scraps you have lying around. This is a budget-friendly way to create something beautiful while keeping waste out of landfills. Placing these pillows in your reading nook or on your bed adds a cozy touch and showcases your unique personality.
• Cut your favorite tees into squares or rectangles.
• Sew or tie the edges for easy assembly.
• Use eco-friendly stuffing or scraps for filling.
• Mix patterns and colors to express your style.
These pillows are more than just decor; they tell your story. Each one carries memories of your favorite band, summer camp, or family trip. So, dive into this fun project and let your creativity shine! Your room will feel fresh and inviting, making it the perfect spot to relax and hang out with friends.
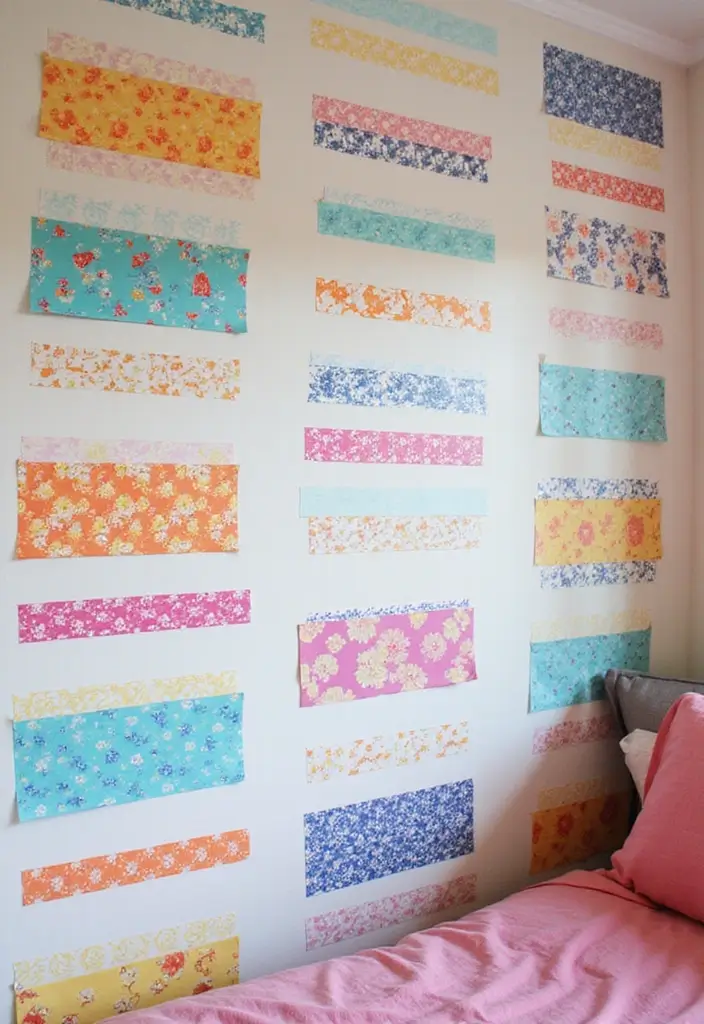
2. Personalized Photo Collage Wall
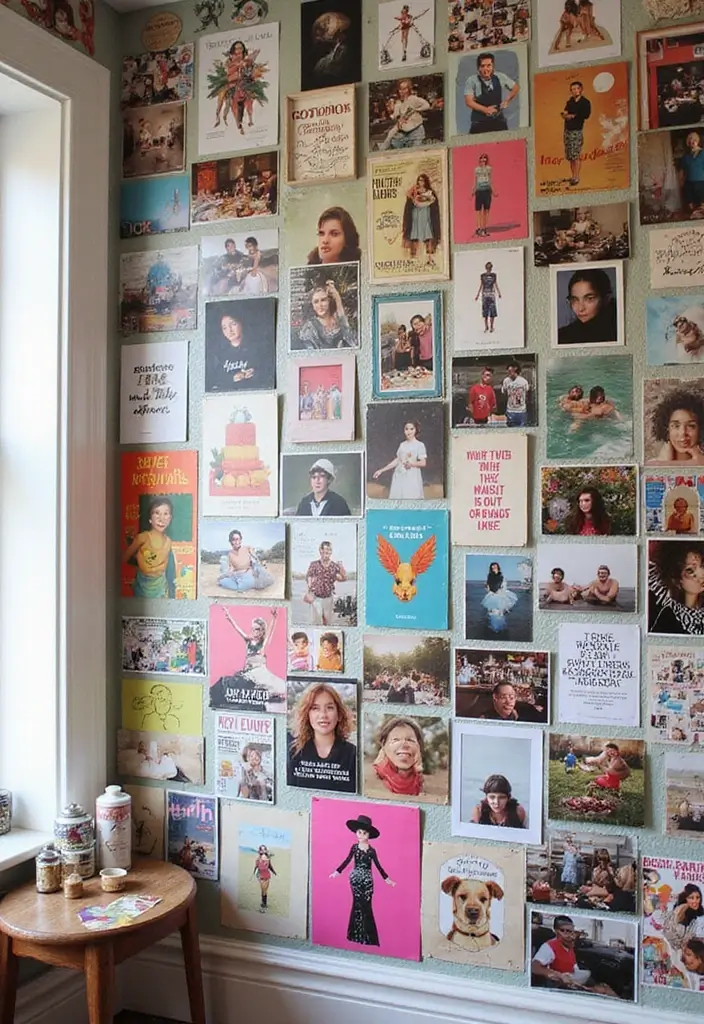
Bring your walls to life with a Personalized Photo Collage Wall! This fun project allows you to showcase your favorite memories and express your unique style. Imagine a vibrant mix of photos, magazine clippings, and art prints in colors and styles that make you smile. Pinterest is buzzing with these creative setups, featuring everything from pastel hues to bold patterns, making your space feel fresh and lively.
To get started, gather your favorite images and lay them out on the floor. This will help you visualize how they fit together. Once you’re happy with the layout, grab some eco-friendly glue or washi tape to stick them to your wall. If you’re on a budget, consider using old magazines or prints you already have. This collage not only brightens your room but also tells your story, celebrating your friends and adventures. You can easily change it up whenever you need a new look!
• Gather images from magazines, photos, and prints
• Arrange them on the floor for an ideal layout
• Use eco-friendly glue or washi tape to secure them
• Refresh the collage anytime to keep your space exciting
This project is perfect for personalizing your room and making it feel like your own sanctuary. You’ll love how it captures your journey and adds warmth to your space!
3. DIY Terrariums
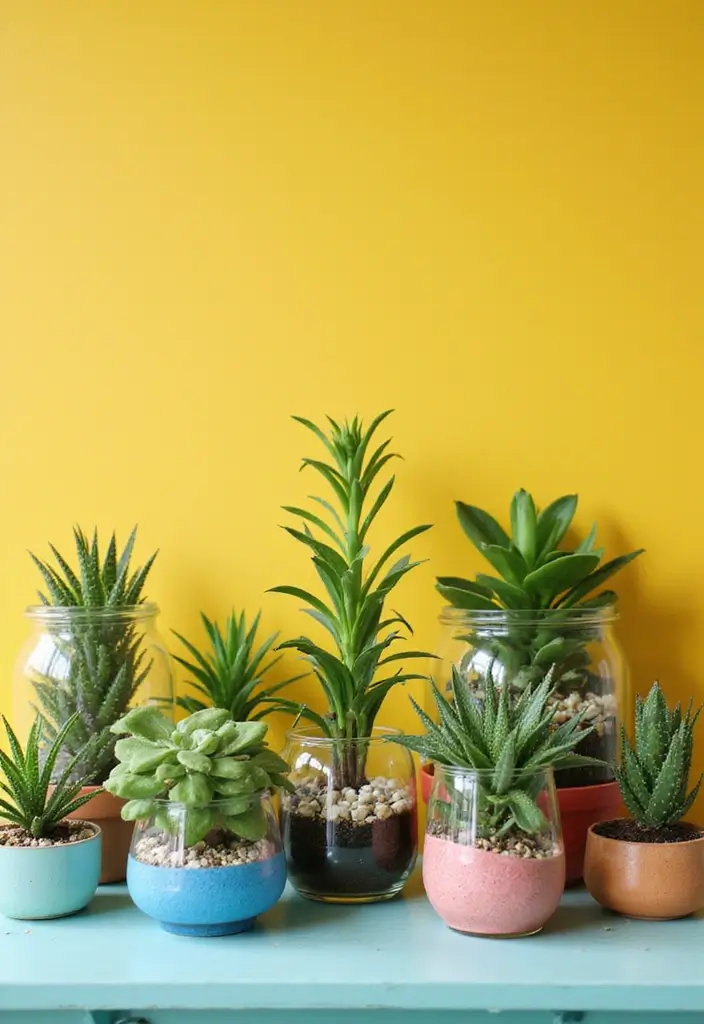
Bring the beauty of nature right into your room with DIY terrariums! These mini gardens, housed in glass containers, are not just pretty to look at; they also add a touch of tranquility to your space. You can play with different plants, pebbles, and soil types to match your decor style. Imagine a vibrant green succulent nestled among colorful pebbles, or a whimsical moss garden glowing in the sunlight. Pinterest is buzzing with terrarium ideas, offering endless inspiration for your personal touch.
Creating your own terrarium is simple and budget-friendly. Start by collecting a glass jar or container—old jars or vases work perfectly. Layer the bottom with pebbles to allow water to drain properly. Next, add activated charcoal to keep the air fresh. Then, top it off with potting soil and arrange your favorite small plants. Water them lightly and find a cozy spot with indirect sunlight. These little ecosystems require minimal upkeep, making them ideal for busy teens. They help you connect with nature and make your room feel lively and inviting.
• Choose a variety of small plants for different textures and colors.
• Add pebbles for drainage to keep your plants healthy.
• Use activated charcoal to keep the terrarium fresh.
• Place in indirect sunlight for optimal growth.
With a little creativity, your terrarium will not only be a conversation starter but also a delightful reminder of nature’s beauty in your everyday life. You’ll love how it brightens up your room and reflects your unique personality!
4. Painted Flower Pots
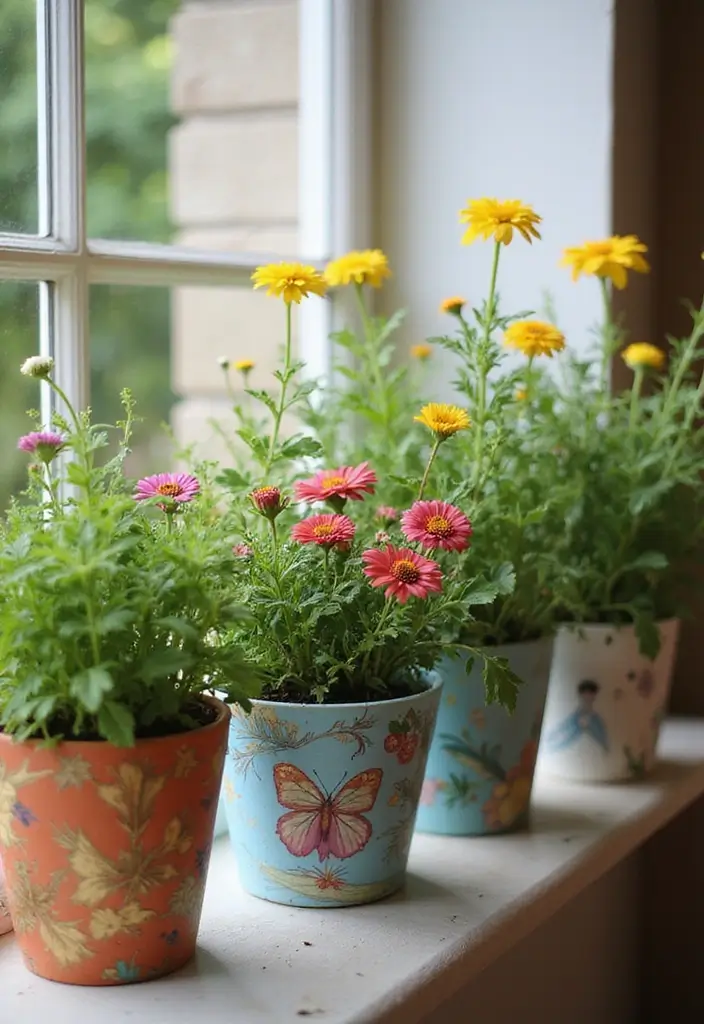
Elevate your room’s vibe with painted flower pots! This simple DIY project allows you to express your creativity while adding a touch of nature to your space. Start with basic terracotta pots—these are affordable and perfect for any room. Grab some eco-friendly paint in your favorite colors. You could go for bright hues or soft pastels, depending on your style. Pinterest is buzzing with ideas, from bold stripes to whimsical polka dots, so get inspired!
To get started, gather your supplies: terracotta pots, paint, brushes, and sponges. Don’t be afraid to use your hands! Mix techniques for unique designs. If you want to make it even more personal, consider adding motivational quotes or fun patterns. Once your pots are painted and dried, fill them with your favorite flowers or herbs. Not only do these pots add greenery, but they also showcase your personality and style.
• Use eco-friendly paint for a safe DIY project
• Choose colors that reflect your personality
• Add quotes or patterns for a personal touch
• Place herbs or flowers to brighten your space
This project is not just about decor. It’s about creating something that feels like you. Your painted flower pots will bring life to your room and might even spark conversations. So roll up your sleeves and let your creativity flow!
5. Mason Jar Organizers
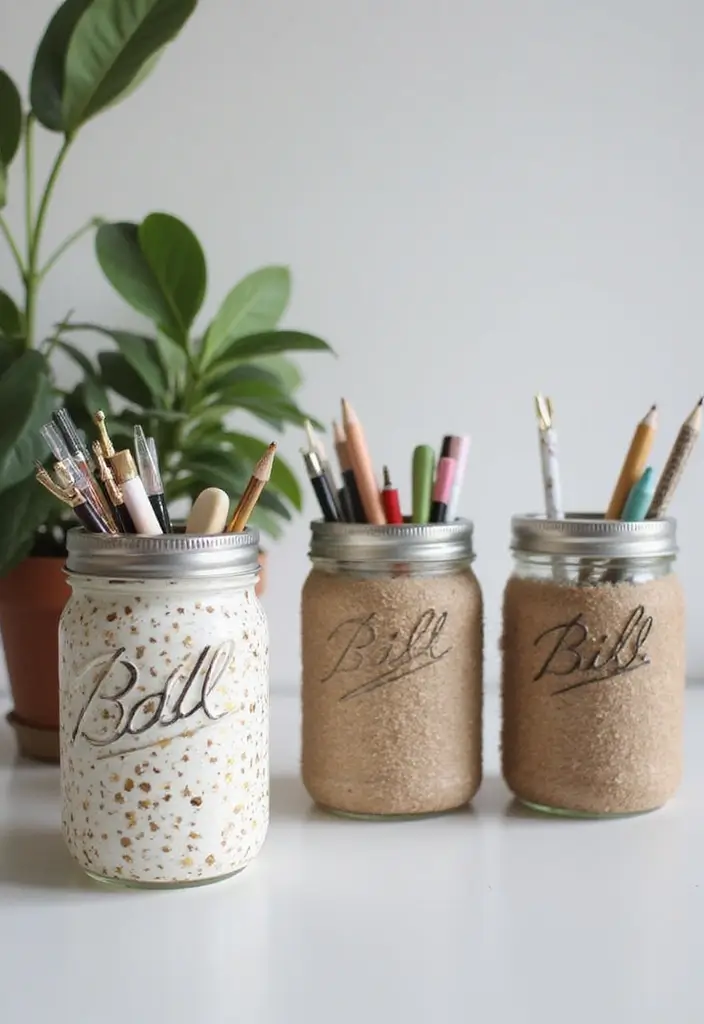
Mason jars are a fantastic way to add charm and organization to your room. They are not just for canning anymore! These versatile jars can hold everything from office supplies to tiny plants. Imagine a row of colorful jars on your desk, filled with pens, brushes, or even succulents. This trendy look is popular on platforms like Pinterest, where many teens showcase their creative takes on jar decor.
To get started, gather some old mason jars and give them a good wash. Then, unleash your creativity! You can wrap them in twine for a rustic vibe, paint them in your favorite colors, or cover them with fun fabric. If you’re feeling adventurous, try attaching them to a wooden board or a cork board to create a stylish wall organizer. This not only saves space but adds a unique flair to your decor. Plus, it keeps your room tidy, allowing your personality to shine through!
• Use twine or ribbon to create a rustic look.
• Pick bright paint colors for a pop of fun.
• Attach jars to a board for a creative wall display.
• Fill jars with plants for a fresh touch of greenery.
These mason jar organizers are practical and help express your unique style. They are budget-friendly and easy to make, making them perfect for any teen looking to personalize their space. With just a few jars and some creativity, you can turn clutter into cute decor!
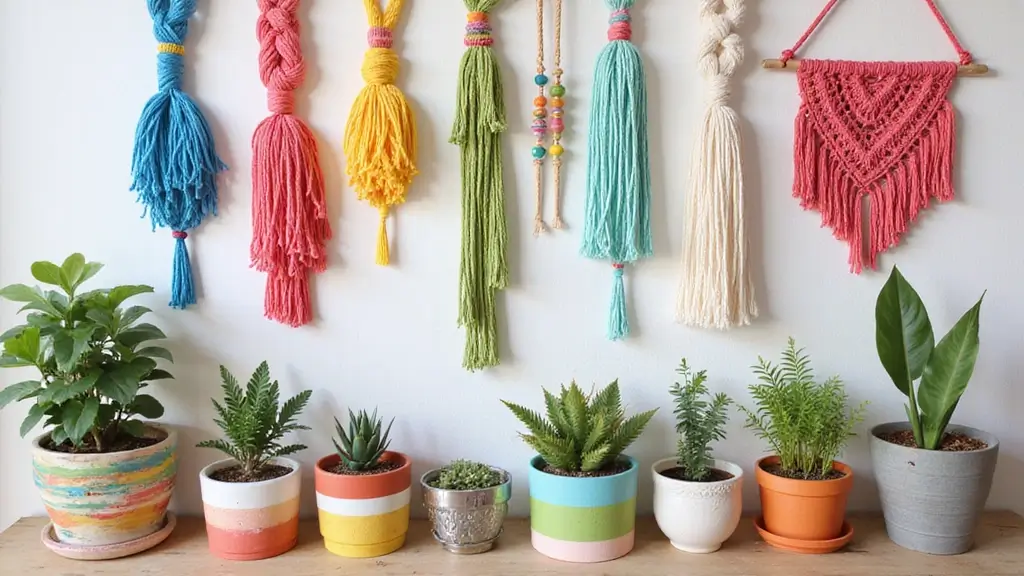
6. Dreamcatchers

Creating a dreamcatcher is a fun way to mix art with tradition. These beautiful pieces not only add flair to your room but also carry a meaning that can make your space feel special. You can use natural materials like twigs, colorful threads, and beads to create a design that reflects your unique style. Think about using bright colors or earthy tones based on your room’s theme. Popular on Pinterest, these boho-inspired decorations can really stand out above your bed or in a reading nook.
To get started, gather your materials. Look for twigs in your backyard or at a local park for a personal touch. You can find threads and beads at craft stores without spending much. Just follow these simple steps to make your dreamcatcher:
1. Form a circle with your twigs and secure it with twine.
2. Weave the thread through the circle to create a web-like pattern.
3. Attach beads and feathers to add personality and flair.
Once you’re done, hang your dreamcatcher where you sleep. It’s not just a decoration; it adds a protective and comforting vibe to your space.
• Gather natural materials like twigs and threads for authenticity.
• Weave in colors that match your room’s decor for harmony.
• Add personal touches like feathers and beads to express yourself.
• Hang it above your bed to catch bad dreams and enhance your space.
This project is perfect for adding character to your room while embracing a meaningful tradition. Plus, it’s a fantastic way to spend an afternoon crafting something unique just for you.
7. DIY Wall Art from Recycled Materials
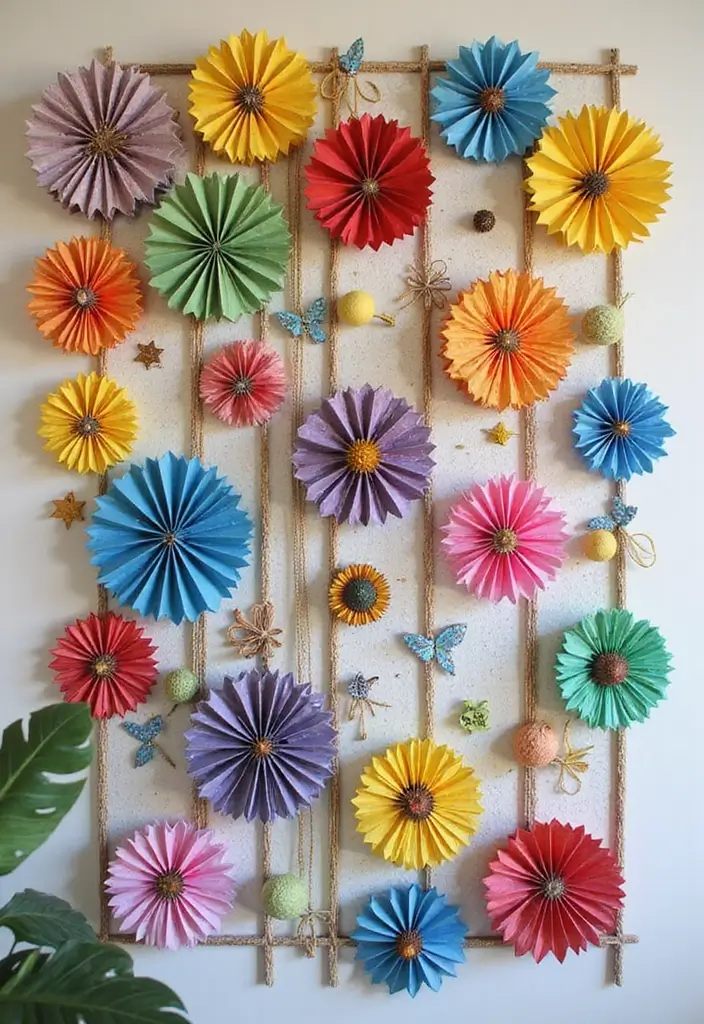
Creating stunning wall art doesn’t have to cost a fortune. With just a few recycled materials like cardboard, old magazines, or fabric scraps, you can design unique pieces that reflect your style. Think about using bright colors or interesting textures to make your artwork pop. Pinterest is full of ideas for using these materials creatively, from bold geometric shapes to layered collage designs. This not only makes your room look stylish but also showcases your personality.
To get started, gather your supplies. You can find everything you need right at home. Old frames are a great way to give your art a polished finish. If you want something more rustic, consider skipping the frame altogether. Hang your creations in a group or as a focal point above your bed or desk. This project is budget-friendly and helps you practice your artistic skills while being eco-conscious. Your room will feel more inviting and personal, perfect for sharing with friends or just enjoying yourself.
• Collect materials like cardboard, magazines, and fabric scraps.
• Use old frames for a neat and professional look.
• Experiment with shapes—try abstract or themed designs.
• Hang in groups for a gallery-style display that makes a statement.
8. String Art Projects
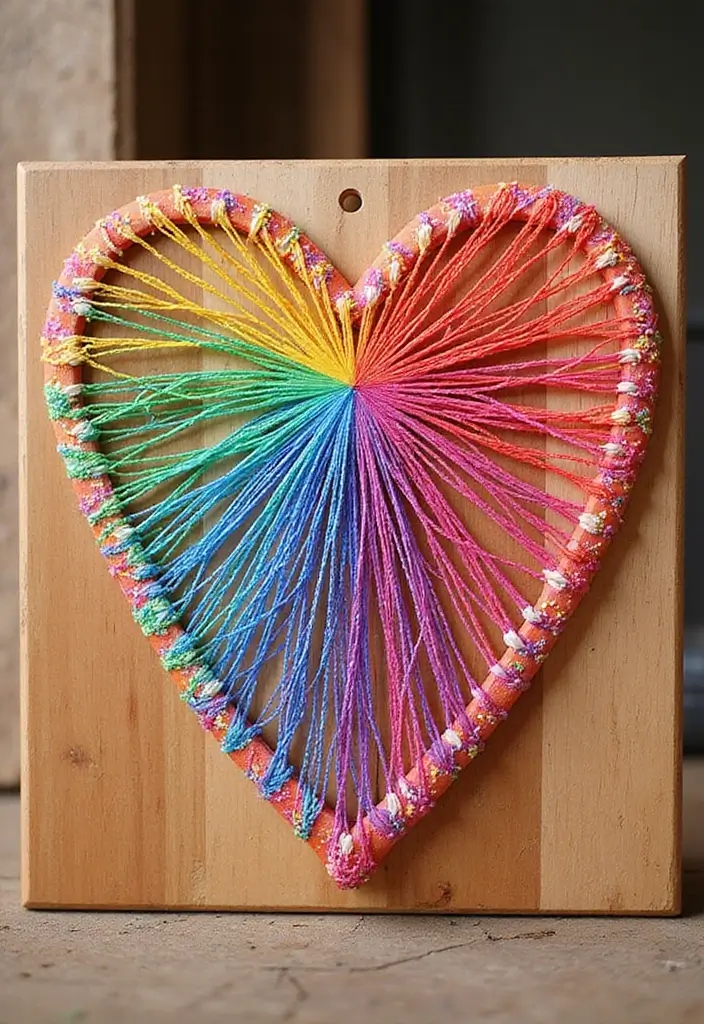
Bring your walls to life with delightful string art! This trendy craft lets you express your creativity while adding a personal touch to your space. Imagine a vibrant heart or a whimsical star made from colorful string. You can choose bold hues like electric blue or soft pastels to match your room’s vibe. The best part? This craft is all over Pinterest, inspiring teens everywhere to create unique, eye-catching decor.
To get started, gather a few simple materials: a wooden board, some nails, and colorful string. First, sketch your favorite design on the wood. Next, hammer the nails along the outline to create a guide. Finally, wrap the string around the nails, filling in the shape with any pattern you like. It’s a budget-friendly way to customize your room, and you can even use leftover materials from other projects. This craft not only looks amazing but also makes your space feel uniquely yours, perfect for showcasing your personality!
• Choose a design that reflects your style
• Use bright or pastel strings for a fun look
• Hang your art in a prominent spot to wow guests
• Experiment with different shapes for variety
String art is more than just a craft; it’s a conversation starter. So grab your supplies and let your creativity shine!
9. Washi Tape Wall Design
Washi tape is a fun and flexible way to express your style on your walls! With a wide range of colors and patterns available, you can create eye-catching designs without the hassle of paint. Imagine bright stripes, whimsical shapes, or even intricate mandalas that reflect your personality. Pinterest is full of inspiring ideas that show how easy it is to transform your space with just a roll of tape!
To get started, pick out a few rolls of washi tape that speak to you. It’s budget-friendly and you can find it at craft stores or online. Before you dive in, sketch your design on paper to map out your vision. This planning step helps you visualize how your wall will look. Best of all, washi tape is removable! You can change your design whenever you feel like refreshing your room’s vibe, making it perfect for teens who love to reinvent their space.
• Choose bright or pastel colors to match your mood
• Plan your design on paper for a clear vision
• Apply tape in geometric patterns for a modern look
• Mix patterns and colors for a playful touch
With washi tape, your walls can become a canvas for creativity. Dive into this project, and watch your room come alive with personality!
10. Eco-Friendly Candle Making
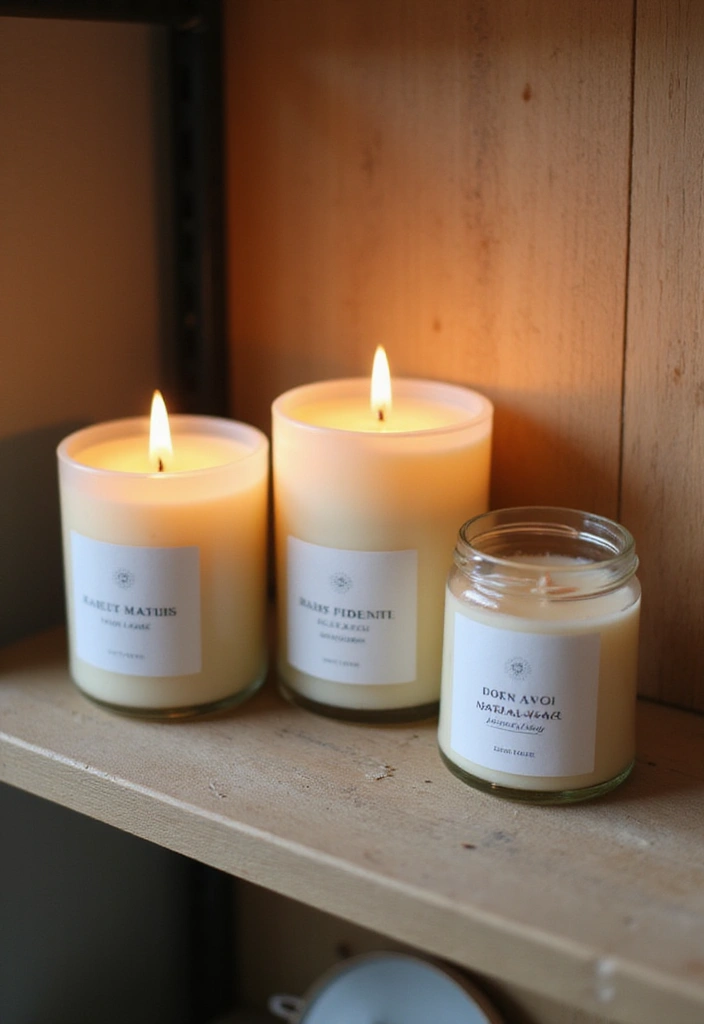
Looking for a fun and eco-friendly activity? Candle making is a fantastic way to express your creativity while adding a warm glow to your room. Imagine having personalized candles that reflect your style! You can choose colors, scents, and shapes that resonate with you. Soy wax and beeswax are great materials that are gentle on the environment and safe for your home. Pinterest is buzzing with unique candle ideas that can inspire your creations.
Getting started with candle making is simple and budget-friendly. First, gather your supplies: eco-friendly wax, wicks, containers, and essential oils for fragrance. You don’t need fancy tools. A double boiler works perfectly to melt the wax. Once melted, mix in your favorite scents and pour the wax into your chosen containers. Let them cool completely. This process is not only relaxing; it’s also a wonderful way to create gifts for friends or simply brighten your space.
• Melt eco-friendly wax in a double boiler for safety.
• Add essential oils to personalize your scent.
• Choose unique containers like mason jars or decorative tins.
• Gift your candles to friends for thoughtful presents.
Candle making is not just a craft; it’s a way to bring a cozy atmosphere to your room. Each candle tells a story and adds a personal touch to your decor. Plus, you’ll feel great knowing you’re doing something good for the planet while enjoying a relaxing hobby. Dive into this creative adventure and watch your space shine with your handmade creations!
11. Customized Tote Bags

Give your plain canvas tote bags a makeover and turn them into stylish accessories! With just a few supplies like fabric paint or markers, you can unleash your creativity. Picture a tote in your favorite colors, adorned with quotes that inspire you. This trend is all over Pinterest, making it a popular choice for teens looking to express their unique style.
To get started, grab a canvas tote and some fabric paint. Choose colors that make you happy. You might even want to sketch your designs lightly in pencil before you start painting. This project is budget-friendly, as you can often find plain totes at local craft stores or online for a few dollars. Plus, customizing these bags not only shows off your personality but also gives you a practical accessory. Whether for school, shopping, or as decor in your room, these totes make life a bit brighter.
• Use bright colors that represent your style.
• Choose quotes that motivate or make you smile.
• Pick patches or pins that reflect your interests.
• Place your tote on a hook in your room as decor.
With these tips, your customized tote bags will not only be functional but also a fun way to showcase your flair. Get creative and let your personality shine!
12. Pom-Pom Decor
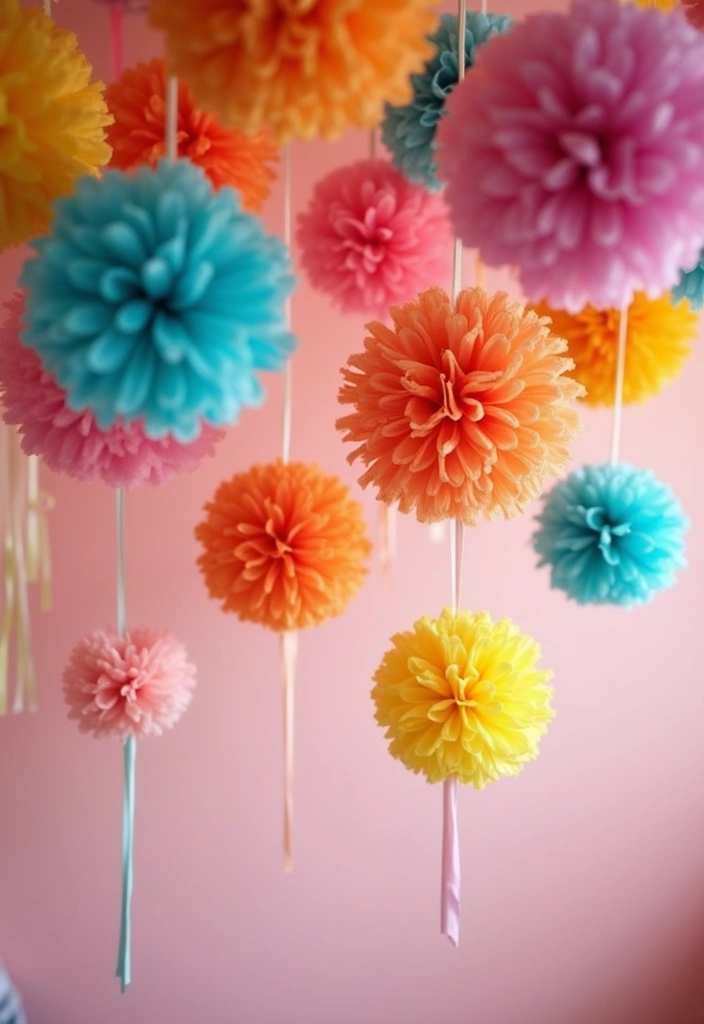
Brighten up your space with adorable pom-pom decor! These fluffy little balls add a fun and whimsical touch to any room. You can create them in vibrant colors that reflect your personality. Imagine clusters of pastel pom-poms hanging from your ceiling or a burst of color strung along a wall. Pinterest is buzzing with ideas on how to use these playful accents, making them a trendy choice for your DIY room decor.
Making pom-poms is easy and budget-friendly, which is perfect for teens looking to personalize their rooms without spending much. All you need is some yarn—choose colors that speak to you! You can hang them from fairy lights or attach them to a garland for a festive look. This decor choice not only makes your space feel lively but also adds a cozy vibe that welcomes friends over for hangouts.
• Choose yarn colors that match your room’s theme
• Hang clusters from the ceiling for a playful look
• Use pom-poms as fun accents on shelves or beds
• Attach them to fairy lights for a magical atmosphere
Pom-pom decor is a simple way to express your creativity and style. It’s perfect for making your room feel uniquely yours and inviting. So grab some yarn and let your imagination run wild!
13. DIY Fabric Wall Hangings
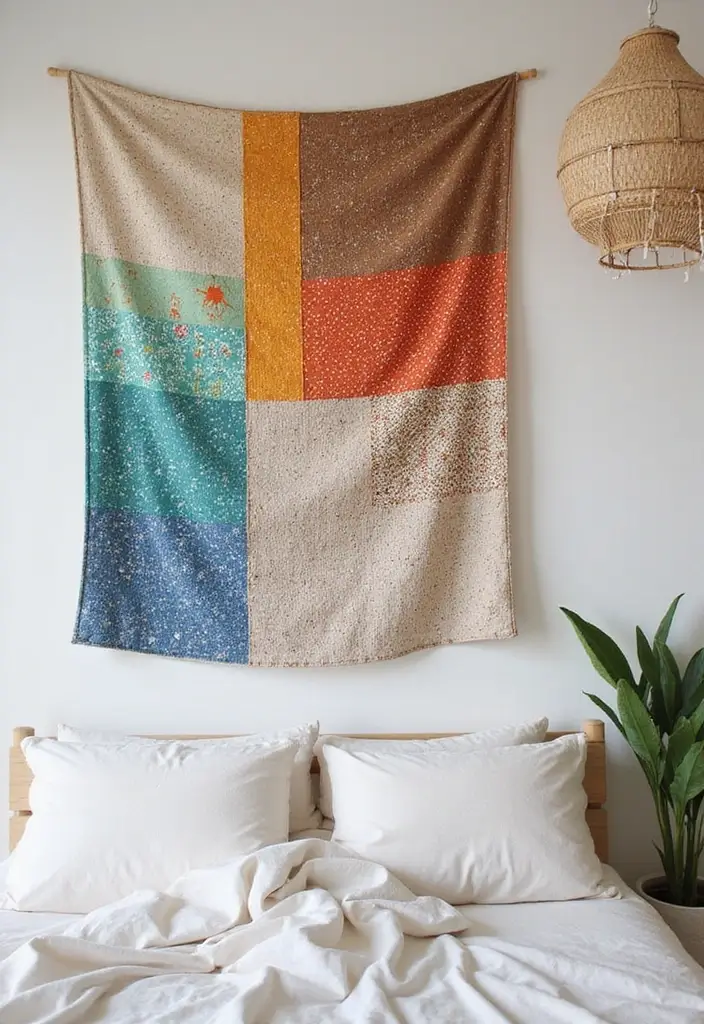
Bring a touch of softness to your room with DIY fabric wall hangings! These charming pieces can transform bare walls into a cozy retreat. Imagine using colorful fabric scraps or a canvas to create unique designs that reflect your personality. Pinterest is buzzing with ideas for wall hangings that add both style and warmth to any space. Think of bright patterns or soothing pastels that complement your current decor.
Getting started is simple and budget-friendly! Grab some fabric remnants you already have or check out local thrift stores for great finds. Cut your fabric into shapes that inspire you—triangles, circles, or even abstract forms. Secure them to a wooden frame or a sturdy stick for easy hanging. This project not only showcases your creativity but also provides an opportunity to practice your sewing skills. Plus, it’s a wonderful way to make your room feel inviting and personal.
• Choose colorful fabrics to match your room’s vibe.
• Cut different shapes for a playful or elegant look.
• Secure fabric on a stick for easy hanging.
• Add personal touches like embroidery or paint for extra flair.
This creative endeavor is perfect for teens looking to express themselves and make their space truly their own.
14. Recycled Paper Mache Projects
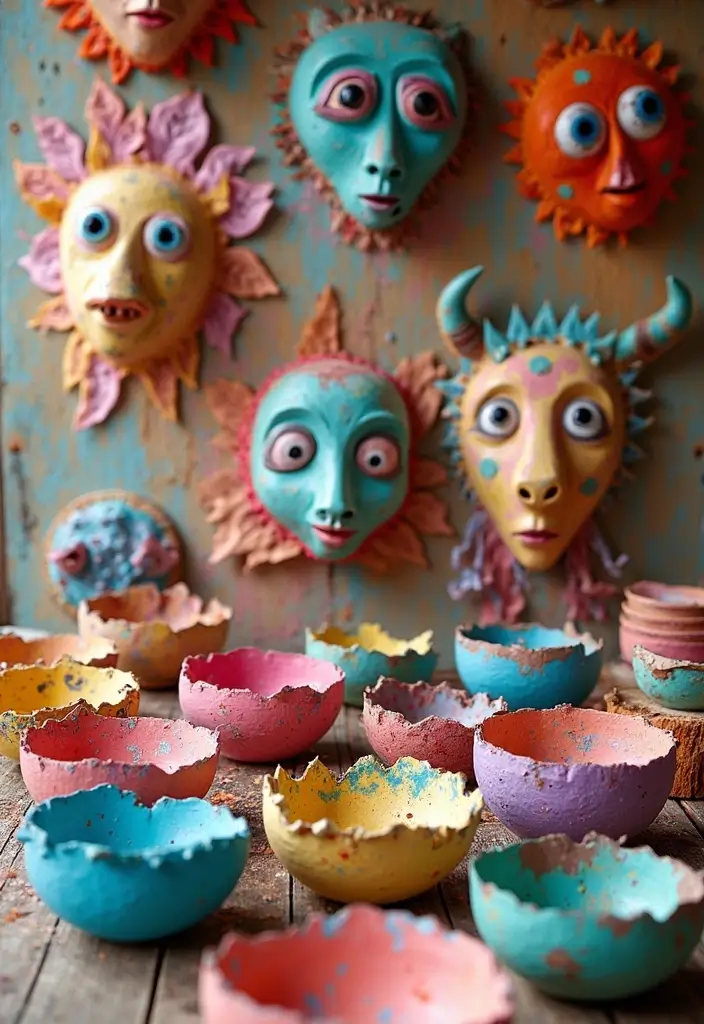
Get ready to unleash your creativity with recycled paper mache projects! This fun and eco-friendly craft allows you to transform old newspapers into stunning decor pieces. Imagine colorful bowls, whimsical masks, or unique wall art decorating your room. Pinterest is buzzing with these creative ideas, and you can make them too!
To start, gather your materials. You’ll need old newspapers, glue, and some water. Tear the newspapers into strips. Mix equal parts glue and water in a bowl. Dip each strip into the mixture, then layer them over a mold, like a balloon or a bowl. Let your creation dry completely, and voila! You have a beautiful, one-of-a-kind piece that adds personality to your space.
This project is budget-friendly and a great way to recycle. Plus, it encourages you to think outside the box. You can customize your pieces with paint or embellishments, making them truly yours. It’s a fun way to express yourself, perfect for adding a touch of your style to any room.
Here are some quick tips to help you get started:
Use bright paint to personalize your paper mache items.
Choose unique molds like balloons or bowls for different shapes.
Add glitter or stickers for a fun touch.
Place your finished pieces on shelves or walls to showcase your creativity.
Dive into the world of paper mache and let your imagination soar! You’ll create decor that’s not just beautiful but also meaningful.
15. DIY Wall Hooks with Branches
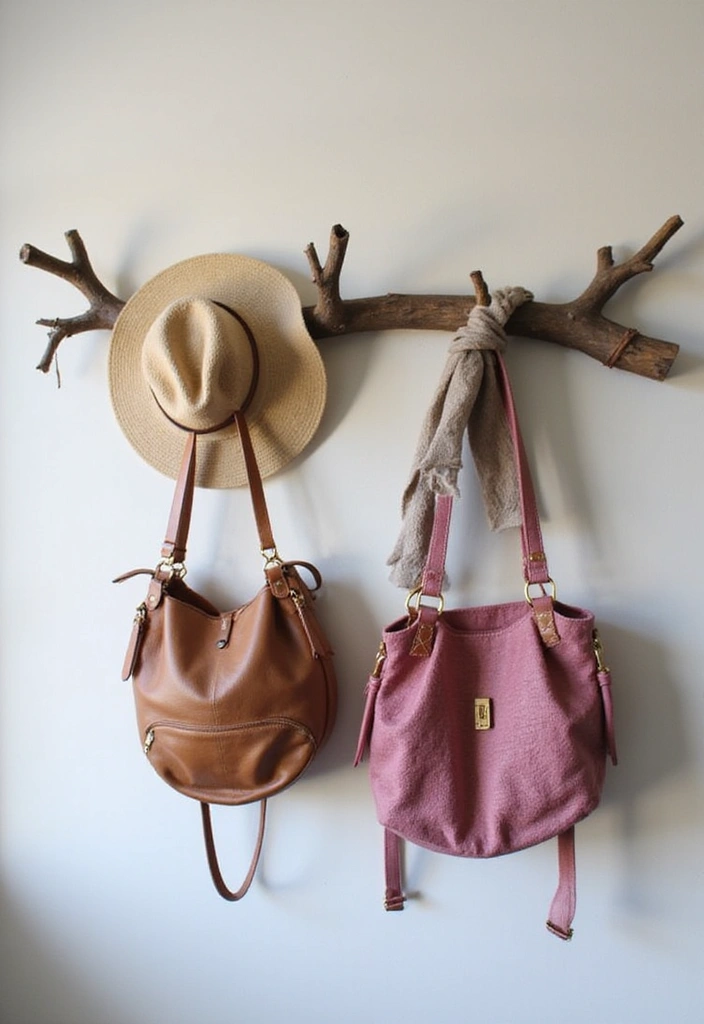
Create a charming atmosphere in your room with DIY wall hooks made from branches. This project embraces nature and adds a rustic flair, making your space feel cozy and inviting. Imagine a sturdy branch, sanded smooth, showcasing its beautiful natural wood grain. You can paint it in soft pastel colors or leave it in its natural state to match your decor. As seen on Pinterest, these hooks are not just functional; they serve as a unique statement piece that reflects your personal style.
Ready to bring this idea to life? Start by finding a sturdy branch that fits your space. Sand it down to remove any splinters. Then, use brackets to securely attach it to the wall. You can hang bags, hats, or even lightweight decor items like string lights for a whimsical touch. This project is budget-friendly, as branches are often free or can be found in your backyard. Plus, it aligns perfectly with the trending natural decor style, making your room feel warm and full of character.
• Select a branch that fits your space and style.
• Sand the surface to create a smooth finish.
• Secure it with brackets to ensure stability.
• Hang your favorite items to personalize your decor.
This simple yet effective craft not only keeps your room organized but also adds a personal touch. Enjoy the satisfaction of creating something beautiful that reflects your personality!
16. Stenciled Furniture
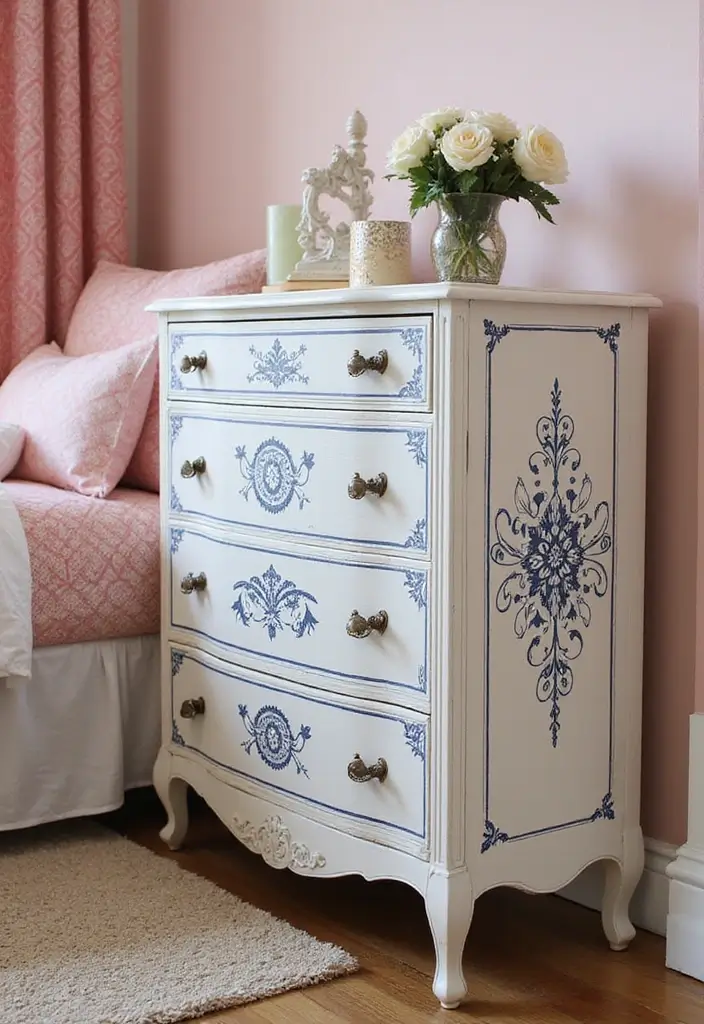
Revamp your furniture with stencils for a fun and personal touch! This easy DIY project lets you express your style while transforming ordinary pieces into eye-catching decor. Imagine bright colors and unique patterns on your drawers or shelves. Pinterest is buzzing with stenciled furniture ideas, showcasing everything from floral designs to geometric shapes. This is your chance to make your room shine with personality!
To get started, gather some eco-friendly paint and choose stencils that reflect your vibe. You can find affordable options at craft stores or online. Lightly secure your stencils on the surface with tape to prevent slipping. Then, paint over them with a brush or sponge, and let everything dry before carefully peeling off the stencil. This technique is not only budget-friendly but also gives your furniture a custom look.
Here’s how to make your stenciled furniture project a success:
Choose stencils that match your room theme, like flowers for a soft touch or stripes for a modern feel.
Pick vibrant or muted colors based on your existing decor.
Add a clear sealant over the paint to protect your design from wear.
Place your stenciled furniture in focal points, like next to your bed or in a reading nook, to draw attention.
With a little creativity, your furniture will not only serve a purpose but also make your space feel uniquely yours. Enjoy the process, and let your creativity flow!
17. DIY Message Board
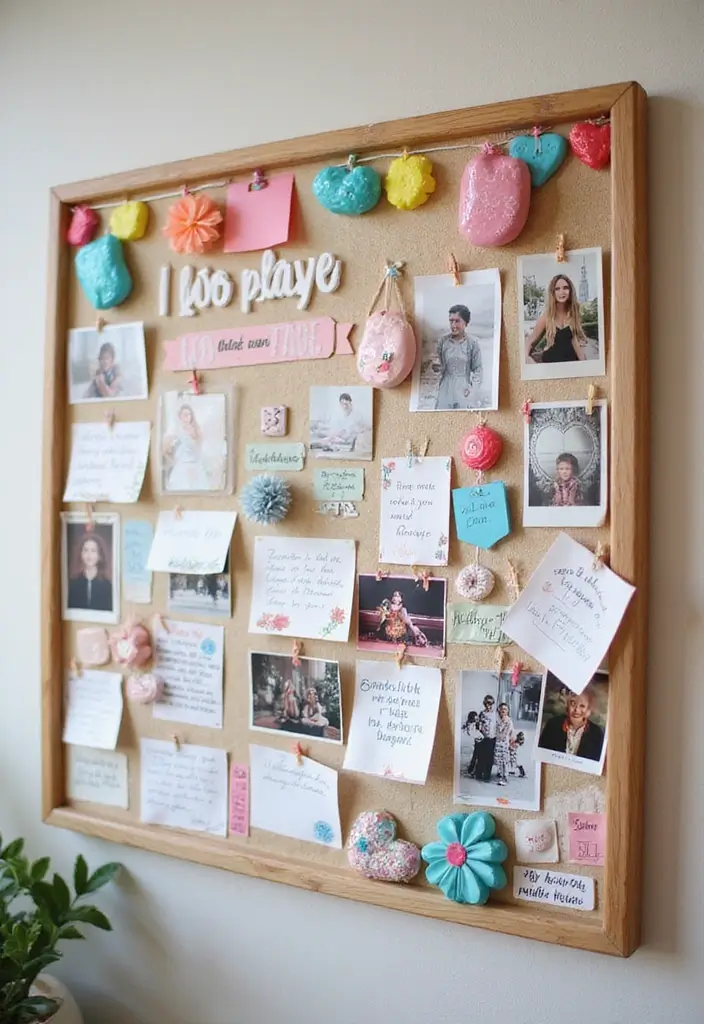
Transform your space with a DIY message board that’s as functional as it is stylish! This project lets you display reminders, photos, or inspirational quotes in a way that adds character to your room. Imagine a fabric-covered corkboard in bright colors or trendy patterns that pops against your walls. Pinterest is buzzing with ideas for these boards, making them a must-have for any teen’s room.
To get started, grab a corkboard and your favorite fabric. It’s an affordable way to create something unique! First, cut the fabric to fit your board and use glue to secure it tightly. Once that’s dry, decorate with colorful pins or clips to hold your notes and pictures. You can even add ribbons or washi tape to give it that extra flair. This not only keeps you organized but also makes your room feel cozy and inviting.
• Cover your corkboard with colorful fabric for a personalized touch.
• Use fun push pins or clips to display notes and photos.
• Add decorative elements like ribbons or washi tape for style.
• Hang it in a central spot for easy access and visibility.
With this simple DIY project, you’ll create a message board that not only helps you stay organized but also reflects your personality. It’s perfect for keeping your space tidy while looking fabulous!
18. Beaded Curtains
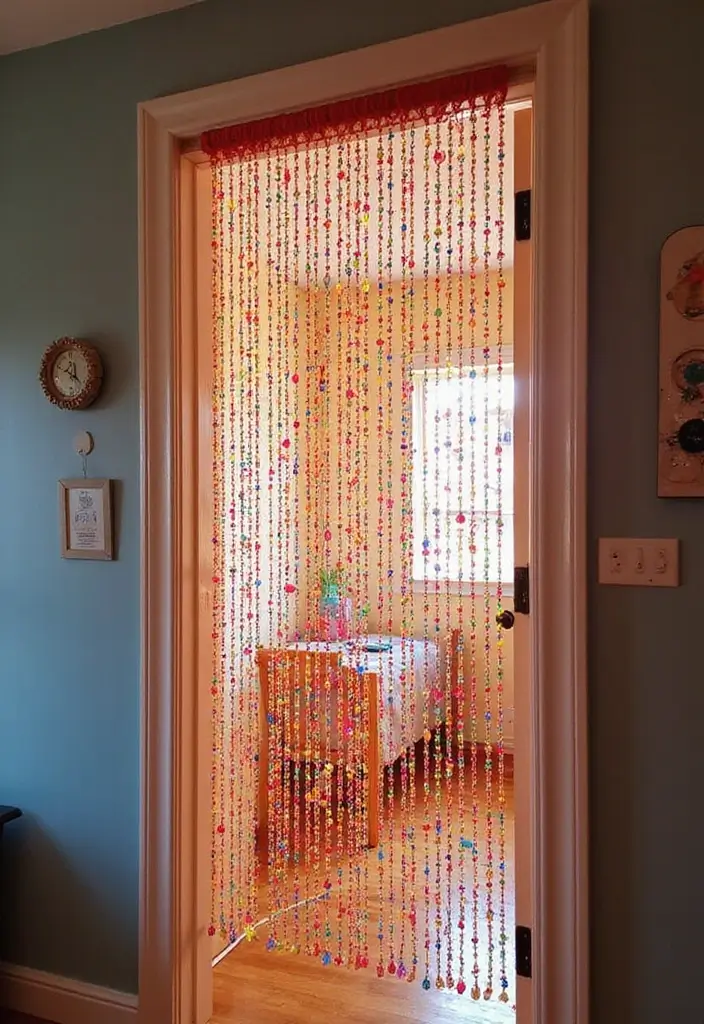
Brighten up your space with delightful beaded curtains! These eye-catching decorations can add a dash of whimsy to any room. Imagine strands of colorful beads swaying gently in the breeze. You can use a mix of vibrant colors or stick to a soft palette to suit your style. Whether you hang them in a doorway or a window, they create a fun visual barrier that keeps your room feeling open yet distinct. Pinterest is buzzing with these trendy decor ideas, showcasing their charm in teen rooms everywhere.
Getting started on your beaded curtains is easy and budget-friendly. First, gather your materials: some sturdy string or fishing line and a variety of beads that catch your eye. You can find these at craft stores or even repurpose old jewelry for a unique touch. Cut the strings to your desired length, and start threading the beads in patterns that inspire you. Once you’ve created your strands, hang them where they will catch light and attention. This simple project can transform any dull space into a lively retreat, making your room feel fresh and inviting.
• Choose colorful beads for a fun look
• Cut strings to your desired length
• Hang in doorways for a playful barrier
• Use fishing line for extra strength and durability
Embrace your creativity and let your personality shine through with these charming beaded curtains!
19. Colorful Clothespin Art
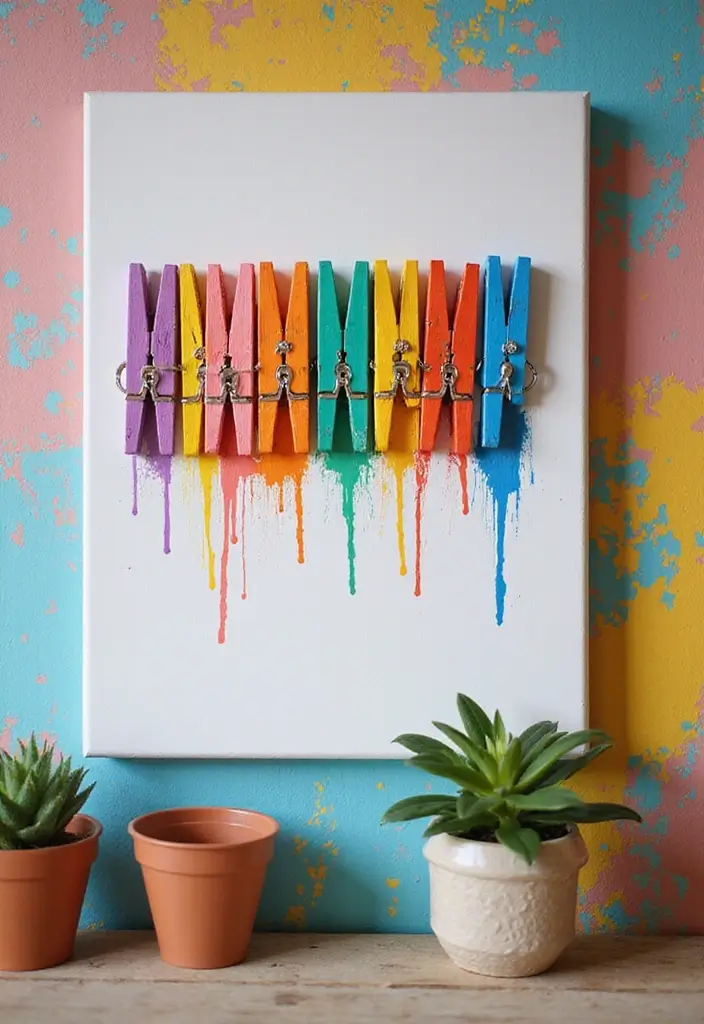
Get ready to transform simple clothespins into a stunning piece of art! These versatile tools aren’t just for hanging laundry; they can add a splash of color and creativity to your room. Imagine painting them in bright shades like turquoise, sunny yellow, or a soft pastel pink. You can arrange them into fun shapes or patterns on a canvas, making a unique art piece that truly reflects your personality. This DIY project is trending on platforms like Pinterest and is a fantastic way to showcase your style.
To get started, gather some clothespins, acrylic paint, and a canvas or sturdy board. Choose colors that make you happy and inspire your creativity. While painting, let your imagination run wild! You can even mix colors or add patterns like stripes or polka dots. Once your clothespins are dry, arrange them on the canvas in a design that speaks to you. This project is budget-friendly and can be completed in just a few hours. The final result will be a charming decor piece that makes your space feel lively and personal.
• Paint clothespins in your favorite colors for a creative touch
• Arrange them into shapes or patterns on a canvas
• Mix colors or add fun designs for extra flair
• Display your creation to brighten up your room and showcase your style
This colorful clothespin art not only adds personality to your space but also serves as a fun way to display photos or notes. It’s all about making your room feel like your own little sanctuary. So grab those clothespins and let your creativity shine!
20. Customized Light Switch Covers
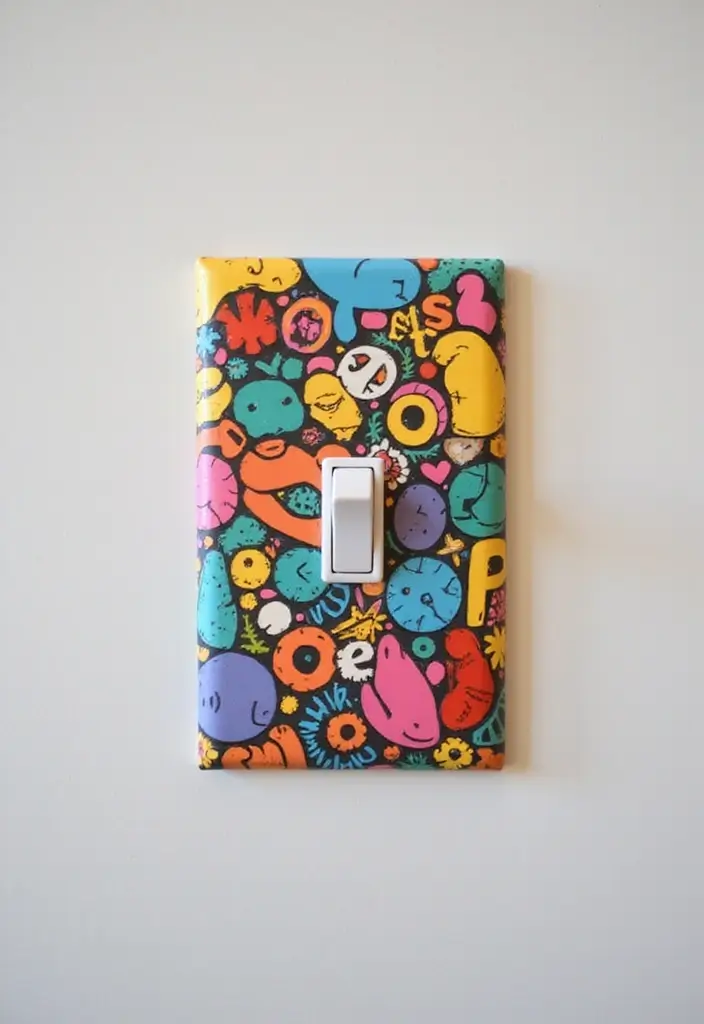
Spruce up your light switches with customized covers that reflect your style! This easy craft project can transform boring fixtures into eye-catching decor. Imagine a light switch adorned with bright colors or funky patterns that speak to your personality. Popular trends on Pinterest showcase designs that range from floral prints to geometric shapes, making even the smallest details in your room feel special.
To get started, gather a few supplies like plain light switch covers, acrylic paint, or washi tape in your favorite colors. You don’t need to break the bank; these items are usually inexpensive and easy to find. Simply remove your current switch cover, let your creativity flow as you decorate the new one, and then reattach it. This small change can create a cozy and personalized atmosphere in your room, perfect for showcasing your unique vibe.
• Choose bold colors to make a statement
• Use washi tape for easy, removable designs
• Add stickers or decals for extra flair
• Incorporate themes like nature or favorite hobbies
With these simple steps, you’ll not only brighten up your switches but also inject a dose of fun into your space. It’s a small project that can bring a big impact, making your room feel more like you!
21. DIY Glitter Jars

Create your own DIY glitter jars for a fun and calming touch in your room! These sparkling jars not only look great but also serve as a wonderful stress-relief tool. Imagine shaking a jar and watching the glitter dance around like magic. You can use colorful glitter to match your room’s decor, whether you prefer bright, bold hues or soft, pastel shades. Pinterest is filled with ideas for these charming jars, showcasing their popularity in teen room decor.
To make your glitter jar, gather a few simple supplies. You’ll need a clear jar, water, glitter, and a bit of glue to keep the glitter suspended. Start by filling the jar with water, leaving some space at the top. Add your choice of glitter and a few drops of glue. Make sure to seal the lid tightly to avoid spills. These jars can sit on your desk or nightstand, adding a whimsical flair that reflects your style. Plus, they create a soothing effect, perfect for winding down after a busy day.
• Use clear jars to showcase colorful glitter swirls
• Add glue to keep glitter floating for longer
• Experiment with colors to match your room’s theme
• Secure the lid tightly to prevent spills and messes
Make your space sparkle with these easy-to-make glitter jars, and enjoy a little piece of magic every day!
22. Fabric Scrap Garlands
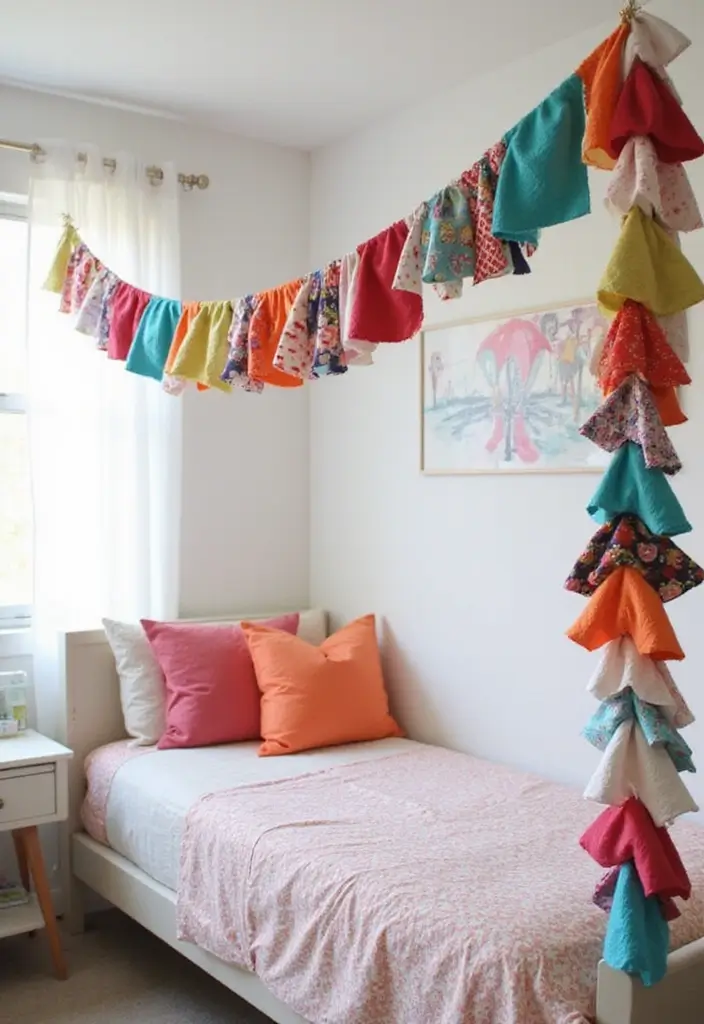
Brighten up your room with cheerful fabric scrap garlands! These simple decorations add personality and warmth to any space. You can use colorful fabrics, like floral patterns or solid pastels, to create a fun atmosphere. Hang them above your bed, along a wall, or even in a cozy nook. Pinterest is buzzing with ideas for these delightful garlands, making them a trendy choice for DIY decor.
Getting started is easy and budget-friendly. Gather fabric scraps from old clothes, leftover projects, or thrift store finds. Cut the fabric into fun shapes like triangles, stars, or hearts. Use a hot glue gun to attach these shapes to a sturdy string or twine. Then, hang your garland wherever it will shine! This project is not only affordable but also a fantastic way to show off your unique style.
• Choose vibrant fabrics that reflect your favorite colors
• Cut shapes that match your room’s theme
• Use a hot glue gun for quick assembly
• Hang in creative spots to catch attention and compliments
Now, go ahead and let your creativity shine! You’ll love how this personal touch makes your space feel inviting and special.
23. Sandwich Board Sign

To get started, gather a wooden board and some basic supplies. First, sand the surface until it’s smooth, then paint it in your favorite eye-catching colors. Choose colors that match your room’s vibe—think sunny yellows, bold blues, or soft pastels. Once the paint dries, use stencils or your own artistic flair to add quotes or fun messages. You can easily switch out the messages as your mood changes, making it a versatile decor piece that keeps your space fresh and lively.
• Choose a wooden board for durability and style.
• Pick bold, bright colors that reflect your personality.
• Use stencils or freehand to add your favorite quotes.
• Display it proudly in your room to inspire you daily.
This project is budget-friendly and lets you express yourself creatively. The board serves as a statement piece that brightens your room and sparks conversations with friends. You’ll love how easy it is to make your space feel more like you.
24. DIY Beaded Jewelry Display
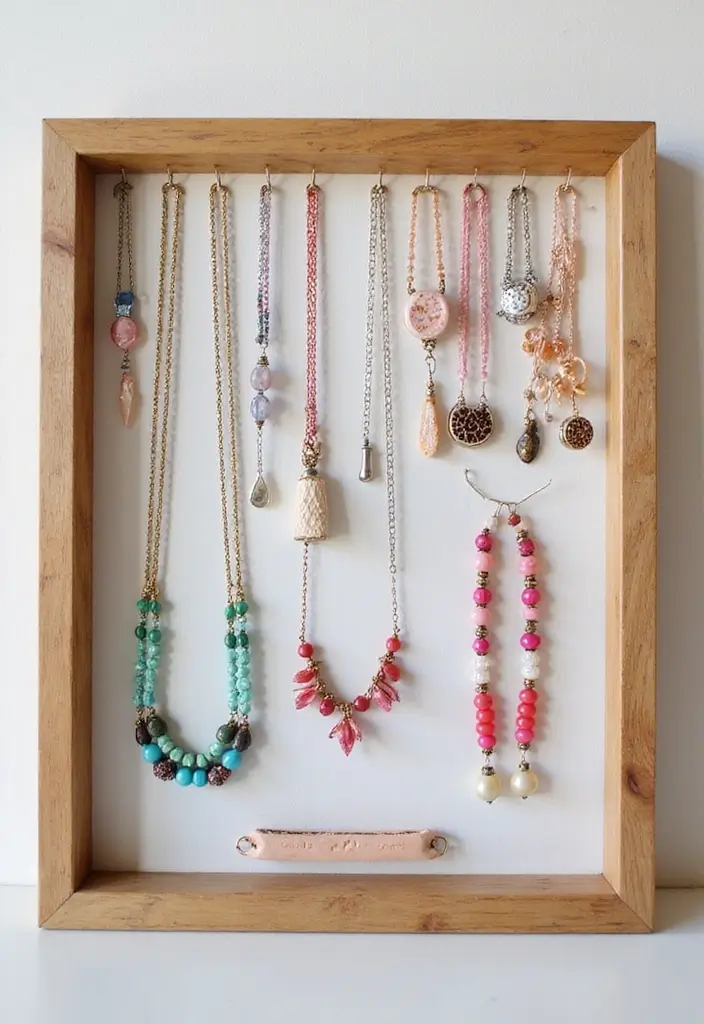
Are you looking for a fun way to show off your jewelry? A DIY beaded jewelry display can turn your favorite pieces into a stunning decor element. Imagine a colorful wooden frame adorned with twine, showcasing your earrings and necklaces. You can use bright colors or natural wood tones to fit your room’s vibe. This trendy idea, loved by many on Pinterest, adds a personal touch to your space while keeping everything organized.
Creating your jewelry display is simple and budget-friendly. Start with an unused picture frame, perhaps one you found at a thrift store. Remove the backing and get some twine or wire. String it across the frame in different directions, making sure to leave space for your jewelry. Now, hang your favorite pieces on the strings! This project not only declutters your space but also makes your room feel uniquely yours, perfect for impressing friends or adding a cozy touch to your personal sanctuary.
• Choose a frame that matches your room’s style.
• Use twine or wire for a rustic or modern look.
• Hang jewelry at varying heights for visual interest.
• Personalize with beads or charms that reflect your personality.
This DIY project is not just functional; it’s a creative outlet too. Enjoy the process, and watch as your jewelry transforms into a beautiful display that sparks joy every time you see it.
25. DIY Scented Sachets
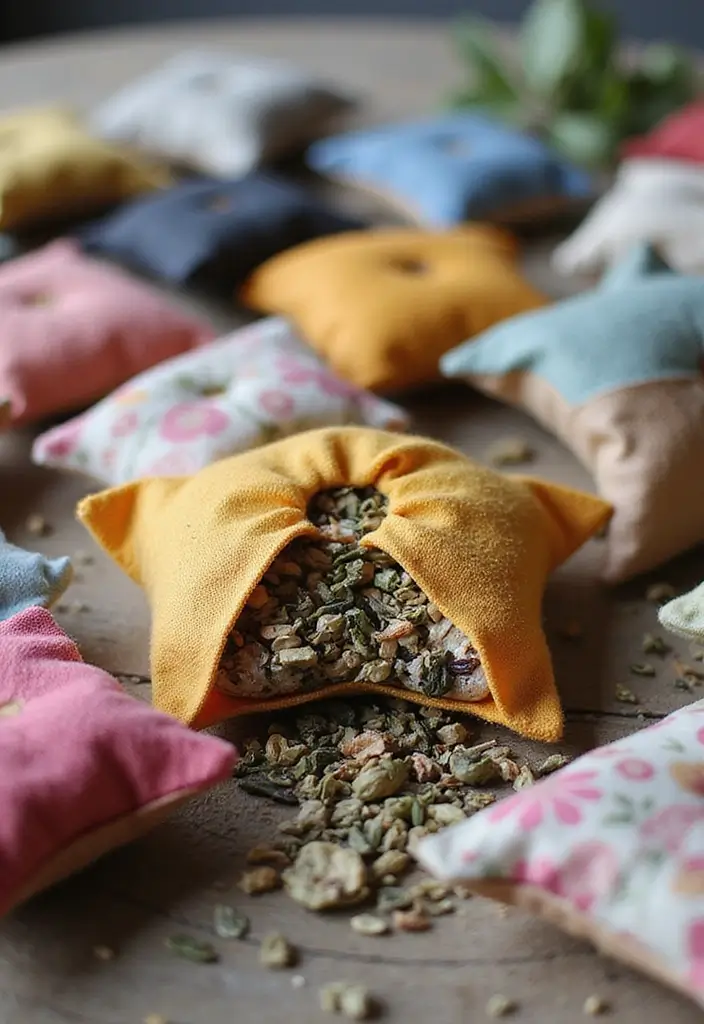
Breathe life into your room with delightful DIY scented sachets! These charming pouches not only smell wonderful but also add a personal touch to your space. Imagine walking into a room filled with the soothing scent of lavender or the fresh aroma of dried herbs. You can achieve this with simple materials like fabric scraps and your favorite natural fragrances. Plus, creating these sachets is all the rage on platforms like Pinterest, where everyone loves a touch of homemade charm.
To get started, grab some fabric you already have—think old clothes or leftover craft materials. Cut it into small squares, then sew them into little bags. Fill these bags with dried flowers, herbs, or even a mix of both. When you seal them up, you’ll have a sweet-smelling decoration ready to use. Place them in your drawers, hang them in your closet, or set them on your nightstand for a constant burst of fragrance. This project is not just fun; it’s also eco-friendly and budget-friendly!
Here’s how to make it happen:
• Choose vibrant fabrics that match your room’s color scheme.
• Pick dried herbs like lavender, chamomile, or rosemary for calming scents.
• Sew or glue the edges of the fabric for a quick and easy finish.
• Place sachets in shoes, drawers, or closets for a refreshing touch.
With these simple steps, you can create a cozy atmosphere in your room. DIY scented sachets are perfect for expressing your personality while keeping things fresh and inviting. Enjoy crafting and let your space smell amazing!
Conclusion
Crafting is a fun and rewarding way to make your room reflect who you are! From upcycled projects to colorful decorations, there are endless possibilities to explore and enjoy. Remember, each piece you create adds a special charm to your space and tells a story about you.
Why not pick a project from this list and make your room even more personal? Get creative and have fun with it!
Frequently Asked Questions
What Are Some Easy Cute Crafts for Teenagers to Make for Room Decor?
If you’re looking for easy and cute crafts for teenagers, consider making personalized wall art, decorative photo collages, or DIY dream catchers. These projects are not only fun but also allow you to infuse your personality into your space. Gather supplies like colored paper, string, and paint to get started on these creative DIY projects!
How Can I Make My Teen’s Room More Personalized with DIY Crafts?
Personalizing your teen’s room can be as simple as incorporating their favorite colors and themes into arts and crafts for teens. Think about creating custom name signs, themed pillows, or even hand-painted furniture. Encourage your teen to pick designs that resonate with their interests to make the space truly their own!
Are There Eco-Friendly Craft Ideas for Teen Room Decor?
Absolutely! Eco-friendly crafts are a fantastic way to decorate while being kind to the planet. Use materials like recycled paper, fabric scraps, or natural elements like wood and stones. Projects like making plant hangers, upcycled jars for storage, or DIY terrariums can add a fresh touch to any teen room while promoting sustainability.
What Supplies Do I Need for Fun Craft Activities in a Teen’s Room?
For fun craft activities, you’ll want to gather some basic supplies. Stock up on colored papers, scissors, glue, markers, and paint. Don’t forget items like string, beads, or fabric remnants for more complex projects. Having a well-equipped craft corner will inspire creativity and make it easy to jump into new DIY room decor ideas!
How Do I Choose the Right DIY Room Decor Projects for My Teen?
Choosing the right DIY room decor projects for your teen involves understanding their interests and style. Ask them about their favorite colors, themes, or hobbies. This communication will guide you to select crafts that resonate with them. Look for creative DIY projects that match their personality, ensuring they feel a connection to the decor they help create!