

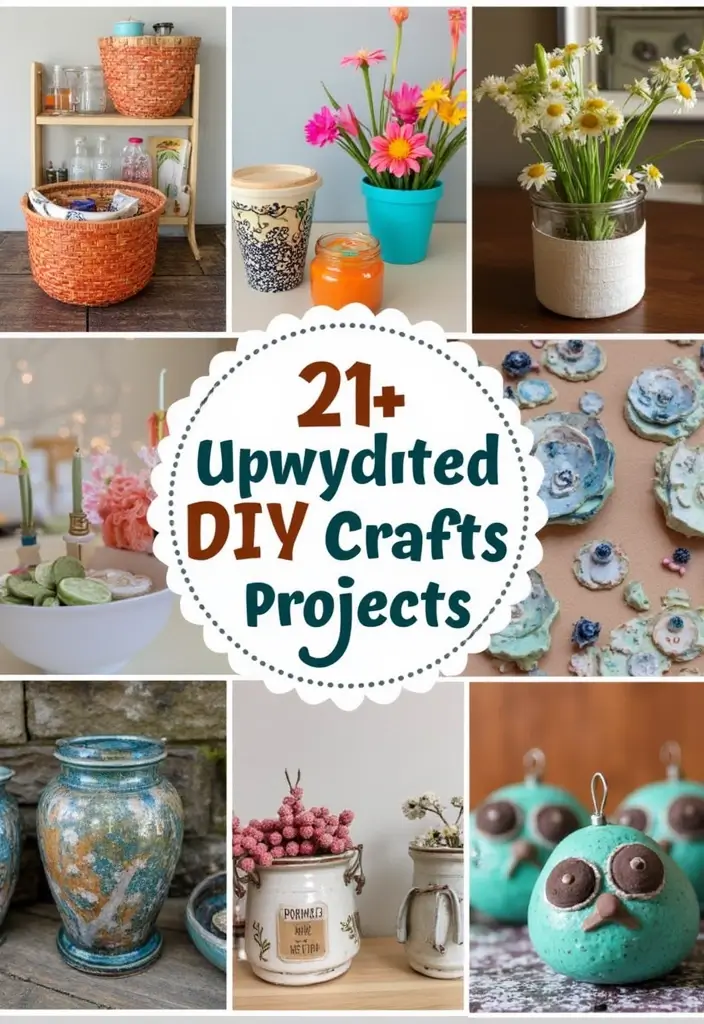
Feeling like your home could use a little sprucing up? You’re not alone. Many of us crave a cozy, stylish space but might hesitate when it comes to spending a fortune on decor. That’s why I put together this list of 27 easy DIY crafts for home decor. I want to help you transform your living space without breaking the bank.
If you’re someone who enjoys getting a little crafty or simply loves the idea of personalizing your home, this post is for you. Whether you’re an experienced DIYer or just starting out, these projects are designed to be accessible and fun. You can easily create beautiful pieces that reflect your personality and style.
What can you expect from this collection? Each craft is straightforward and requires materials you might already have at home or can find easily. You’ll discover creative ideas that are not only affordable but also stylish. From wall art to decorative accents, these projects will help you make your home feel warm and inviting.
So grab your supplies, roll up your sleeves, and let’s dive into these 27 easy DIY crafts. You’ll find that with just a little effort, you can create a space that truly feels like home. Ready to get started? Let’s bring some fresh ideas into your decor!
1. Upcycled Mason Jar Vases
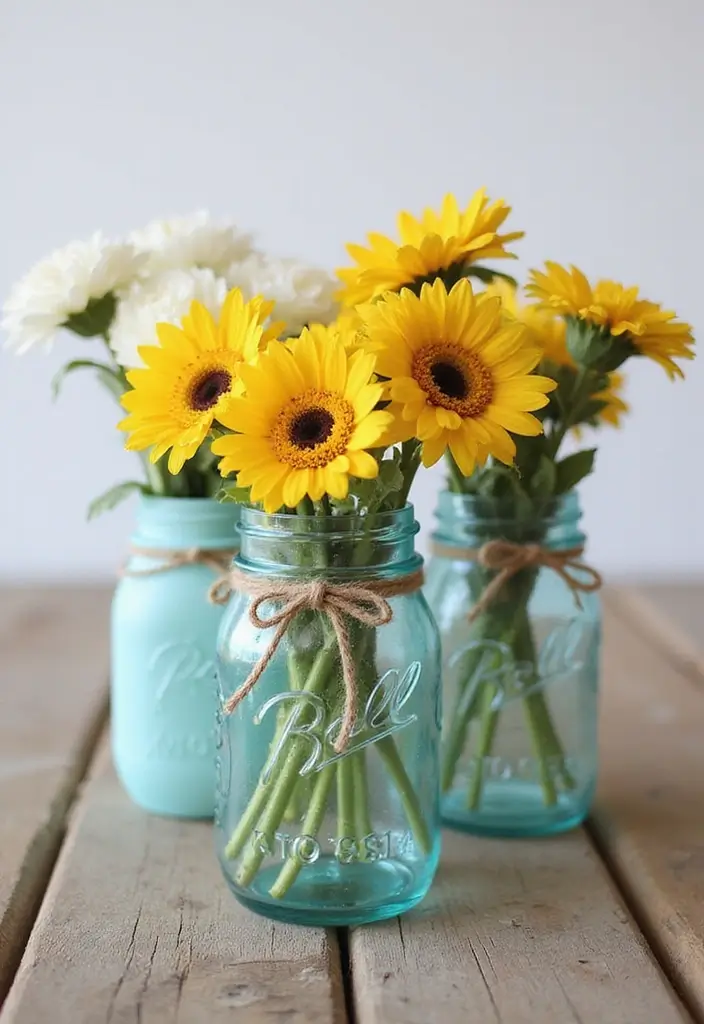
Brighten up your home with upcycled mason jar vases. These delightful creations add a touch of charm and personality to any space. Imagine colorful flowers or twinkling fairy lights glowing softly in your kitchen or living room. Plus, they are an eco-friendly way to repurpose glass jars that might otherwise end up in the trash. Pinterest is buzzing with ideas on how to style these vases, making them a trendy choice for home decorators everywhere.
To get started, gather your materials. You’ll need empty mason jars, some paint in your favorite colors, and a few fun embellishments like twine, lace, or buttons. This project is not only easy and quick but also budget-friendly. You can often find jars for free or at low cost. Once you’ve created your vases, you’ll love how they brighten your space, making it feel warm and inviting—perfect for hosting friends or enjoying a quiet evening at home.
Here’s how to create your own charming mason jar vases:
1. Clean the jars thoroughly and peel off any labels.
2. Paint them in colors that match your decor or leave them clear for a rustic vibe.
3. Wrap twine or lace around the neck of the jar for a stylish finish.
4. Fill them with fresh flowers, dried arrangements, or even fairy lights for a magical look.
These vases can be used in many ways. You can group different sizes together on a windowsill or showcase them as a centerpiece on your dining table. They also make thoughtful gifts that show you care. Plus, you’ll feel good knowing you’re reducing waste while creating something beautiful. Dive into this simple DIY project and let your creativity shine!
2. T-Shirt Pillow Covers
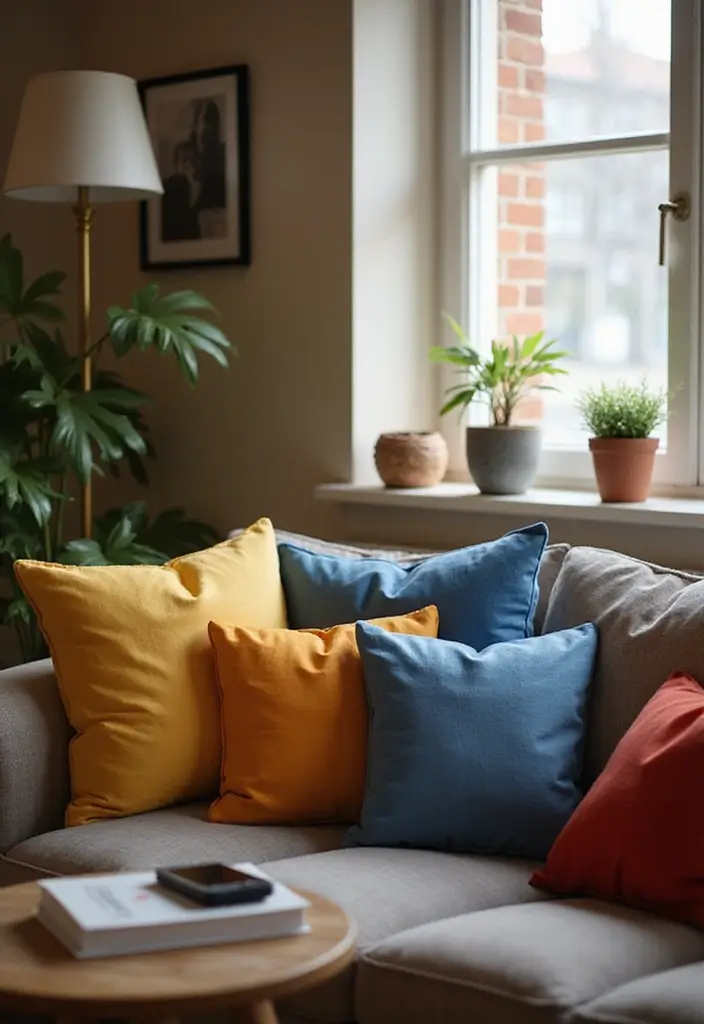
Transform your old t-shirts into trendy pillow covers that not only look great but also hold sentimental value. This project is perfect for anyone looking to add a personal touch to their home decor. Whether it’s a favorite band tee or a shirt from a special event, these pillow covers will spark conversations and bring back memories.
Start by picking a t-shirt you no longer wear. Choose one with colors that match your living space. You could go for bright hues for a fun vibe or soft pastels for a calming effect. Once you choose your shirt, cut it into a square shape, leaving about an inch around the edges for seams. Don’t worry if you’re not a sewing expert! You can easily use fabric glue to seal the edges. Just leave one side open for stuffing. Once that’s done, fill it with a pillow insert or cotton filling. Finally, close it up, and there you have it—a cozy pillow that tells your story!
This DIY project is not only budget-friendly, but it also allows you to customize your decor. By using items you already own, you keep costs low while adding a unique flair to your space. Imagine how fantastic these pillows will look on your couch or bed, making your home feel more inviting and personal.
• Choose a t-shirt that has special memories or colors you love.
• Cut into a square shape, leaving an inch for seams.
• Seal the edges with fabric glue or sew them for durability.
• Stuff and close for a trendy, personalized pillow cover.
Now, you’re ready to create stylish pillows that not only brighten your room but also tell a story. Enjoy the process and let your creativity shine!
3. Painted Wooden Crates
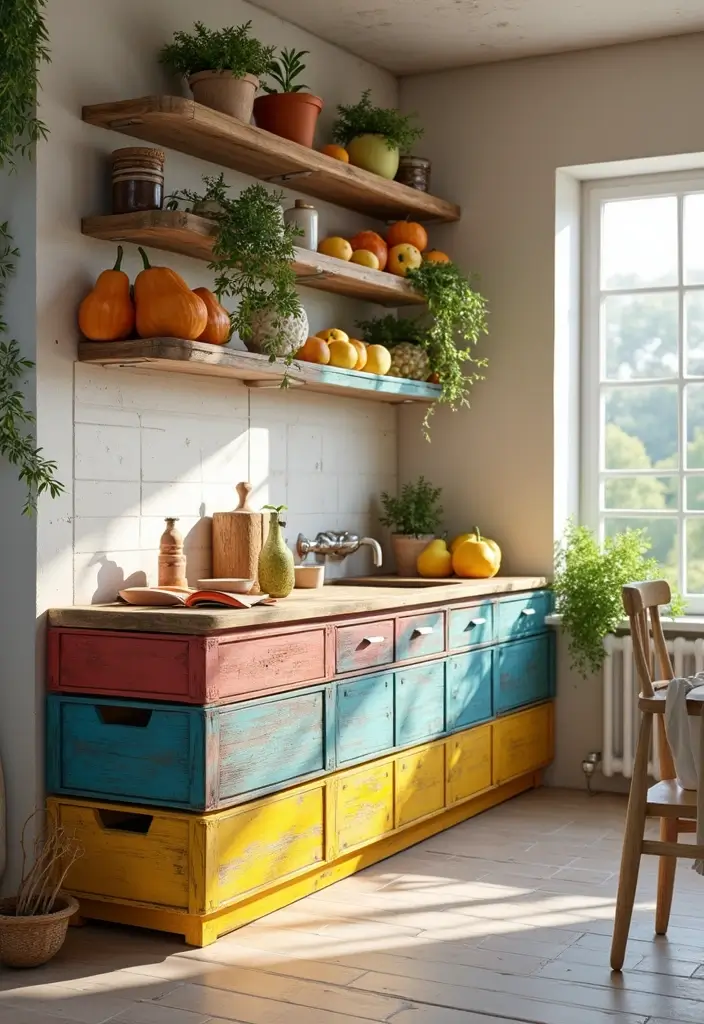
Wooden crates are a fantastic way to bring rustic charm into your home. They are not just functional; they add a touch of character to your decor. Imagine a set of painted crates in soft pastels or bold hues stacked in your living room or kitchen. Pinterest is buzzing with ideas on how to use these versatile pieces, and you can easily make them your own!
To get started, gather some crates—old ones can be upcycled or you can find new ones at craft stores. Begin by sanding down any rough areas to ensure a smooth finish. Once prepped, choose colors that resonate with your style. Whether you opt for a single color or a fun pattern, the possibilities are endless. After painting, let them dry completely. Then, use your crates to organize items or display them as part of your decor.
These crates work beautifully in various spaces. They can become charming storage solutions in your kitchen for fruits and veggies or serve as stylish book holders in your living room. They not only help keep your space tidy but also make it feel more inviting and personalized.
• Sand the crates for a smooth finish before painting.
• Choose colors that match your home’s decor style.
• Stack them for a unique shelving unit that saves space.
• Use them in the kitchen, living room, or even outdoors for added charm.
With just a few steps, you can create stunning wooden crates that enhance your home’s style while keeping it organized. Dive into this DIY project and enjoy the satisfaction of making something beautiful and functional!
4. Wine Cork Coasters
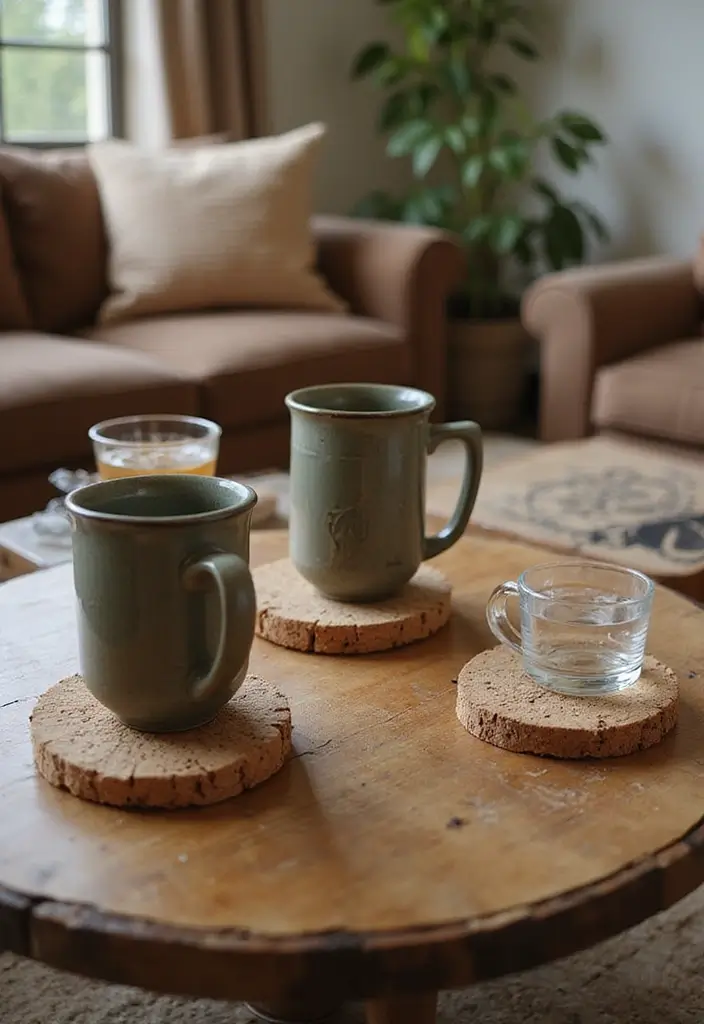
Transform your used wine corks into stunning coasters that add a rustic charm to your home. Imagine placing a set of these unique coasters on your coffee table, catching the eye of every guest. With their natural textures and earthy tones, these coasters fit perfectly into any decor style, whether you lean towards modern farmhouse or cozy cottage vibes. Pinterest is buzzing with these DIY coasters, showcasing how simple yet stylish they can be.
Creating your own wine cork coasters is both easy and budget-friendly. You can use corks from bottles you’ve enjoyed or pick some up at a craft store. This project requires minimal tools and materials, making it perfect for anyone. Plus, crafting these coasters is a rewarding way to reuse items that might otherwise go to waste, making your space feel more personalized and inviting.
Here are some steps to get you started:
• Gather 10-15 wine corks for each coaster you want to make.
• Decide if you want them whole or cut in half for a flatter look.
• Arrange the corks in a circle or square and glue them to a sturdy base.
• Seal your masterpiece with a waterproof sealant for durability.
With a little creativity, you’ll have coasters that not only protect your surfaces but also spark conversations during gatherings. Enjoy crafting these delightful accents that make your home feel warm and welcoming!
5. Fabric Scrap Wall Art
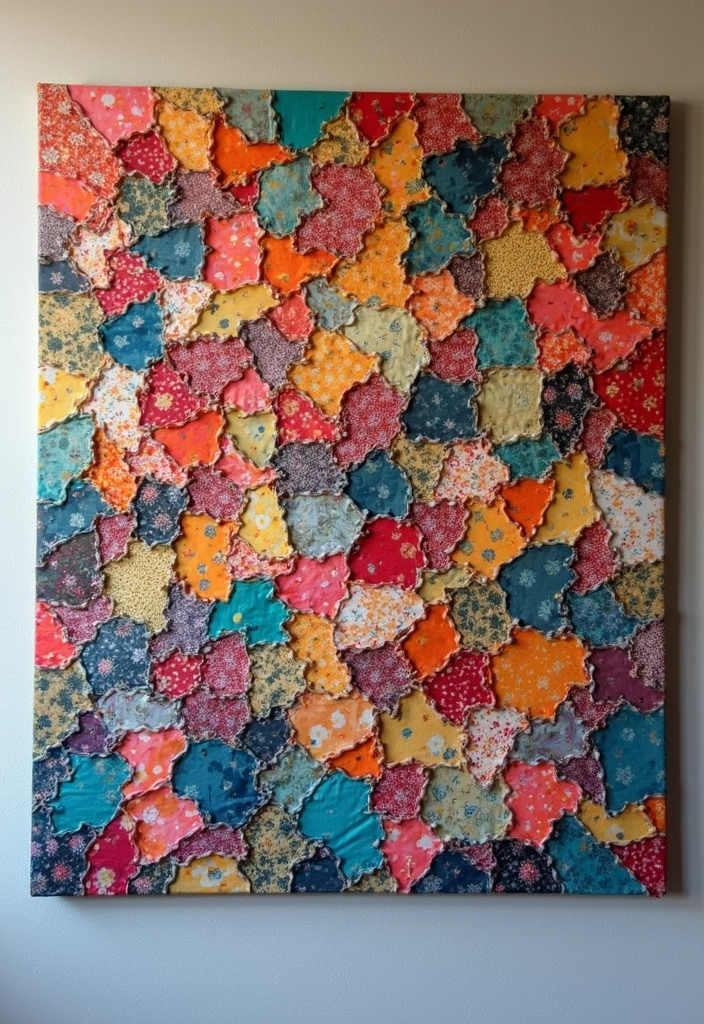
Create stunning wall art with fabric scraps you already have at home! This DIY project is a fantastic way to add a personal touch to your space while using up leftover materials. Think of it as a canvas for your creativity. Choose vibrant colors and fun patterns to express your style. This trend is all over Pinterest, inspiring many to transform their spaces with unique art pieces.
Start by gathering your fabric scraps. Cut them into different shapes like triangles, circles, or even hearts. You can use an old canvas or a wooden board as your base. Arrange the fabric pieces freely on the board, mixing colors and textures until you love the look. Once you’re happy with the design, glue the pieces down. You can frame your art or simply hang it as is for a casual vibe. This project is not just budget-friendly; it’s also a great way to recycle materials and make your room feel lively.
• Gather fabric scraps in various colors and patterns.
• Cut them into shapes like squares or circles for variety.
• Arrange pieces on a canvas or board until it feels right.
• Glue down your design and hang it up for all to see.
This fabric scrap wall art is not only easy but also incredibly rewarding. You’ll love looking at it every day, knowing it reflects your unique style. Plus, it’s a wonderful conversation starter for guests. Get started on this creative journey today and turn your leftovers into a masterpiece!
6. Upcycled Picture Frames
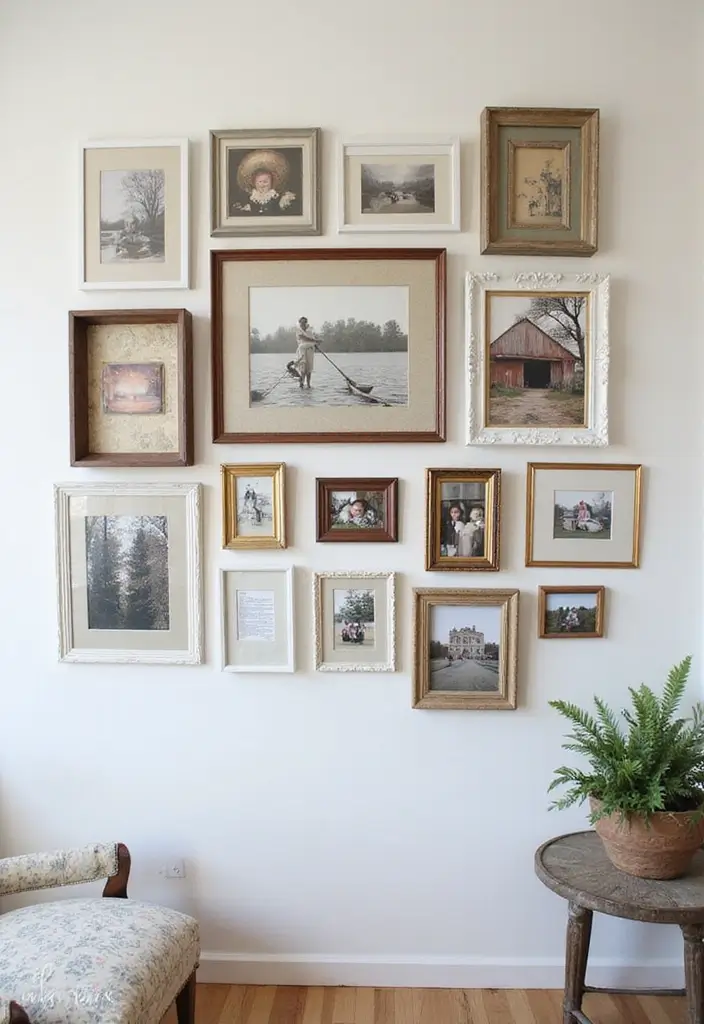
Revamp your home with upcycled picture frames that showcase your personality. These vintage treasures aren’t just for photos anymore. You can turn them into unique art pieces that add character to any room. Imagine vibrant colors or rustic finishes that complement your decor. Frames filled with fabric, colorful paper, or pressed flowers are trending right now. Pinterest is buzzing with these creative ideas, making your home feel warm and inviting.
Ready to get started? First, hunt down old frames in different shapes and sizes. You can find them at thrift stores or even in your attic. Sand them down if they look worn, and then unleash your creativity with paint or stain. Don’t shy away from bold colors or go for a chic distressed look; it’s all about what fits your style. Hang your frames together on a gallery wall for a stunning visual impact. This DIY project is not only budget-friendly, but it also lets you express your creativity and make your living space feel truly yours.
• Choose frames in various sizes for added interest.
• Pick a color palette that matches your room’s theme.
• Add fabric or art instead of photos for a fresh look.
• Place your frames in a gallery-style arrangement for drama.
With just a little effort, your old frames can become conversation starters, bringing warmth and charm to your home. Enjoy the process, and let your imagination shine!
7. Tin Can Lanterns
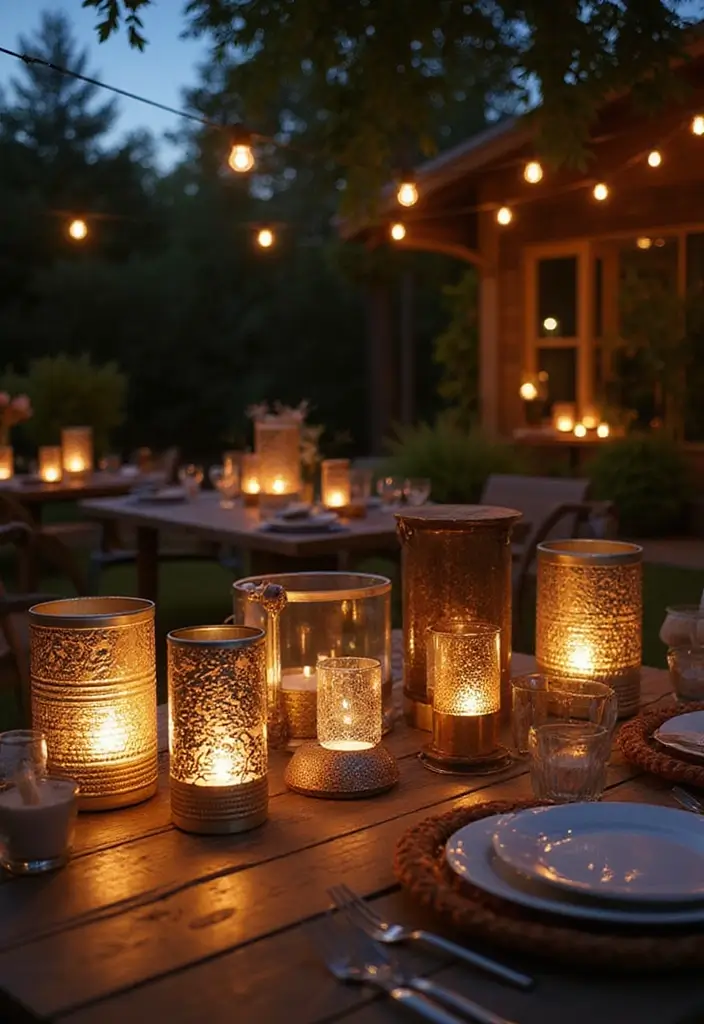
Bring your outdoor space to life with charming tin can lanterns! This easy DIY project transforms simple cans into stunning light sources that are perfect for summer nights. Imagine gathering with friends or family, surrounded by the soft glow of your handmade lanterns. It’s an inviting way to enjoy your patio or garden.
You’ll need some empty tin cans, water, and a few basic tools to create these beauties. Start by thoroughly cleaning the cans and peeling off any labels. Fill them with water and freeze them overnight. Once the water has turned to ice, take them out and use a hammer and a nail to punch holes in the ice. Be creative! You can create star patterns, hearts, or even intricate designs. After the ice melts, you’ll have a unique lantern ready for a tea light or small candle.
These lanterns not only add a decorative touch but also set a cozy atmosphere for outdoor gatherings. Plus, they are a budget-friendly way to elevate your home decor!
Here are some tips to get you started:
Choose colorful cans for a fun look. Bright colors can make your lanterns pop!
Use larger cans for bigger designs. Bigger surfaces allow for more creativity.
Add a coat of spray paint. A metallic finish can give them a stylish touch.
Place them along pathways or tables. This creates a magical ambiance for your gatherings.
Now you’re ready to light up your nights with these easy and delightful tin can lanterns! Enjoy your crafting and the charming glow they bring to your home.
8. DIY Rope Bowls
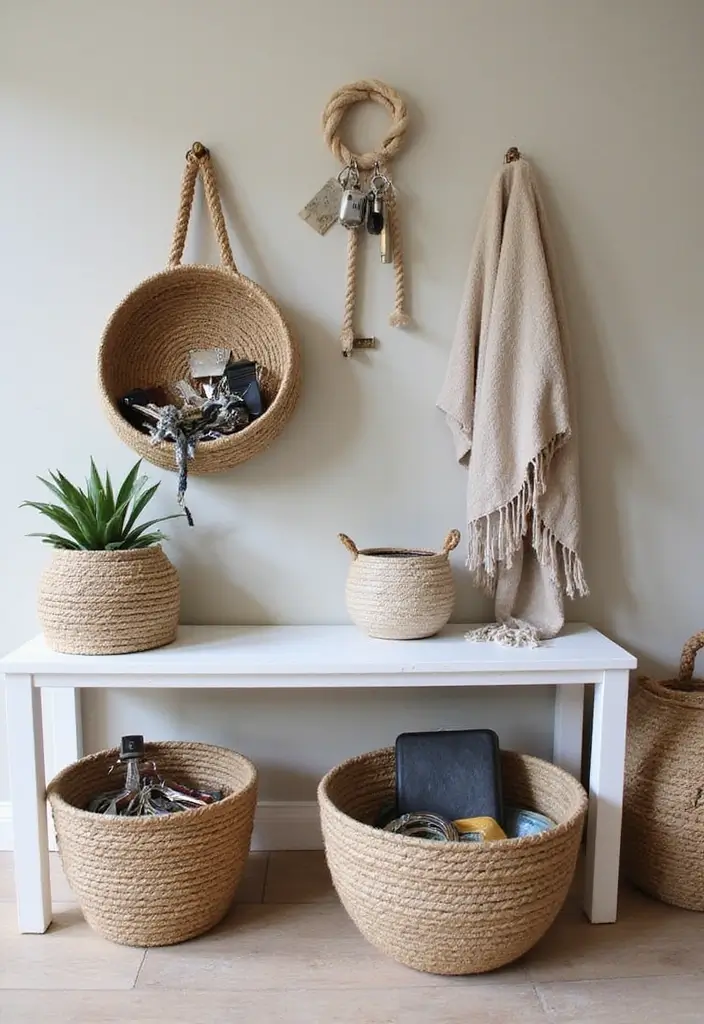
Do you want to add a touch of creativity to your home while keeping things organized? Look no further than DIY rope bowls! These trendy bowls not only help you tidy up small items but also bring a handmade charm to any space. Picture a natural jute bowl on a shelf, filled with your favorite trinkets. Or imagine a colorful cotton bowl that brightens up your entryway. Pinterest is buzzing with these charming creations, and they’re perfect for any room in your home.
Getting started is simple and budget-friendly. First, gather some cotton or jute rope and an old bowl to shape your new masterpiece. Begin coiling the rope and use hot glue to secure it as you go. You can stop when you reach your desired size. For a personal touch, paint the bowl or leave it in its natural state to showcase the rustic vibe. These bowls are great for holding keys, jewelry, or even snacks while you watch a movie. Plus, they make your home feel warm and inviting.
Here’s how to create your own DIY rope bowls:
Gather materials: Use cotton or jute rope for a natural look.
Choose a bowl: Pick a bowl in any size or shape for shaping.
Glue as you go: Secure the rope with hot glue to keep it in place.
Decorate: Add color with paint or leave it natural for a rustic feel.
With just a few materials and some creativity, you can craft unique rope bowls that not only organize but also elevate your home decor. Enjoy the process and let your personality shine through each piece!
9. Floral Wreaths
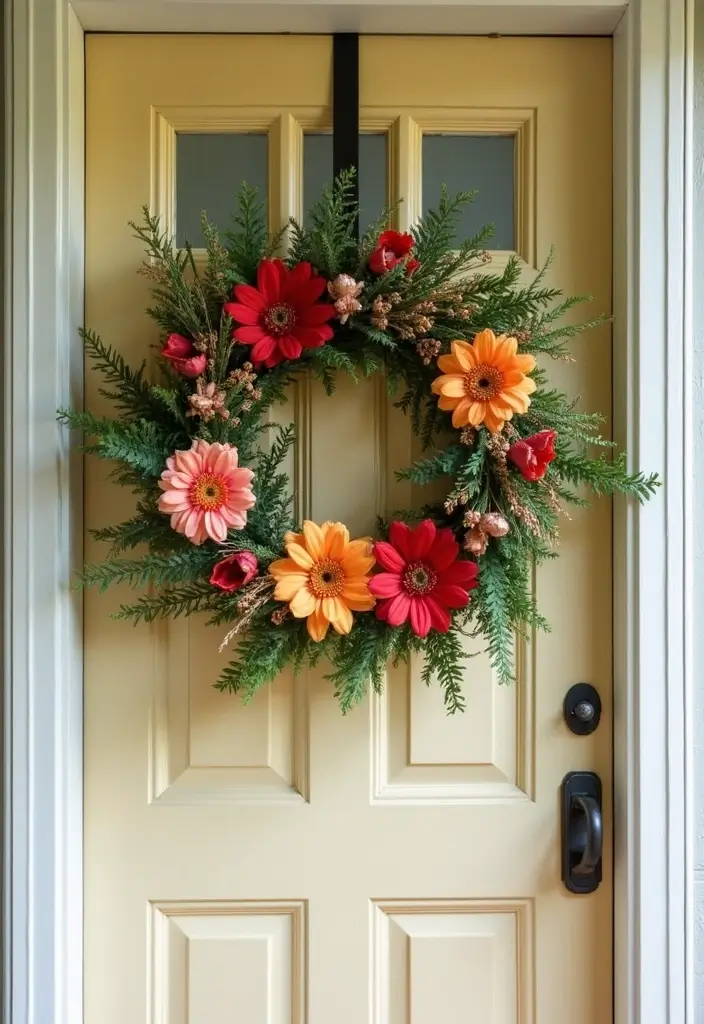
Creating a floral wreath is a fun way to brighten up your home. These colorful decorations can reflect your personal style and add a fresh vibe to any room. You can use a mix of faux flowers, greenery, and a wire frame to craft something special. Think about using pastel tones for a soft spring feel or bold colors for a vibrant summer look. Pinterest is full of inspiration for seasonal wreaths, showcasing everything from rustic wildflowers to elegant roses.
Start your project by gathering materials that fit your budget. You can find faux flowers at craft stores or online, often at a great price. Look for wire frames that are affordable yet sturdy. When you attach flowers to the frame, use floral wire for a secure hold. Layer the flowers for a lush appearance and fill in any gaps with greenery for a balanced look. Hang your finished wreath on your front door to greet guests or display it on a wall to make a statement. This simple project can make your space feel warm and inviting.
• Gather faux flowers and greenery for a lush effect
• Choose a wire frame that fits your budget
• Layer flowers for fullness and add greenery for contrast
• Hang your wreath to create a welcoming atmosphere
Whether you change it with the seasons or keep it up year-round, floral wreaths are a versatile way to express your creativity. They can bring joy to your home and are sure to be a conversation starter. So why not give it a try?
10. Upcycled Pallet Furniture
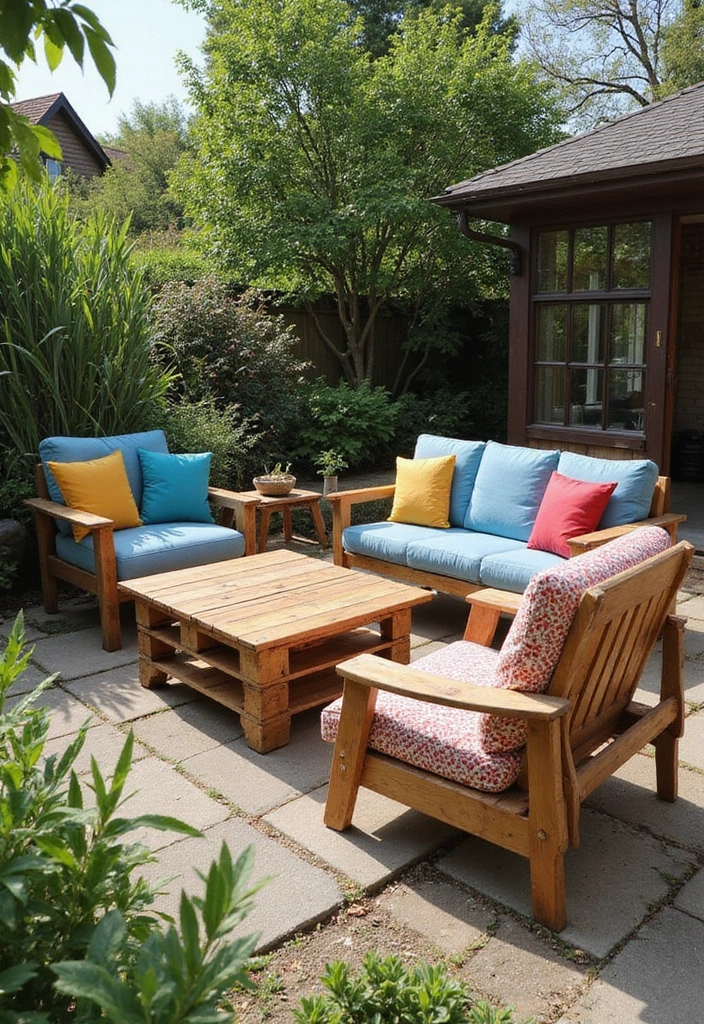
Transform your living space with upcycled pallet furniture. This DIY project not only adds a rustic touch to your home but is also an eco-friendly choice. You can easily turn wooden pallets into stunning coffee tables, benches, or shelves that showcase your style. Imagine a weathered coffee table with a rich stain, paired with cushions for comfort. Pinterest is buzzing with these creative ideas, making them a trendy choice for your home.
Ready to get started? First, find clean pallets at local shops or online marketplaces. Make sure they’re safe to use. Next, sand them down to smooth out any rough edges. This step is essential for both safety and aesthetics. After that, apply your favorite stain or paint. Choose bold colors for a modern look or stick with natural wood for a more rustic feel. Finally, arrange your new furniture in your home. Use it for extra storage or as a cozy seating area, both indoors and outdoors.
• Source clean pallets from local businesses or online sites.
• Sand the pallets for a smooth finish before staining.
• Choose colors that complement your existing decor.
• Add cushions for comfort and style, perfect for relaxing.
This project is an affordable way to inject personality into your home. Each piece tells a story, making your space feel more inviting and uniquely yours. Plus, you’ll love knowing you’ve contributed to sustainability by reusing materials. Dive into this fun DIY project and watch your home transform!
11. Beaded String Art
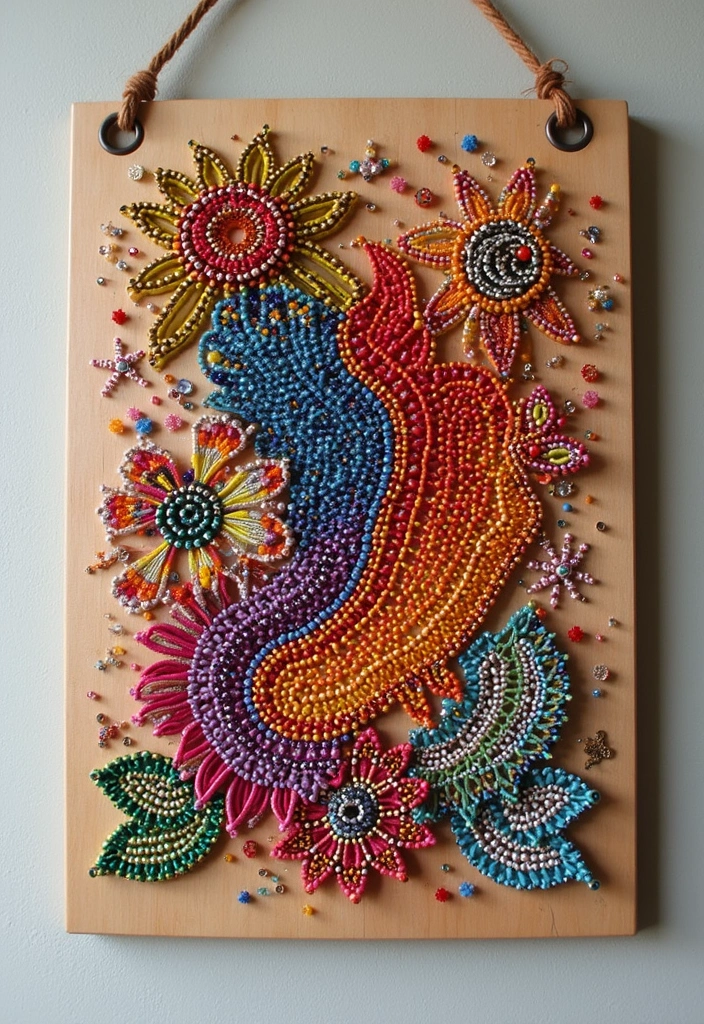
Transform your space with beaded string art that adds depth and color to your walls. This DIY project is perfect for anyone looking to unleash their creativity and personalize their home decor. Imagine a beautiful design filled with vibrant threads and shimmering beads, catching the light and drawing attention. You can create a charming piece that feels uniquely yours, whether you choose a simple heart or a detailed geometric pattern. Pinterest is buzzing with these ideas, showcasing how this art style can brighten up any room.
To get started, you only need a few materials. Grab a sturdy wood board and sketch your design lightly with a pencil. Next, use nails to outline your pattern. This step is simple and allows for great flexibility. Choose colorful threads that match your home’s palette and weave them in and out of the nails to bring your design to life. To give it that extra sparkle, add beads along the strings. This DIY is budget-friendly, making it easy to create something special without spending a fortune. Plus, it adds a lovely personal touch to your home, making every guest feel welcome.
• Pick a design that reflects your style
• Choose colorful threads to match your decor
• Add beads for a touch of glam
• Hang it in a prominent place to showcase your creation
Now you’re ready to dive into this fun and rewarding craft. It’s a wonderful way to express yourself and create a cozy atmosphere at home. Enjoy the process and watch your walls come alive!
12. DIY Glass Bottle Planters
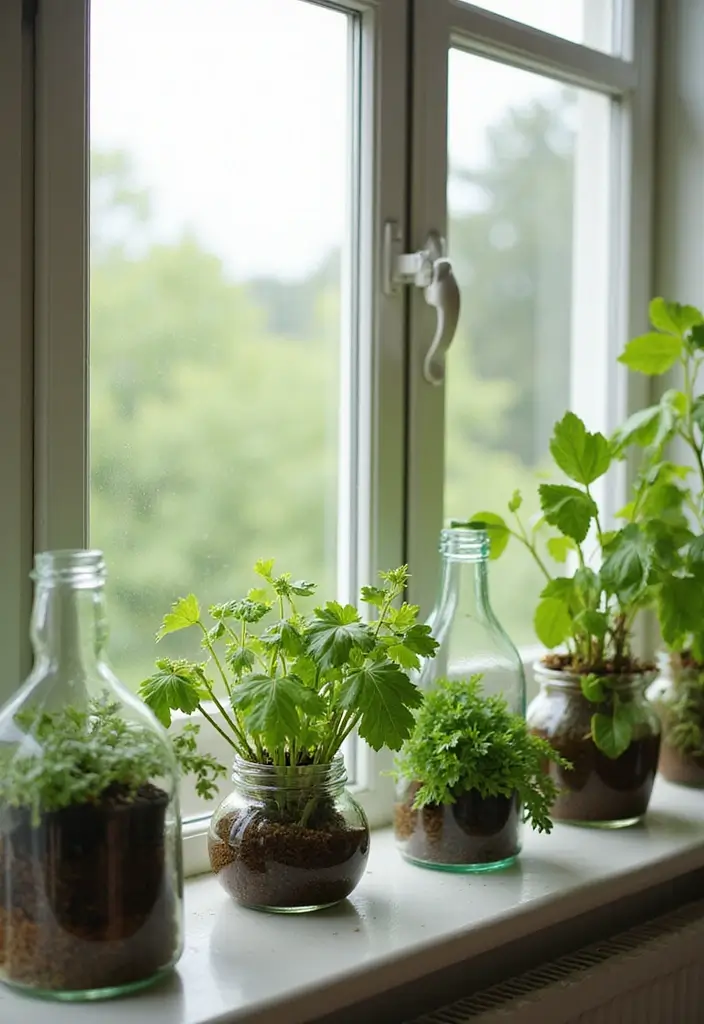
Turn simple glass bottles into charming planters that brighten your home and support a green lifestyle! This trendy DIY project is not only fun but also adds a personal touch to your decor. Whether you choose vibrant paint colors or natural twine, these planters can enhance your space while showcasing your favorite herbs or succulents. Picture a sunny windowsill filled with these unique planters, creating a lively atmosphere that’s both stylish and refreshing.
To get started, gather a few empty glass bottles and give them a good wash. You can cut them in half for a modern look, or keep them whole for a simple yet elegant design. If you decide to cut, fill the bottom half with potting soil and plant your greenery. You might enjoy painting the outside in bright hues or wrapping it with twine for a rustic feel. This DIY project is budget-friendly and allows you to express your creativity while enhancing your home.
• Gather a variety of glass bottles for different styles.
• Cut bottles if you want a unique, layered look.
• Fill the bottom with potting soil and add your plants.
• Decorate with paint or twine to match your decor.
These DIY glass bottle planters are not just beautiful; they also promote a sustainable lifestyle. You can hang them or place them on your windowsill, making your space feel fresh and inviting. Try this project today and watch your home transform!
13. Upcycled Denim Bags
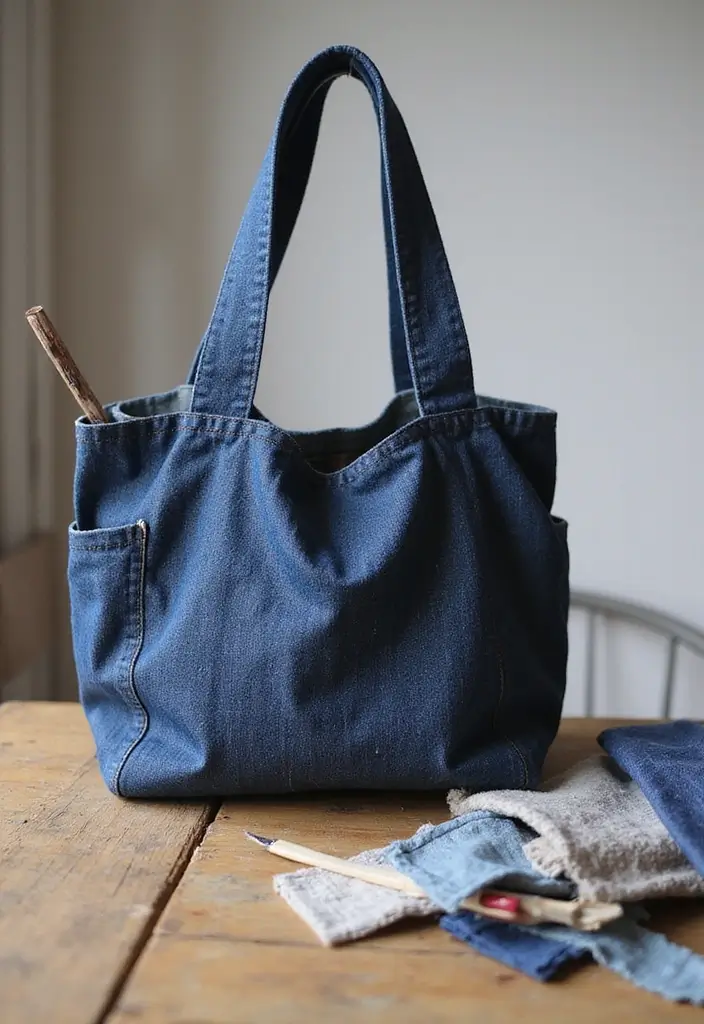
Breathe new life into your old jeans by transforming them into chic upcycled denim bags! Not only are these bags practical, but they also reflect your unique style. Picture a sturdy tote made from your favorite pair of jeans, perfect for running errands or hitting the beach. As seen on various DIY blogs, this trend is not just stylish; it’s environmentally friendly too.
To get started, gather your materials and follow these simple steps. First, cut the legs off your jeans at the length you want for your bag. Next, sew or glue the bottom shut, depending on your comfort level with sewing. Want to add a personal touch? Use leftover denim fabric or an old belt for straps. Feeling creative? Embellish your bag with patches or paint to make it truly one-of-a-kind!
This project is budget-friendly and allows you to express your personality. Plus, it reduces waste and promotes sustainable living. Imagine carrying a bag that tells a story—your story!
Here are some tips to make your upcycled denim bag even better:
• Choose a sturdy pair of jeans for durability.
• Add pockets from the jeans for extra functionality.
• Use contrasting thread for a pop of color in your seams.
• Personalize with fabric paint for a unique design.
Dive into this fun DIY project and enjoy a stylish accessory that’s truly yours!
14. Nature-Inspired Wall Hangings
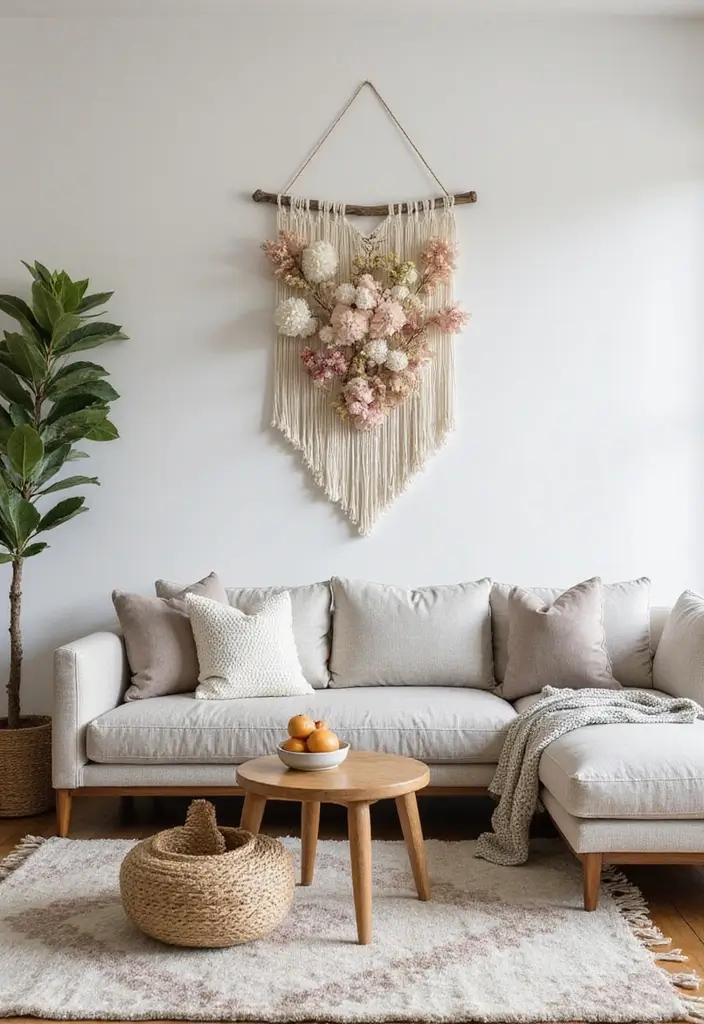
Bring the beauty of the outdoors inside with nature-inspired wall hangings. These charming decor pieces made from branches, twigs, and natural fibers add a serene touch to any room. Imagine a rustic piece of art that not only looks stunning but also connects you to nature. Pinterest is buzzing with these ideas, showcasing how they can transform your space into a tranquil retreat.
To create your own wall hanging, start by gathering thin branches or twigs from your backyard or a nearby park. You can arrange them creatively, using twine or yarn to tie them together. Hang dried flowers or feathers from the branches to add flair. This project is budget-friendly and lets you personalize your decor. The result? A unique piece that elevates your home’s style.
Here are some practical tips to get you started:
Use branches that match your room’s color scheme for a cohesive look.
Choose a size that fits your wall space—think about what feels balanced.
Pick natural elements like leaves or feathers that speak to you.
Add a splash of color with dried flowers to bring life to the piece.
This DIY project is perfect for anyone looking to add a touch of nature to their home. It makes your space feel warm and inviting, ideal for cozy evenings or lively gatherings. Dive into this creative endeavor and watch your walls come alive with beauty and character.
15. DIY Colored Glass Jars
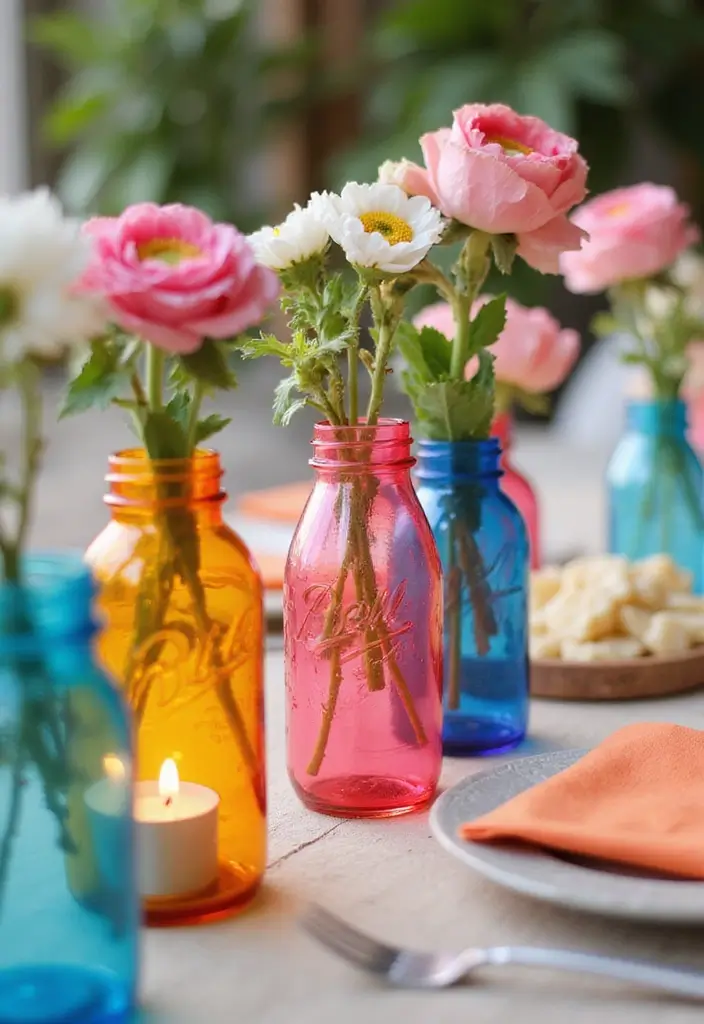
Brighten up your space with DIY colored glass jars! These charming pieces work as vases, candle holders, or stunning decor items. You can create a colorful display that fits any room in your home.
Start by collecting some clear glass jars. Look for old jars you might have lying around, like pasta or jam jars. Then, grab some acrylic paint in your favorite hues. You can choose bold colors like turquoise or soft pastels, depending on your style. Pour a small amount of paint into each jar. Swirl it around until the inside is fully coated. Don’t worry about perfection; the texture adds character! Once coated, let the jars dry upside down for a few hours. This gives them a polished finish.
Arrange your jars on a table, shelf, or even outside on your patio. Fill them with fresh flowers or place candles inside for a warm glow. These jars not only add a pop of color but also create a cozy atmosphere that feels inviting.
Here are some tips to get you started:
Use glass jars of different sizes for visual interest.
Choose colors that complement your room’s palette.
Pick non-toxic acrylic paint for a safe crafting experience.
Add twine or ribbons around the jars for a rustic touch.
These DIY colored glass jars are a simple and fun project. They make your home feel brighter and more personal. Plus, they are budget-friendly, giving you a creative outlet without breaking the bank. Enjoy crafting your colorful decor!
16. DIY Macrame Plant Hangers
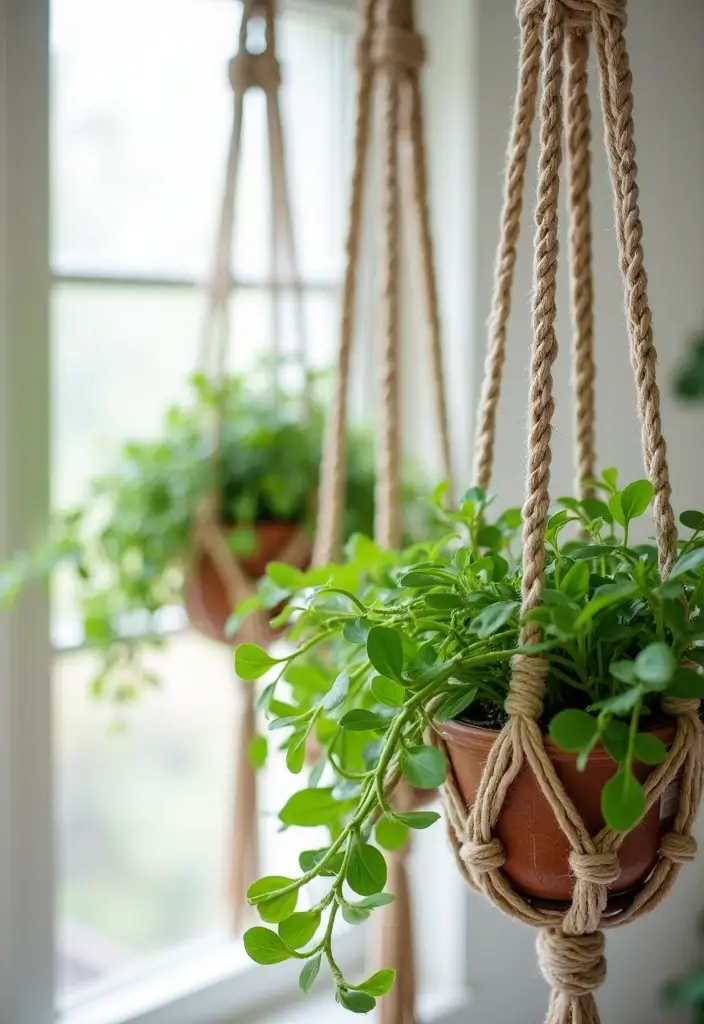
Macrame plant hangers are a fantastic way to showcase your plants while adding a cozy, bohemian vibe to your home. Imagine a lush green plant hanging gracefully from your ceiling, swaying gently in the breeze. You can choose natural cotton cords in earthy tones or vibrant colors to match your decor. As seen on Pinterest, these hangers are a popular choice for bringing life to any room, from sunny kitchens to serene bedrooms.
To get started, gather your materials and let your creativity flow. You don’t need to break the bank for this project. Cotton macrame cord is affordable and easy to find at craft stores. Simply cut several lengths of cord to your desired height, tie them together, and start creating knots in fun patterns. You can even make a small basket at the bottom to hold your plant. Hang your creations near windows or from the ceiling to create a stunning visual impact. This project not only looks beautiful but also makes your plants feel special and well-displayed.
• Cut multiple lengths of cotton cord to customize the height.
• Choose natural or colorful cords to match your home decor.
• Experiment with different knot patterns for a unique look.
• Hang them in bright spots for the best light and aesthetic appeal.
With just a little effort, your DIY macrame plant hangers can transform any space, making it feel fresh and inviting. Plus, they’re perfect for expressing your personal style while giving your plants a stylish home. Get ready to impress your guests with your creative flair!
17. DIY Snow Globe
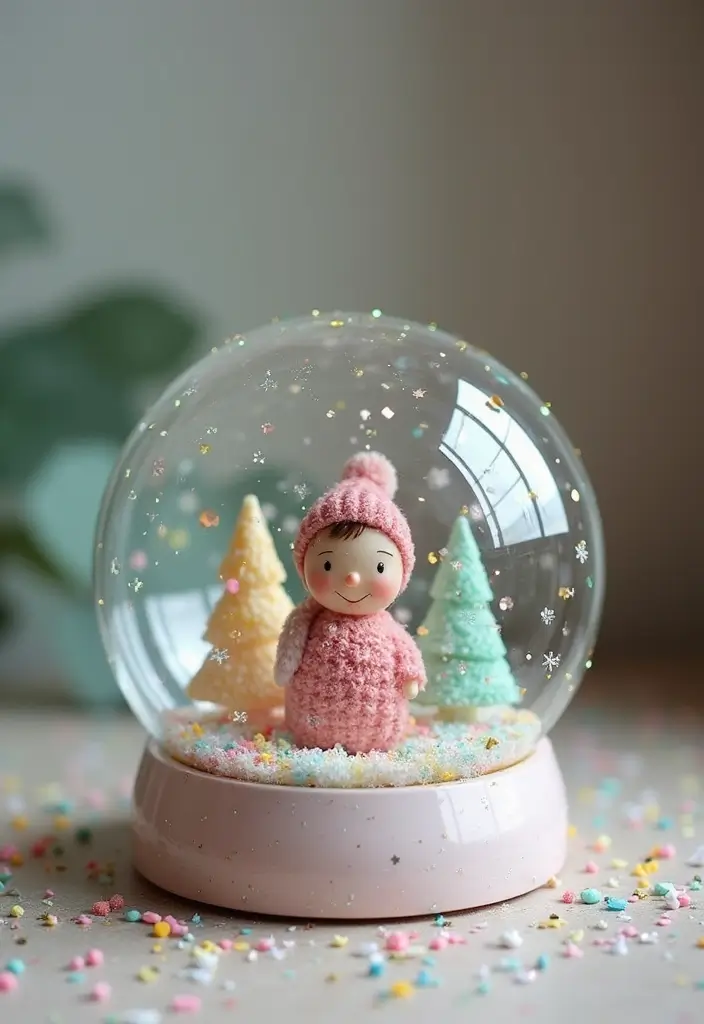
Bring a touch of magic into your home with a DIY snow globe! This charming project is a fantastic way to preserve your favorite memories. Plus, it makes for heartfelt gifts that anyone would love to receive. Imagine shaking it and watching the glitter swirl around your cherished photos or figurines!
To get started, gather a few simple supplies. You’ll need a small glass jar with a lid, some figurines or personal photos, and a bit of glitter or fake snow. You can find these materials at craft stores or even around your home. Think about a theme that speaks to you—perhaps a winter wonderland or a beach scene!
Here’s how to create your snow globe. First, fill the jar about three-quarters full with water. Next, add your glitter or fake snow for that enchanting effect. Place your figurine or photo inside, then secure the lid tightly. Give it a gentle shake and watch the magic unfold! This project is not only budget-friendly but also lets you express your creativity.
These personalized snow globes can easily fit into any decor style, making your space feel warm and inviting. They are perfect for adding a personal touch to your home or for brightening someone else’s day with a thoughtful gift.
• Choose a glass jar that fits your theme and style
• Add water, glitter, or fake snow for a whimsical touch
• Include personal items like photos or small keepsakes
• Shake it up to enjoy the snowfall effect anytime
Creating a DIY snow globe is not just fun; it’s also a way to showcase your memories. These delightful decorations can brighten up any shelf or table. They truly are a beautiful reminder of the moments that matter most!
18. Felt Letter Board
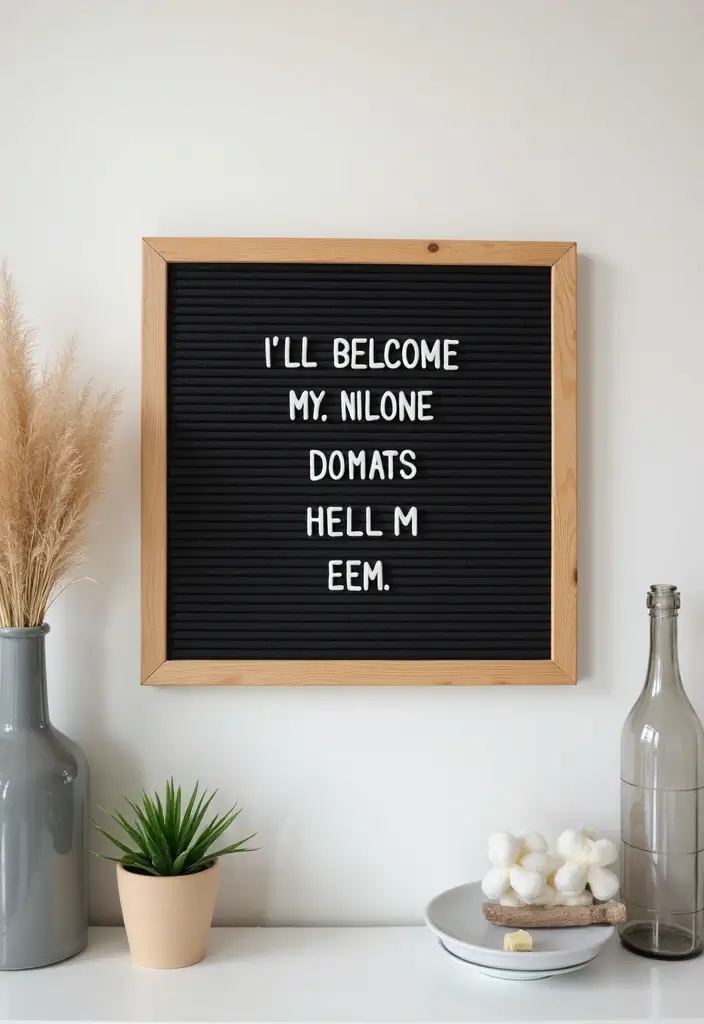
Create your own felt letter board to showcase quotes that inspire you or messages that make you smile. This fun project adds a personal touch to any space and allows you to change your decor whenever the mood strikes.
Start with a simple wooden board and some colorful felt. Choose colors that brighten your room or reflect your style. Popular shades like soft pastels or bold jewel tones can make a statement. Pinterest is buzzing with ideas on how to style these boards, and you can easily join in on the trend!
To make your letter board, follow these easy steps:
1. Cut the felt into small squares that will cover the board.
2. Use a strong adhesive to stick the squares in a neat, square pattern.
3. Grab some letter cutouts or use a cutting machine to create your favorite phrases.
4. Arrange and rearrange the letters as you like!
This project is budget-friendly and fun. You can often find felt at craft stores or online at great prices. Plus, it’s a fantastic way to express yourself and keep your space feeling fresh and inviting.
• Choose colorful felt that matches your decor style
• Use a wooden board for a sturdy base
• Arrange quotes that inspire or uplift you
• Change messages regularly to keep it fresh and fun
With your felt letter board, you can easily switch up your quotes or messages. It’s perfect for adding a personal touch to your home or office, making your space feel warm and welcoming. Enjoy the process and let your creativity shine!
19. DIY Paper Mache Bowls
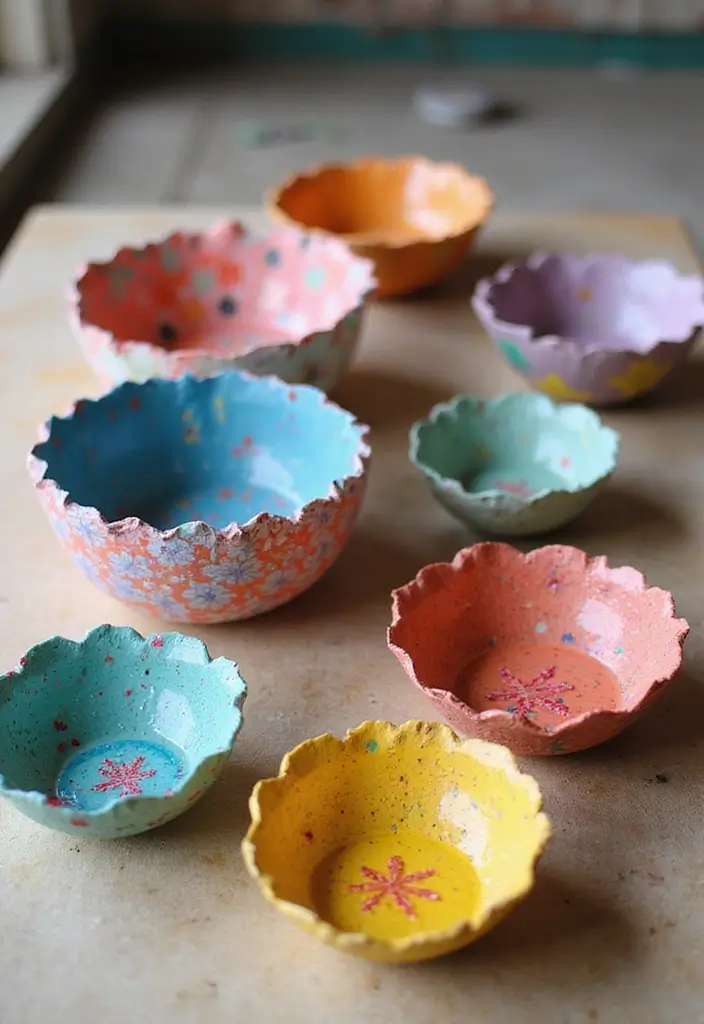
Create stunning DIY paper mache bowls that add charm and function to your home! These bowls are not only easy to make but also perfect for organizing small items like keys, jewelry, or craft supplies. Imagine a colorful bowl sitting on your entry table, ready to catch all the little things you might otherwise misplace. Plus, you can customize them to match your decor!
Start by gathering your materials. You’ll need some newspaper or colored paper, flour, and water. Tear the paper into strips. Mix flour and water to make a paste. Dip each strip in the paste, then layer them over a bowl mold until fully covered. Let it dry thoroughly, then unleash your creativity! Paint your bowls in bright colors or soft pastels to suit your style.
This project is budget-friendly. You can use recycled materials, making it an eco-friendly choice as well. These bowls fit into various design styles, from boho to modern chic. They allow you to express your creativity while making your space feel more personal and inviting.
Here are some tips to make your paper mache bowls shine:
Choose vibrant paper for a fun, eye-catching effect.
Use a simple bowl mold like a glass or plastic bowl for easy shaping.
Add texture by layering different types of paper, such as tissue or kraft paper.
Seal your bowls with a clear coat for durability and a polished look.
Dive into this craft and enjoy the satisfaction of creating something beautiful and useful for your home! Your DIY paper mache bowls will not only organize your items but also spark joy every time you see them.
20. Upcycled Bed Sheet Curtains
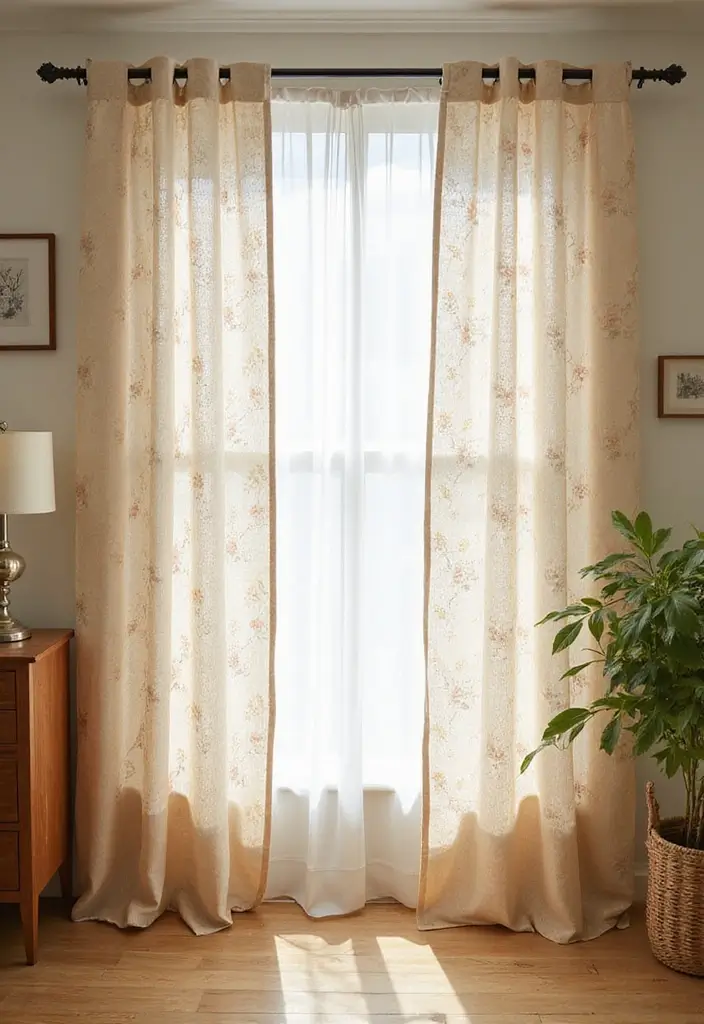
Brighten up your home with stunning, upcycled bed sheet curtains! This fun DIY project not only refreshes your windows but also gives new life to unwanted fabric. Imagine airy, soft drapes in your favorite colors, creating a cozy atmosphere that instantly uplifts any room. Trending on platforms like Pinterest, these curtains add a touch of charm while being kind to your wallet.
To get started, pick bed sheets that complement your existing decor. Think about colors and patterns that resonate with your style. Whether you prefer bold prints or calming pastels, the right sheets can transform your space. Don’t worry if you don’t have sewing skills; fabric glue works wonders too!
Here are some easy steps to create your own curtains.
Choose sheets that match or contrast your room’s color scheme.
Cut them to fit your window’s height for a perfect finish.
Hem the edges using a sewing machine or fabric glue to prevent fraying.
Hang them on a curtain rod and step back to admire your work!
This project is perfect for those on a budget. You can often find sheets at thrift stores or garage sales, making it a cost-effective way to update your decor. Plus, these curtains can add texture and a splash of color to your living spaces, making your home feel warm and inviting.
Embrace your creativity and enjoy the process of crafting something beautiful with upcycled materials!
21. Terracotta Pot Art
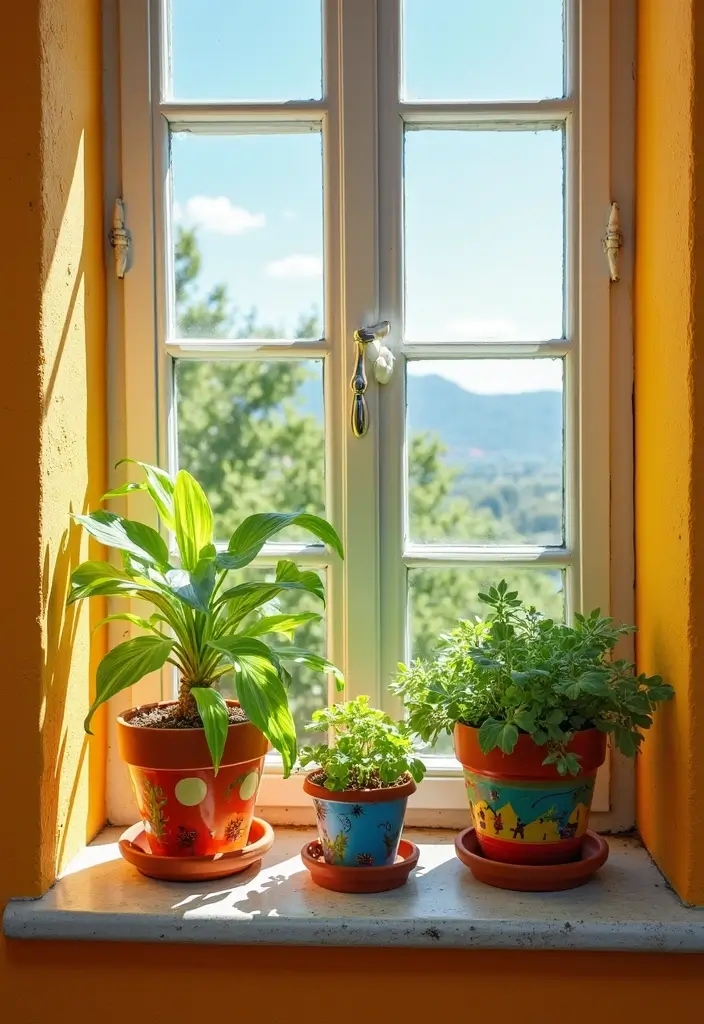
Bring your plants to life by adding a personal touch to terracotta pots! This fun DIY project transforms plain pots into stunning art pieces that showcase your style. Whether you’re sprucing up your succulents or herbs, these painted pots will brighten any space. Imagine vibrant colors and unique patterns catching the light on your windowsill or balcony.
Start with simple terracotta pots and some acrylic paint. You can choose soft pastels for a gentle vibe or bold colors for a dramatic effect. Pinterest is filled with ideas, from geometric designs to whimsical quotes. These pots not only serve as plant homes but also as charming decor elements that tell your story.
To get started, gather your materials. Look for affordable terracotta pots at your local garden center or craft store. Acrylic paint is easy to find and dries quickly, making this project a breeze. Remember to let your pots dry completely before adding plants. This way, you can avoid smudging your artwork. Placing your newly decorated pots in a sunny spot will enhance their beauty, making your indoor garden feel inviting and vibrant.
• Choose terracotta pots for a classic base
• Pick acrylic paints in colors that inspire you
• Use stencils or freehand designs for creativity
• Place them in bright spots for a cheerful display
By adding these artistic pots, you create a cozy atmosphere that reflects your personality. Enjoy the process of painting and watch your plants flourish in their new homes!
22. DIY Memory Jars
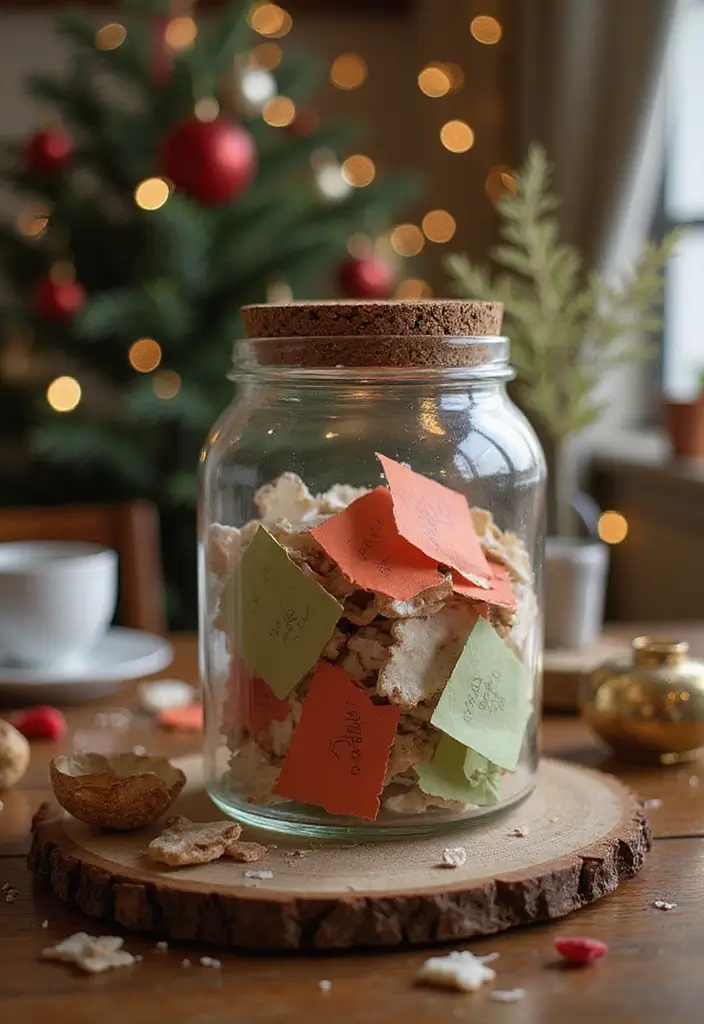
Turn your favorite memories into a stunning DIY memory jar! This simple craft lets you celebrate special moments while adding a unique decorative touch to your home. Memory jars are perfect for keeping sentiments alive and can fit seamlessly into any room.
To start, grab a large glass jar—like a mason jar or an old pickle jar. Choose colorful or patterned paper to write down your most cherished memories, quotes, or even little notes from loved ones. Fold each piece neatly and fill the jar with them. You can even add a few decorative elements, such as ribbons, stickers, or paint, to personalize your jar. Trends show that people love using twine or washi tape for a rustic look, which you can easily find at any craft store.
Once your jar is filled and decorated, find the perfect spot for it! Place it on a shelf, your coffee table, or a windowsill. This charming piece not only keeps your memories but also sparks joy every time you see it.
Here are some tips to make your memory jar truly shine:
• Choose a jar that matches your home decor style
• Use bright colors for the paper to make it pop
• Add small decorations like beads or shells for an extra touch
• Write memories regularly to keep it updated and meaningful
This craft is affordable and a wonderful way to create a conversation starter in your home. It brings warmth and personal flair to your space, reminding you of all the beautiful moments that make life special.
23. DIY Wall Clock
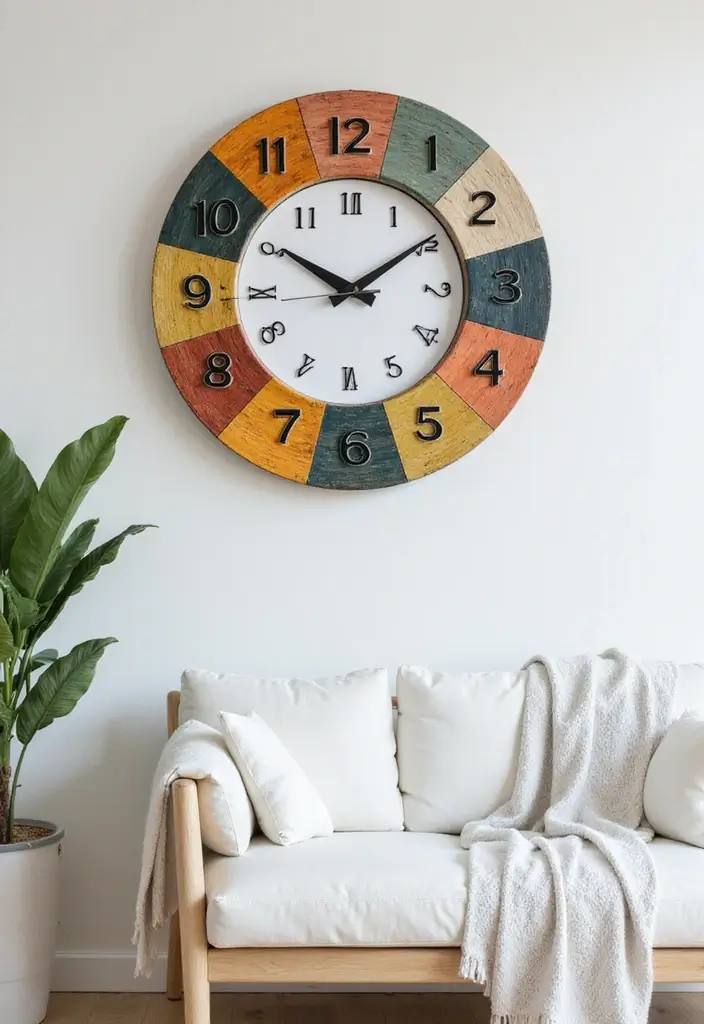
Create a stunning DIY wall clock that not only tells time but also serves as a beautiful piece of art. Imagine walking into a room and seeing a clock that reflects your unique style. Whether you prefer rustic wood finishes or bright, bold colors, the possibilities are endless. Designs featuring natural wood grains or vibrant painted patterns are trending on platforms like Pinterest. Such a clock can transform your space from ordinary to extraordinary.
To start this fun project, gather a few materials. First, find a wooden board, an old pizza peel, or even a reclaimed piece of furniture. Then, purchase a simple clock mechanism kit from a craft store. These kits are affordable and come with everything you need to get started. Attach the clock hands to your base wherever you like. Next, unleash your creativity! Use paints, stencils, or wood-burning tools to decorate the board. This personalization allows you to match it perfectly with your home decor. Once completed, hang it up and enjoy the compliments from friends and family. A personalized wall clock not only keeps you punctual but also makes your home feel more inviting.
• Pick a base material like a wooden board or upcycled item.
• Choose a clock kit that fits your style and budget.
• Decorate with paints or stencils to match your home.
• Hang it in a focal point like a living room or kitchen.
This project is not just about keeping time; it’s about expressing who you are. Enjoy creating a piece that tells your story while being practical.
24. DIY Book Page Art
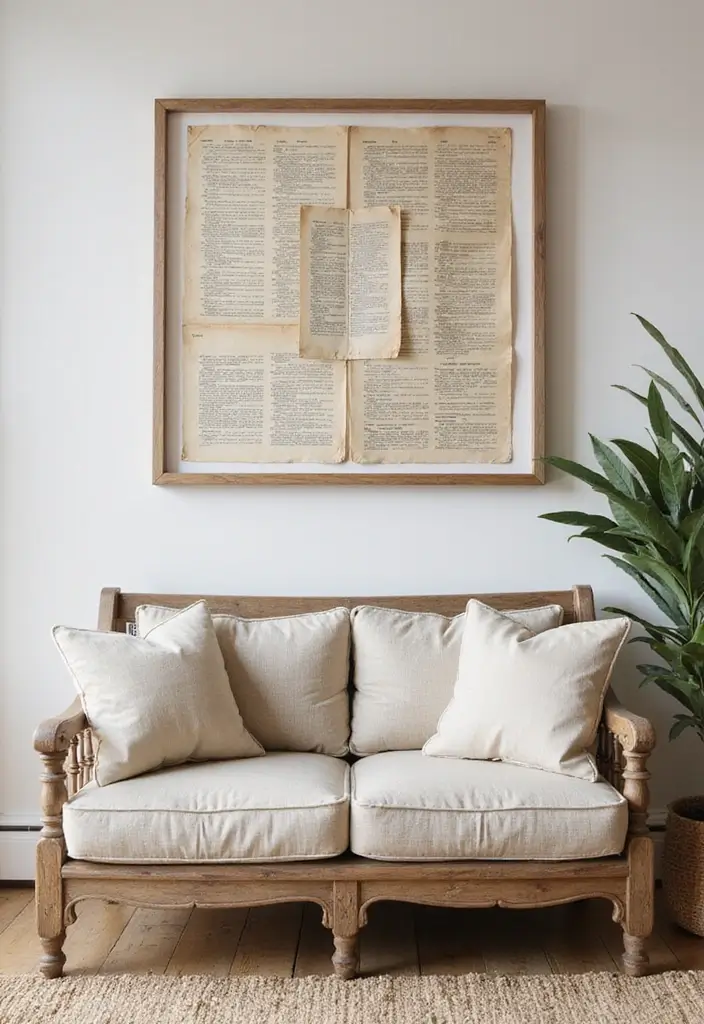
Create stunning DIY book page art that showcases your love for literature while adding a unique touch to your home decor. This project allows you to transform old books into beautiful wall art that tells a story. Imagine arranging pages filled with your favorite quotes or illustrations. These pieces can be a conversation starter, reflecting your personality and interests.
Start by gathering some old book pages and a canvas or frame. Choose a color palette that complements your room. For example, soft pastels work well in a bedroom, while bold colors can energize a living space. You can find inexpensive supplies at thrift stores or online marketplaces. Pinterest is full of inspiring ideas that can help you decide on your layout and design.
Once you have your materials, it’s time to get creative! Arrange the pages on the canvas in a way that feels right to you. Don’t be afraid to overlap or experiment with different orientations. Use glue to secure the pages down, and consider adding personal touches like paint splashes or doodles to enhance the design. This project is cost-effective and allows you to personalize your space, making it feel warm and inviting.
• Gather old book pages to repurpose into art
• Choose a canvas or frame that fits your style
• Add embellishments like paint or illustrations for flair
• Display your art prominently for a literary vibe
This DIY project not only helps you declutter but also brings a piece of your story into your home. Whether you’re an avid reader or just love the look of vintage pages, this craft is perfect for infusing your space with warmth and charm. Get started today and turn your walls into a gallery of your literary adventures!
25. DIY Cloth Napkin Rings
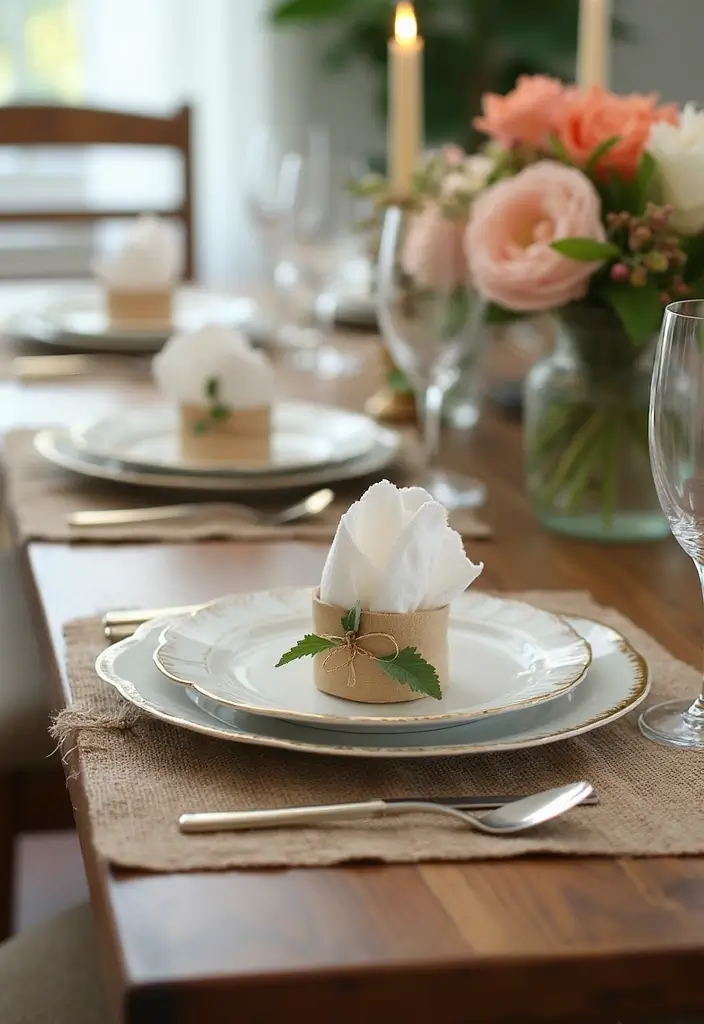
Elevate your dining table with charming DIY cloth napkin rings! These simple accessories not only add flair to your meals but also reflect your personal style. Imagine setting your table with vibrant fabric or rustic twigs that you’ve transformed into beautiful rings. This project allows you to be creative and customize your dining experience for any occasion—birthdays, holidays, or casual family dinners.
Start by selecting materials that resonate with you. You can use fabric scraps in your favorite colors, colorful ribbon, or even natural elements like twigs or dried flowers. Pinterest is bursting with ideas on how to mix and match materials. Think about using soft pastels for spring gatherings or warm tones for autumn dinners. This personal touch makes every meal feel special.
To create your napkin rings, follow these easy steps. First, cut your fabric into strips about 2 inches wide. Then, wrap those strips around a cardboard tube or any round shape you have at home. Secure them with glue or stitches for a neat finish. Finally, add decorative touches like twine, beads, or sequins to enhance the look.
This project is budget-friendly, allowing you to create stunning table decor without spending a fortune. By crafting your own napkin rings, you’ll not only save money but also have unique pieces that reflect your taste, making every meal feel warm and inviting.
• Choose colorful fabric scraps to reflect your style
• Use recycled materials like cardboard tubes for cost savings
• Decorate with twine or beads for a personalized touch
• Match colors to your table settings for a cohesive look
26. Painted Rock Decor

Turn plain rocks into charming decor with painted rock art! This craft is not only fun but also a wonderful way to express your creativity. You can use these painted stones to add personality to your home or garden.
Start by gathering smooth rocks from your yard or buy some at a craft store. Use bright acrylic paints to bring your designs to life. Think about cheerful patterns or uplifting messages. Sealing your artwork with a clear coat helps protect it if you choose to display it outdoors.
Imagine placing these vibrant stones in your garden, using them as unique paperweights, or showcasing them on a shelf. This project is a great way to add a personal touch to your spaces, making them feel more inviting. Plus, it’s a fantastic way to unwind and tap into your artistic side.
To get started, here are some handy tips:
Choose smooth, clean rocks for the best results.
Use bright acrylic paints to create eye-catching designs.
Seal with a clear coat to ensure durability outside.
Display creatively in gardens, on desks, or as centerpieces.
This craft is budget-friendly and allows you to showcase your style. It’s perfect for adding colorful accents to any room or outdoor space, making it feel warm and personalized. So grab your rocks and paints, and let your creativity flow!
27. DIY Shutter Decor
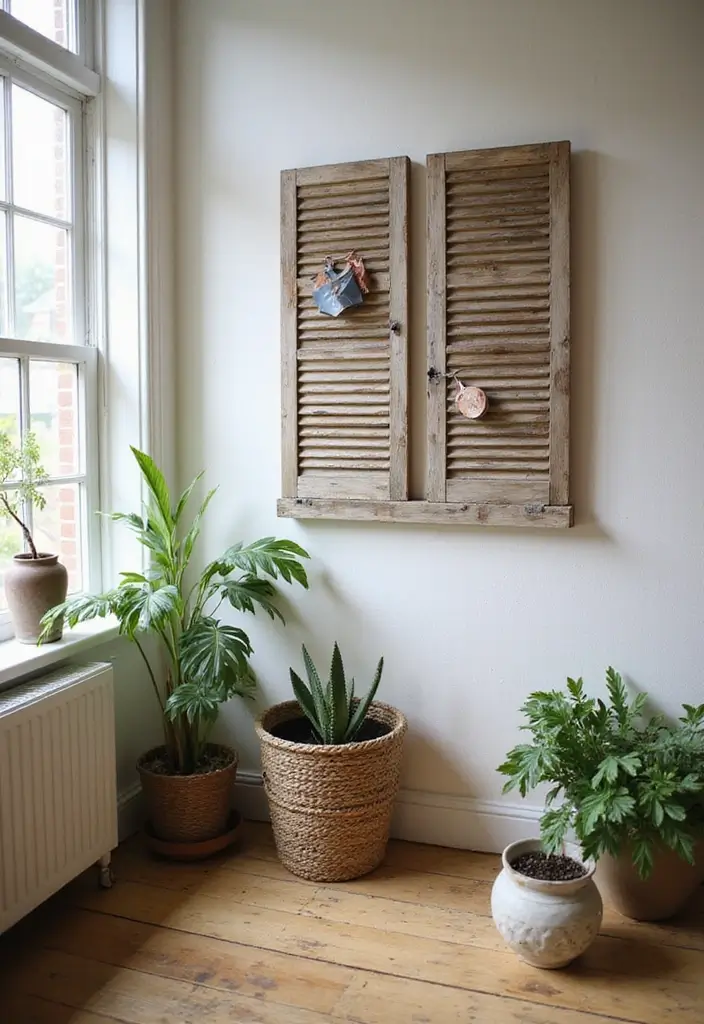
Revitalize your space with DIY shutter decor! Old wooden shutters can become stunning focal points in your home. Whether you’re after a rustic vibe or a chic, modern look, these versatile pieces fit right in. You can find shutters at thrift stores or flea markets, often at a bargain. Imagine painting them in soft pastels or rich, bold colors to match your style. Pinterest is full of inspiration for using shutters as wall art or plant holders, making your home feel inviting and unique.
Ready to get started? First, give your shutters a good sanding to smooth out any rough spots. Then, choose a paint or stain that complements your decor. You can even leave them in their natural state for a more rustic feel. Hang them on your walls as unique art, or prop them up against a wall for a casual look. If you want to get creative, attach some clips to display family photos or artwork. This project not only enhances your home but also lets you express your personality.
Here are some tips to make your shutter decor shine:
• Choose shutters in various sizes for a layered effect.
• Paint them in trendy colors like teal or mustard yellow.
• Attach hooks for hanging plants and add greenery to your space.
• Display photos or art by clipping them to the slats.
With these simple steps, you’ll create beautiful, eco-friendly decor that brings charm and character to your home. Enjoy the process, and let your creativity flow!
Conclusion
Crafting is not only a great way to beautify your home, but it also allows you to express your creativity while being environmentally friendly.
From upcycled mason jars to painted rocks, each of these easy DIY crafts offers a unique touch to your decor.
Try a few that resonate with you, and enjoy the process of creating beautiful, personalized items for your home. Happy crafting!
Frequently Asked Questions
What are some easy DIY crafts for home decor that beginners can try?
If you’re just starting your crafting journey, you’ll love the variety of easy DIY crafts for home decor available! Simple projects like upcycled mason jar vases, painted flower pots, and repurposed wooden pallets can add a personal touch to your space without overwhelming you. These beginner-friendly craft ideas not only enhance your home but also keep your costs down, making them perfect affordable home decor ideas!
How can I upcycle items I already have into creative home decor solutions?
Upcycling is a fantastic way to unleash your creativity! Look around your home for items you no longer use, like old furniture, glass bottles, or fabric scraps. With a little imagination, you can turn these into stunning DIY home decorations. For instance, repurposing an old chair into a unique plant stand or transforming a vintage suitcase into a stylish storage solution can breathe new life into your decor while being eco-friendly.
What materials do I need for simple crafting projects at home?
When diving into simple crafting projects, it’s essential to have some basic materials on hand. Gather items like scissors, glue, paints, brushes, and a variety of paper or fabric. You might also want to collect recyclable materials such as cardboard, jars, and cans for your easy DIY crafts for home decor. These materials can help you create beautiful pieces while keeping your crafting budget-friendly.
Where can I find inspiration for DIY home decorations?
Inspiration for DIY home decorations is everywhere! Check out websites like Pinterest or Instagram, where creative minds share their projects. You can also explore craft blogs and YouTube channels dedicated to DIY. Local craft stores often host workshops that can spark your creativity. Don’t forget to look at your surroundings—nature, your favorite colors, or even your travels can ignite new ideas for your next affordable home decor ideas!
Are there any time-efficient easy DIY crafts I can do for home decor?
Absolutely! If you’re short on time, there are plenty of easy DIY crafts for home decor that can be completed in an afternoon. Consider making quick projects like decorative wall hangings using yarn, creating a photo collage with washi tape, or painting a canvas with your favorite quote. These beginner-friendly craft ideas allow you to refresh your home decor without taking up your whole day!