
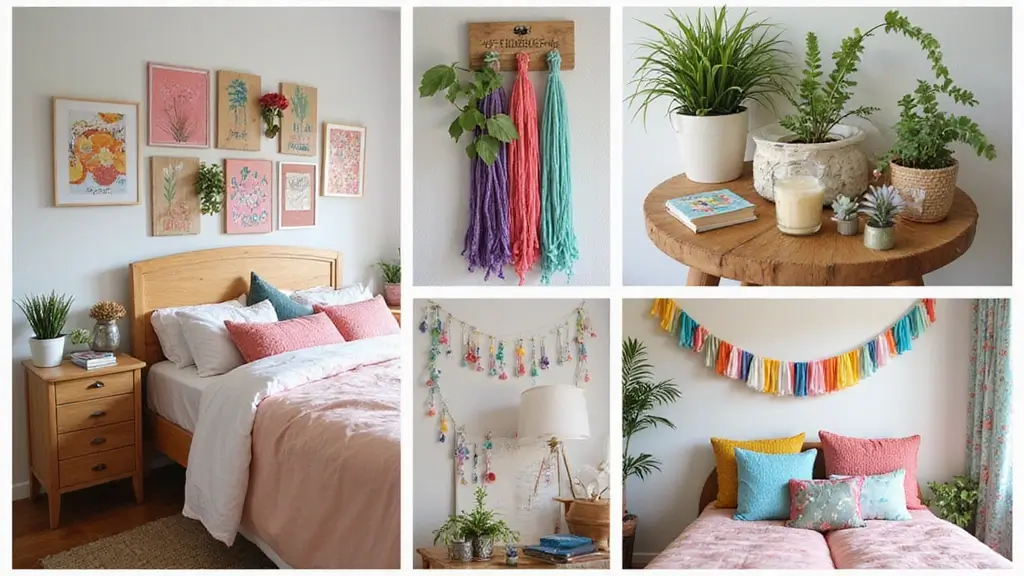
Are you looking to freshen up your room without breaking the bank? You’re not alone! Many teens want their spaces to reflect their unique style, but finding affordable and cute decor can be tricky. That’s why I put together this list of 25 simple DIY room decor ideas just for you.
If you love to express yourself through creativity and design, this post is right up your alley. You might be a budding artist, a crafty DIY enthusiast, or just someone who wants to make their room a little more “you.” Whatever your vibe is, these projects are fun, easy, and perfect for any skill level.
What will you get from this post? A variety of cute and creative decor ideas to brighten up your space, from wall art to cozy accents. Each project is designed to help you personalize your room while having a blast. You’ll find step-by-step instructions and tips to make the process smooth and enjoyable.
So grab your supplies, unleash your creativity, and let’s transform your room into a cozy haven that truly feels like home. With just a little time and effort, you can create a space that reflects who you are. Let’s dive into these DIY projects and get started!
1. Upcycled Wall Art
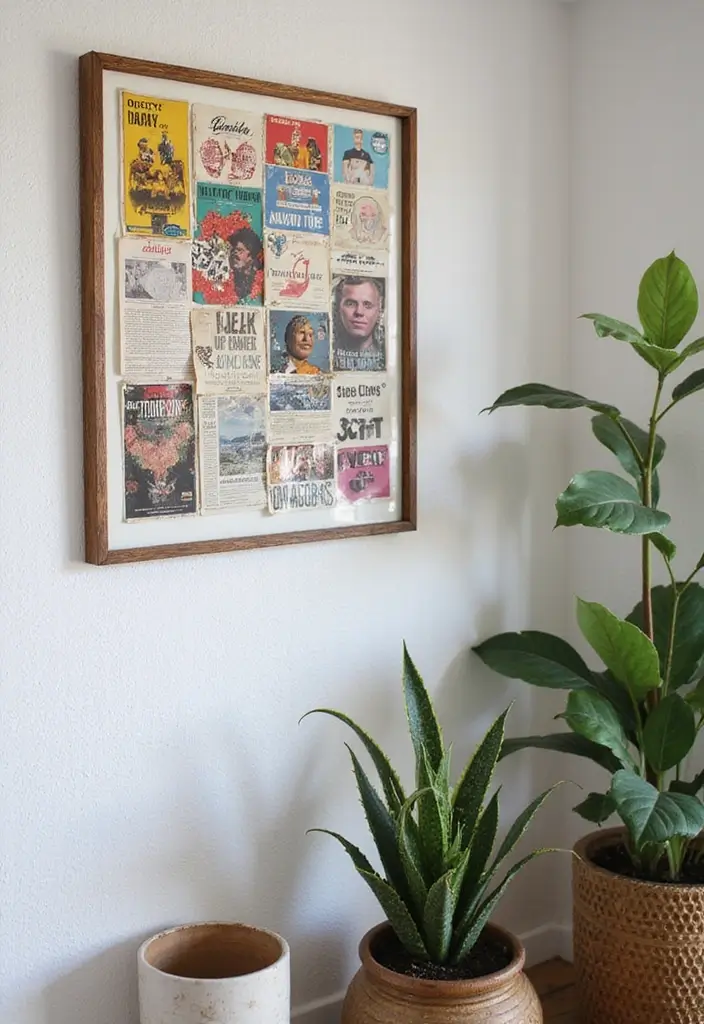
Imagine transforming your old magazines into beautiful wall art that reflects your unique style. Instead of tossing them in the recycling bin, why not create a stunning collage? Use vibrant colors and interesting patterns to make your space pop! You can find inspiration on platforms like Pinterest, where creative minds showcase their fabulous DIY projects.
To get started, gather your favorite pages. Look for bright images or quotes that speak to you. Grab a canvas or sturdy cardboard, and let your imagination run wild. Arrange the cutouts until you love the layout. Once you’re happy, glue everything down and let it set. Hang your masterpiece on the wall or display it casually against a shelf. This project not only personalizes your room but also helps reduce waste. It’s a fun way to express yourself and make your space feel cozy.
• Choose vibrant images from magazines that inspire you.
• Cut out quotes that resonate with your personality.
• Use a large canvas for a bold statement piece.
• Experiment with textures by adding fabric or paint for depth.
This fun activity brings your personality to life while being wallet-friendly. Plus, it’s a great way to spend an afternoon with friends or family. So, gather your supplies, and get ready to create something special that makes your room truly yours!
2. DIY Plant Terrarium
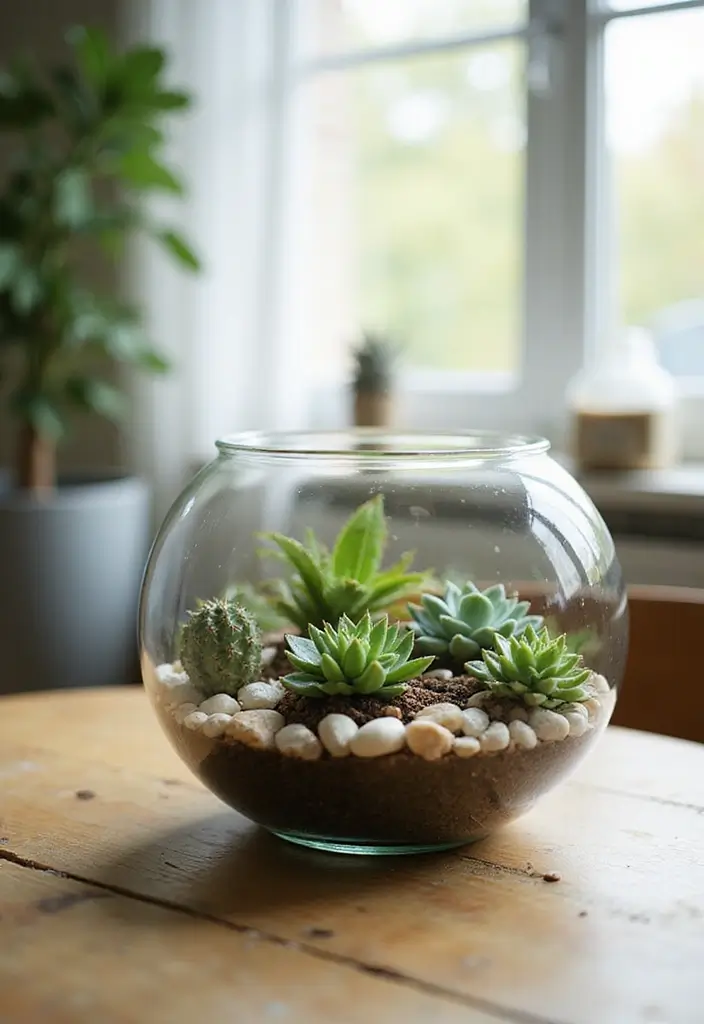
Create a cozy vibe in your room with a DIY plant terrarium! These mini gardens are not only cute but also super easy to make and care for. Plus, they bring a fresh burst of nature indoors, which is perfect for any teen’s space.
Start by choosing a glass container that suits your style. You can use anything from a simple mason jar to a trendy geometric terrarium. Look for options that reflect your personality—think colorful or clear glass. Pinterest is full of inspiration for unique designs and arrangements. Imagine how lovely your terrarium could look on your desk or shelf, adding a pop of life to your decor!
To get started, gather your materials. You’ll need:
What You’ll Need:
– A glass container
– Small pebbles
– Activated charcoal
– Potting soil
– Small plants or succulents
Here’s how to create your terrarium step-by-step.
Steps:
1. Begin by placing a layer of small pebbles at the bottom of your glass container. This helps with drainage, so your plants won’t drown.
2. Next, sprinkle a thin layer of activated charcoal on top of the pebbles. This keeps the air fresh and prevents odors.
3. Add potting soil next, creating a nice base for your plants.
4. Finally, plant your small plants or succulents. Feel free to get creative! Add decorative stones or tiny figurines to give it a personal touch.
This project is budget-friendly and allows you to express your style. Plus, having plants around can brighten your mood and even help purify the air. Making your own terrarium is a fun way to bring the outdoors in, making your room feel more alive and welcoming.
• Choose a glass container that matches your style.
• Layer pebbles for drainage to keep plants healthy.
• Use activated charcoal to prevent odors and keep air fresh.
• Decorate with small figurines or colorful stones for flair.
3. Fabric Wall Hangings
To get started, gather materials like fabric, scissors, and a wooden dowel or a sturdy branch. Cut the fabric into fun shapes—triangles, circles, or even fringes. Use knots to attach the fabric pieces to the dowel, arranging them in a way that pleases your eye. Hang your creation on the wall, and voilà! You’ve instantly added a bohemian vibe to your room. Plus, this project is budget-friendly and great for the environment since you’re repurposing items you might have otherwise tossed.
• Cut fabric scraps into fun shapes and sizes for variety.
• Choose a sturdy dowel or branch to hang your masterpiece.
• Tie each piece securely, creating a layered look for texture.
• Hang it on your wall to make your room feel inviting and stylish.
This DIY project not only adds color but also lets you express who you are. It’s perfect for creating a space that feels uniquely yours while being easy and fun to make!
4. Recycled Jar Organizers
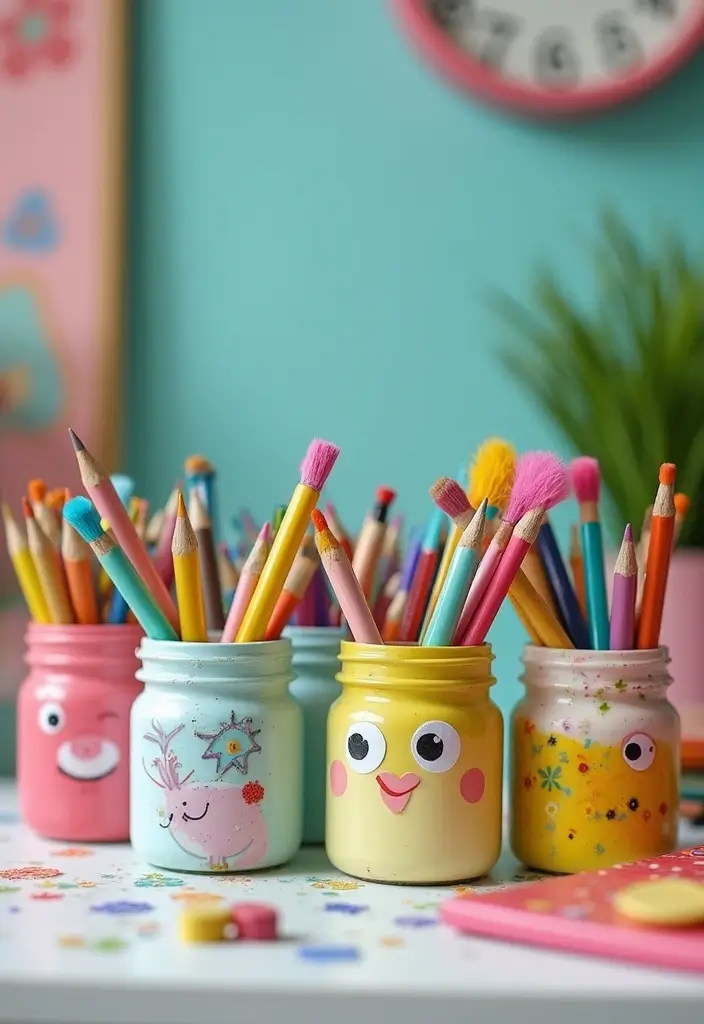
Turn your empty jars into trendy organizers that brighten up your space! Whether it’s for your desk or dresser, these recycled jar organizers are a cute way to keep your essentials tidy. Imagine colorful jars holding your favorite pens, makeup brushes, or even tiny plants. Pinterest is buzzing with this DIY trend, showcasing how a simple jar can add a touch of charm to any room.
To get started, gather your empty jars. Clean them well and let them dry. You can paint them in fun colors or wrap them with twine for a cozy vibe. If you want to take it up a notch, use chalk paint to create labels. This makes it easy to find what you need and adds a personal touch to your decor. Best of all, this project is budget-friendly and helps you declutter, making your space feel more inviting.
• Choose jars of various sizes for visual interest.
• Paint or wrap jars in colors that match your room.
• Label jars with chalk paint or tags for easy access.
• Place plants in jars for a fresh, lively touch.
These jar organizers are more than just functional; they spark conversations and showcase your creativity. Plus, you’ll love how they make your space feel more organized and personal.
5. Painted Plant Pots
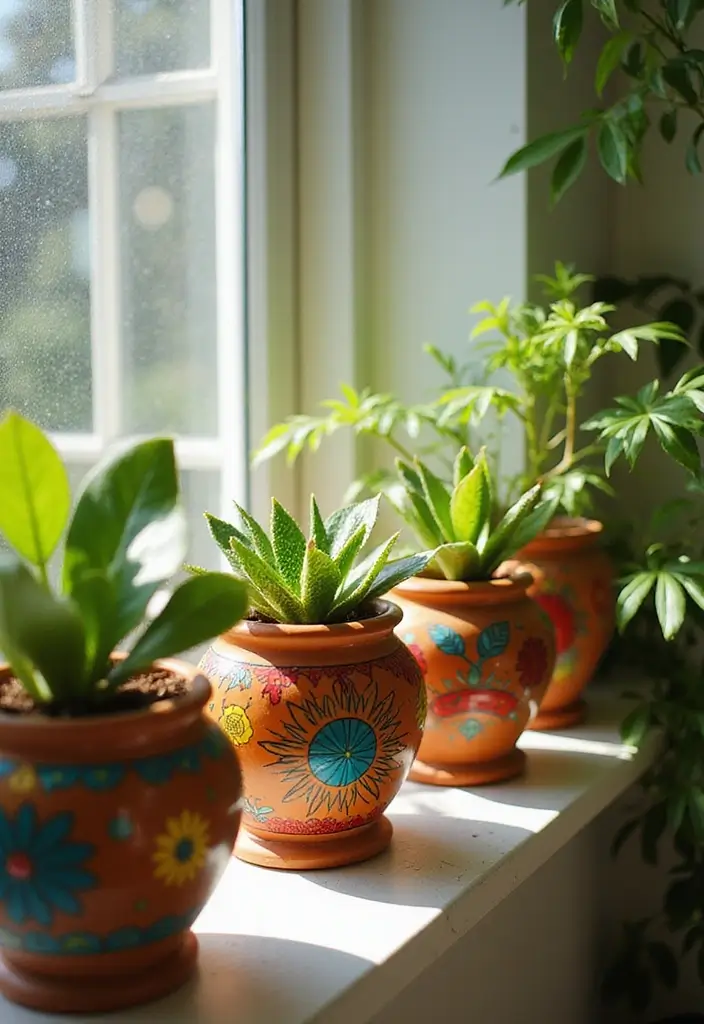
Add a splash of color to your space with painted plant pots! This simple DIY project allows you to show off your personality while caring for your plants. Imagine a sunny corner in your room filled with vibrant pots that reflect your style. Whether you go for bold hues or soft pastels, these painted pots can transform your space into a lively oasis.
To get started, gather some basic materials. You’ll need terra cotta pots, acrylic or spray paint, and paintbrushes if you choose acrylic. This project is budget-friendly and perfect for any skill level. You can find pots at craft stores or even thrift shops. Once you paint them, fill them with your favorite greenery, like succulents or herbs, to create a cozy indoor garden that brightens your room.
• Choose bright or pastel colors to match your style
• Pick fun patterns or quotes for a personal touch
• Seal your pots for durability against moisture
• Place them on windowsills or shelves for maximum visibility
Personalizing your plant pots not only adds unique decor but also brings a bit of nature indoors. Your room will feel more inviting, and taking care of your plants can be a rewarding hobby. Plus, it’s a great conversation starter when friends come over!
6. Photo Clip Display
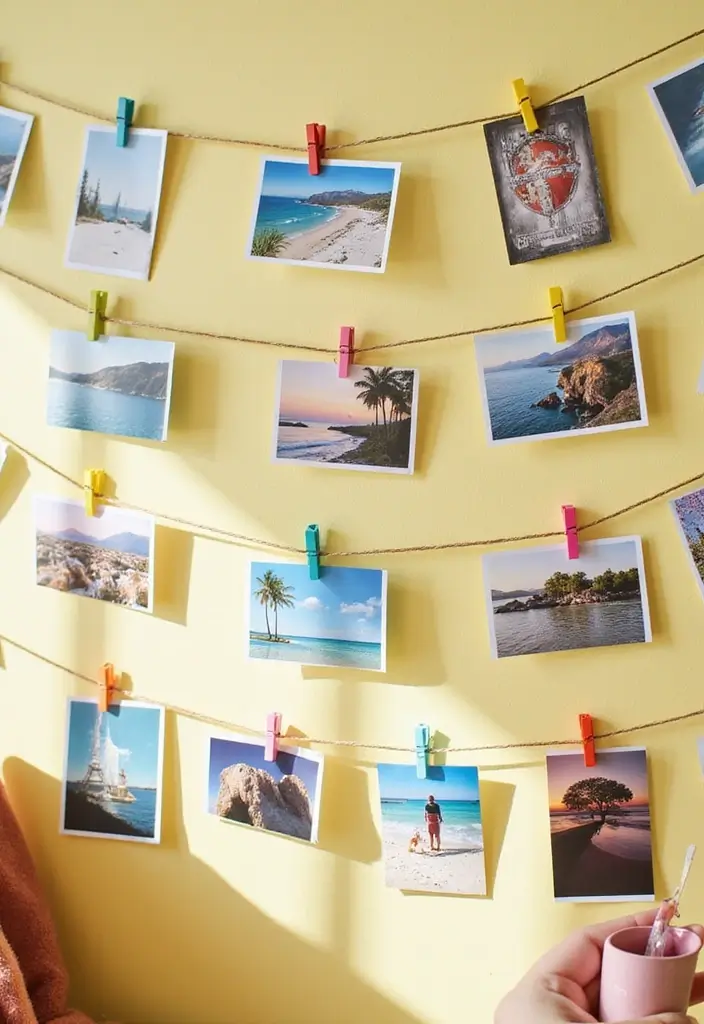
Create a fun and stylish photo clip display to showcase your favorite memories! This DIY project not only adds a personal touch to your room but also allows you to switch out photos anytime. Whether you want to feature snapshots from your last vacation or artwork from your friends, this display brings life to your walls.
To get started, gather some twine or colorful string, some clips or clothespins, and a few wall hooks or nails. You can choose bright colors to match your room’s theme or go for a rustic look with natural twine. Hang the string horizontally across your wall at eye level. Secure it with the wall hooks to ensure it stays in place. Then, use the clips to attach your chosen photos along the line. This simple setup is a hit on Pinterest, where many teens love to express their creativity!
For an affordable twist, consider using thrifted clips or even repurposed materials you have at home. This way, you can create a unique display without spending much. You can also mix in postcards or art prints to keep things fresh and interesting. This method is perfect for expressing your personality and making your space feel more inviting.
• Choose colorful twine for a playful vibe.
• Use clips to attach various pictures and art.
• Hang at eye level for easy viewing and swapping.
• Mix in postcards for added variety and style.
This project not only enhances your room’s decor but also serves as a constant reminder of the moments that matter most to you. Enjoy crafting your photo display!
7. DIY Pom-Pom Garland
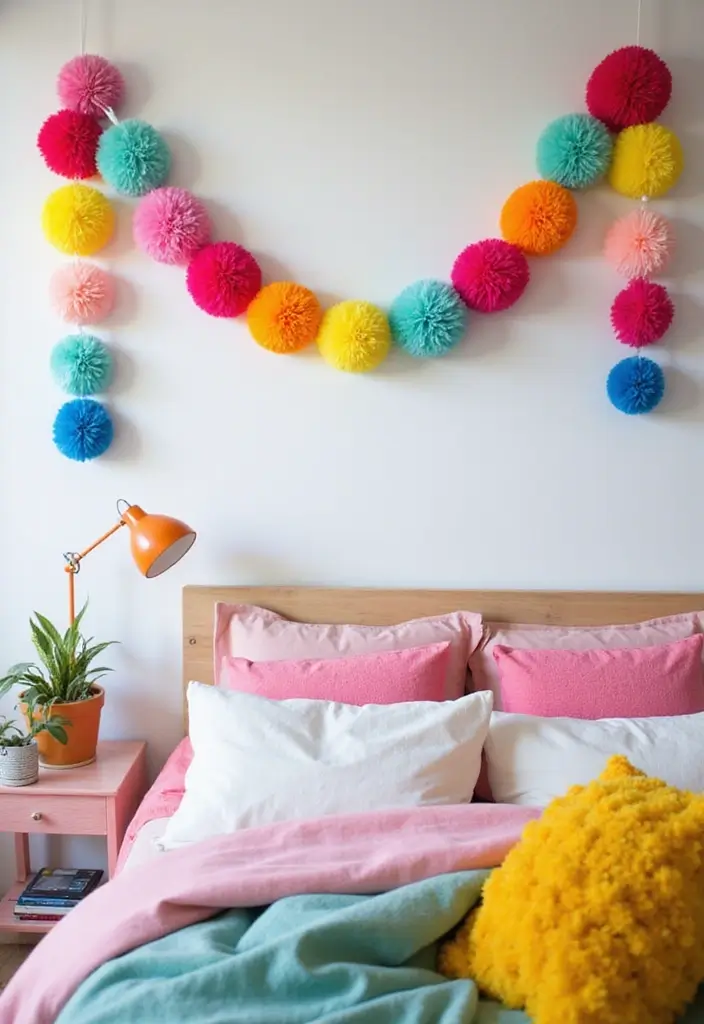
Brighten up your room with a fun DIY pom-pom garland! This colorful decoration can instantly add a whimsical vibe to your space. Imagine a string of fluffy pom-poms in your favorite colors hanging over your bed or draping along a wall. You can choose vibrant hues like pink, teal, or sunny yellow, or go for calming pastels to create a cozy atmosphere. Trends on platforms like Pinterest showcase these cheerful garlands as perfect for personalizing your room.
Creating a pom-pom garland is not only simple but also easy on your wallet. You can find yarn in many colors at craft stores or even repurpose leftover materials. This project encourages creativity and gives your space a cheerful touch. Plus, it’s perfect for parties or just adding a bit of fun to everyday life. You’ll feel proud seeing your handmade decor brighten your room.
• Gather colorful yarn in shades that inspire you.
• Use scissors to cut and shape your pom-poms easily.
• Thread your pom-poms onto a long piece of yarn with a needle.
• Hang your garland wherever you need a pop of joy!
Get ready to enjoy a creative afternoon filled with laughter and color as you make your pom-pom garland. You’ll love how it transforms your space into a fun and inviting retreat. Happy crafting!
8. Recycled Book Bookmark
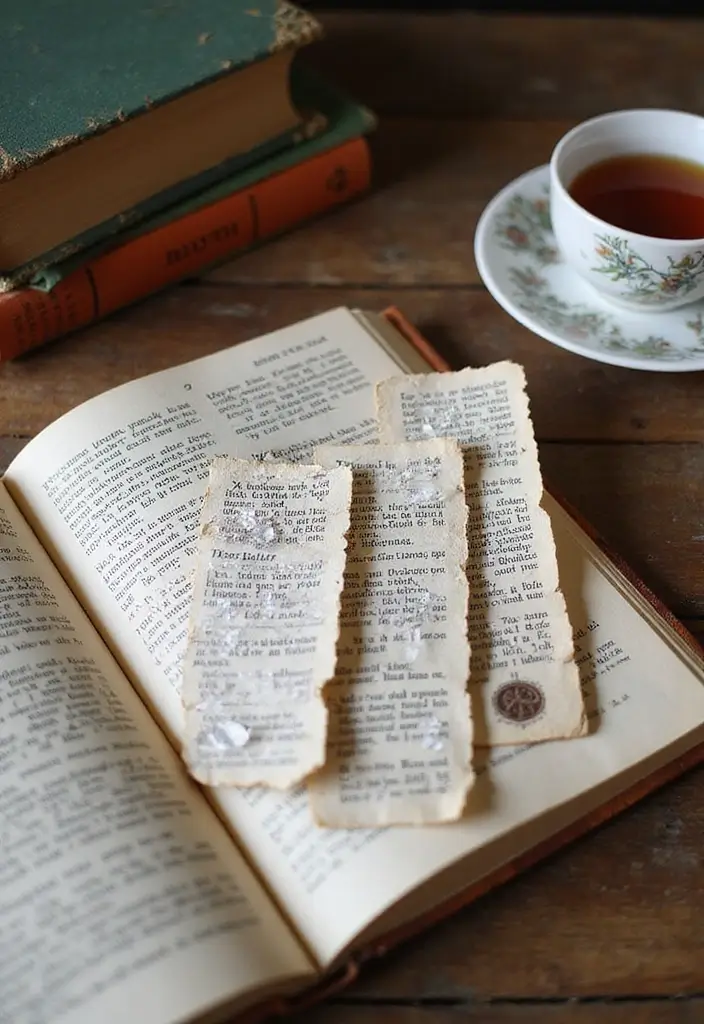
Create your own personalized bookmarks using pages from old books! This fun project not only helps you keep track of your reading but also adds a creative flair to your room decor. Think of bookmarks as small art pieces that can reflect your style and interests.
Imagine using colorful book pages adorned with your favorite quotes or drawings. You can mix and match different designs for a playful look. Pinterest is buzzing with similar ideas, showcasing how unique bookmarks can brighten your reading nook or desk space.
To get started, gather some old books you no longer read. Choose pages that have interesting text or illustrations. Cut them into bookmarks, aiming for a standard size of about 2 by 6 inches. If you want to add more personality, decorate them with doodles, inspiring quotes, or stickers. You can even punch a hole at the top and thread through a colorful ribbon or twine for a stylish touch.
This project is budget-friendly and eco-conscious. You’re recycling materials while creating something functional and beautiful. Plus, these bookmarks are perfect for gifting to friends or using in your own books, making every reading session a bit more special.
• Cut pages into bookmark-sized pieces for a custom fit
• Decorate with your favorite quotes or drawings
• Punch holes and add ribbons for a chic look
• Use old book covers for a sturdier bookmark option
Embrace your creativity and enjoy the satisfaction of making something uniquely yours!
9. DIY Dreamcatcher
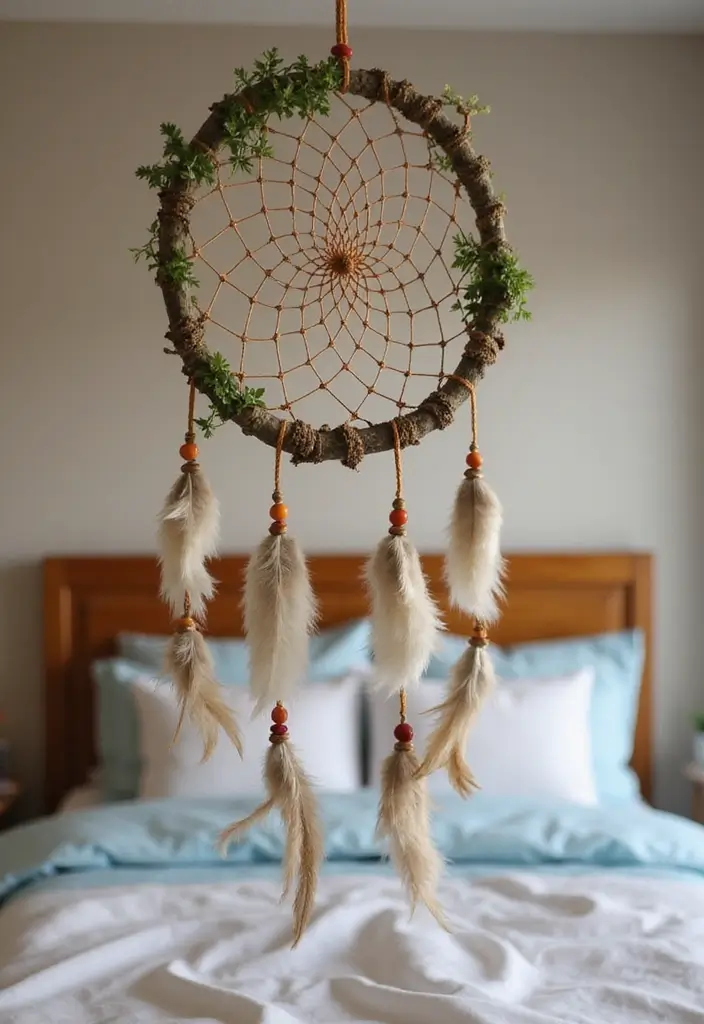
Create your very own dreamcatcher to hang above your bed! This delightful project not only adds a personal touch to your room but is also steeped in tradition. Dreamcatchers are believed to filter out bad dreams, letting only good ones pass through. Picture a colorful design that complements your room’s style while reflecting your unique personality.
Choose a hoop made from a wooden ring or even a sturdy hanger. Wrap it with vibrant string or twine in your favorite colors. You might consider soft pastels for a calming vibe or bold hues for a statement piece. Pinterest is buzzing with creative ideas, showcasing dreamcatchers adorned with feathers and beads. This trend can make your space feel cozy and imaginative.
Let’s dive into how you can make your dreamcatcher! First, gather your materials. You’ll need a hoop, string or twine, and decorative items like feathers and beads. This project is budget-friendly, allowing you to express your creativity without spending much.
Start by wrapping the hoop in your chosen string, covering it evenly. Then, weave a web design inside the hoop with more string. This part is where your creativity shines! Finally, attach feathers and beads at the bottom for a playful touch.
The best part? You’ll create a beautiful piece of art that symbolizes your dreams and aspirations, making your room feel even more special.
• Use a wooden ring or hanger for your hoop
• Wrap with colorful string to match your decor
• Weave a web design with string for creativity
• Add feathers and beads for a whimsical finish
10. Upcycled T-Shirt Pillows
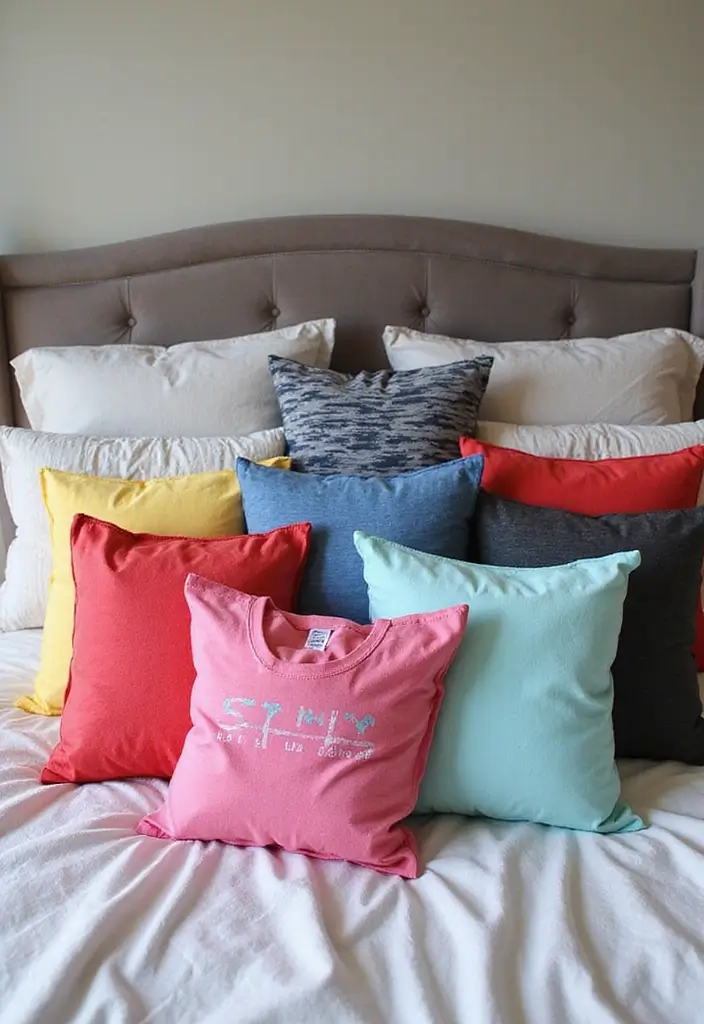
To get started, gather your materials. You’ll need some old t-shirts, stuffing or fabric scraps, and a pair of scissors. This project is budget-friendly, especially if you use shirts you already own. Follow these simple steps:
1. Cut the t-shirt into a square or rectangle.
2. Sew or glue the edges together, but leave a small opening.
3. Fill it with stuffing and seal the opening.
Now you have a pillow that not only looks great but also tells a story!
• Use colorful tees for a vibrant touch to your decor.
• Choose soft, comfy fabric for added coziness.
• Pick unique graphics to express your personality.
• Add embellishments like buttons or patches for a custom look.
These pillows make perfect accents on your bed or chair, adding a splash of personality to your room. Plus, they’re easy to make, and you’ll feel great knowing you turned something old into something fabulous!
11. DIY Wall Shelves
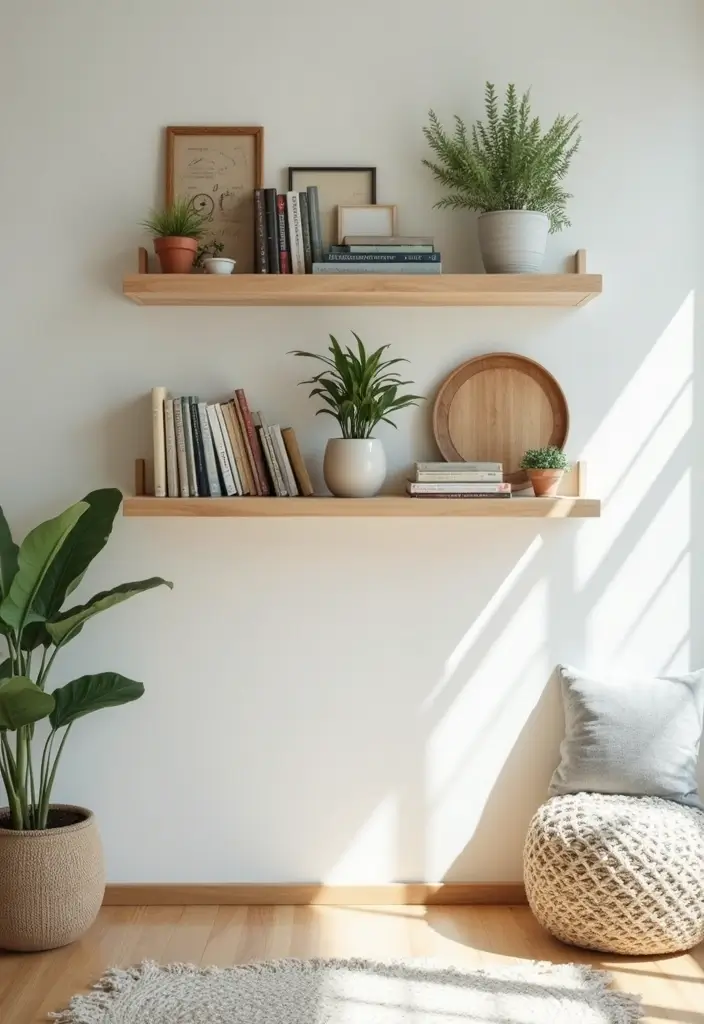
Looking for a way to brighten up your room and showcase your favorite things? DIY wall shelves are a fantastic solution! These shelves not only help you stay organized but also turn your walls into a beautiful display. You can paint them in your favorite colors or use natural wood for a trendy look. Pinterest is buzzing with ideas for unique shelf designs that add personality to any space.
Start by deciding where you want your shelves. Measure the space and choose a size that fits your style. Look for affordable wooden boards at your local hardware store or even use reclaimed wood for a rustic vibe. This project is budget-friendly and perfect for adding a personal touch to your room. Once you’re done, you’ll have a stylish spot to display books, plants, or your latest art collection, making your space feel warm and welcoming.
• Choose sturdy wooden boards for lasting support
• Pick a color that matches your room’s theme
• Measure accurately to ensure a perfect fit
• Add decorative items like plants or framed photos to personalize your shelves
With a little effort, you can create stunning wall shelves that reflect your unique style. Enjoy your new creative space!
12. Vintage Suitcase Storage
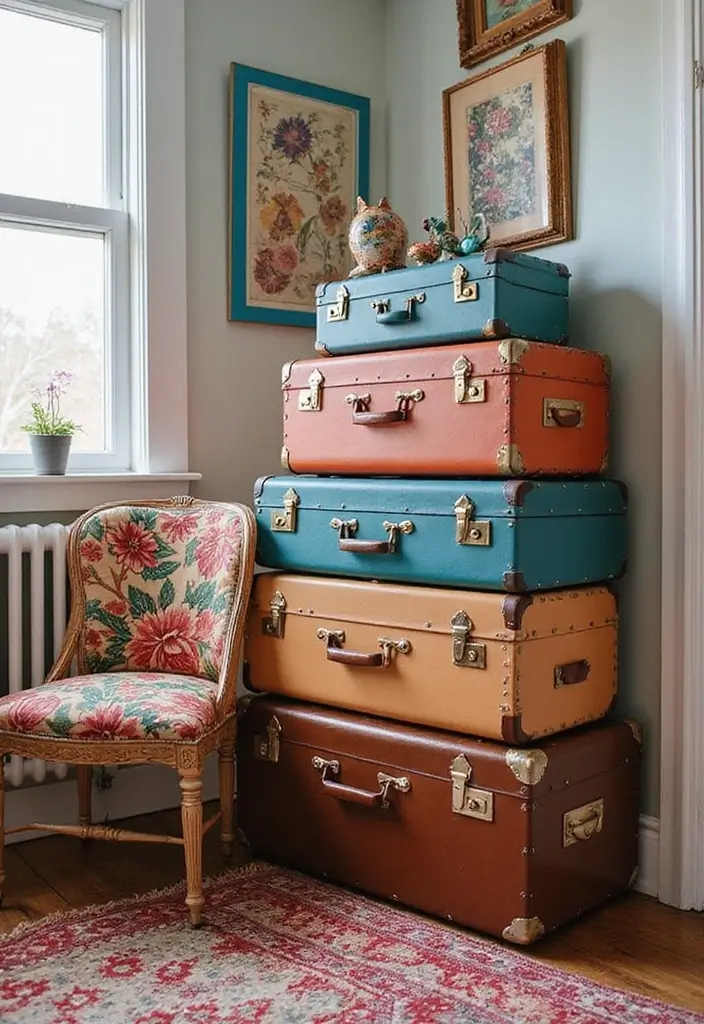
Transform your room with vintage suitcases as chic storage solutions. These stylish pieces not only keep your belongings organized but also add a unique flair to your space. Imagine stacking colorful suitcases in a corner or placing one under your bed. They can be found in a variety of designs and colors, from faded blues to vibrant reds, which makes them a versatile choice for any decor. This trend is popping up on Pinterest, where teens are showing how these retro items can elevate their room’s aesthetic.
To get started, hunt for old suitcases at thrift stores or flea markets. They’re often budget-friendly and can be customized to match your style. You can paint them in bright colors or add fun decals for a personal touch. Stacking them gives you a cool display while saving space. Use them to store seasonal clothes, books, or even your favorite board games. This not only organizes your room but also expresses your personality, making it feel more inviting.
• Choose suitcases in fun colors or patterns for a pop of style.
• Stack them for a trendy display that saves space.
• Paint or add stickers to customize your suitcase storage.
• Use them to store clothes, books, or games for easy organization.
13. DIY String Light Canopy
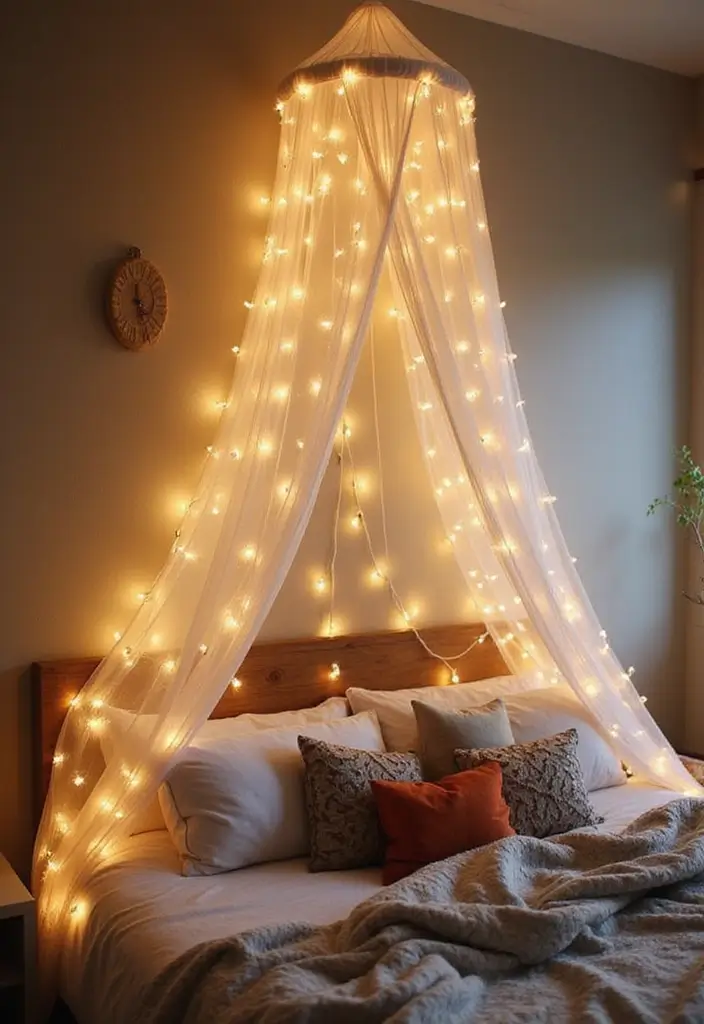
Create a whimsical atmosphere in your room with a DIY string light canopy. This charming project is not only simple but also offers a delightful way to brighten your space. Imagine stepping into a room filled with twinkling lights draped elegantly across the ceiling. You can use soft colors like pastel pinks or calming whites for a dreamy effect, or go bold with vibrant hues. Pinterest is filled with inspiring ideas that show how this touch can transform a room into a cozy retreat.
To get started, you only need a few affordable supplies. Gather your string lights, some tulle or lightweight fabric, and ceiling hooks. First, hang the string lights around the perimeter of your ceiling using the hooks. Then, drape the tulle or fabric in a fun, flowing pattern to create depth. Secure the ends of the fabric to the wall for added stability. This setup not only looks stunning but also makes your room feel inviting, perfect for relaxing or entertaining friends.
• Use soft or bold colors for a unique look
• Gather string lights and tulle for a budget-friendly project
• Hang lights securely for safety and stability
• Drape fabric in a fun pattern to add dimension
With this DIY project, you can easily create a magical space that reflects your style. Your friends will love hanging out under the glow of your beautiful canopy. Plus, it’s an excellent way to express your creativity while enhancing your room’s vibe. Enjoy your new cozy corner!
14. Painted Wood Signs
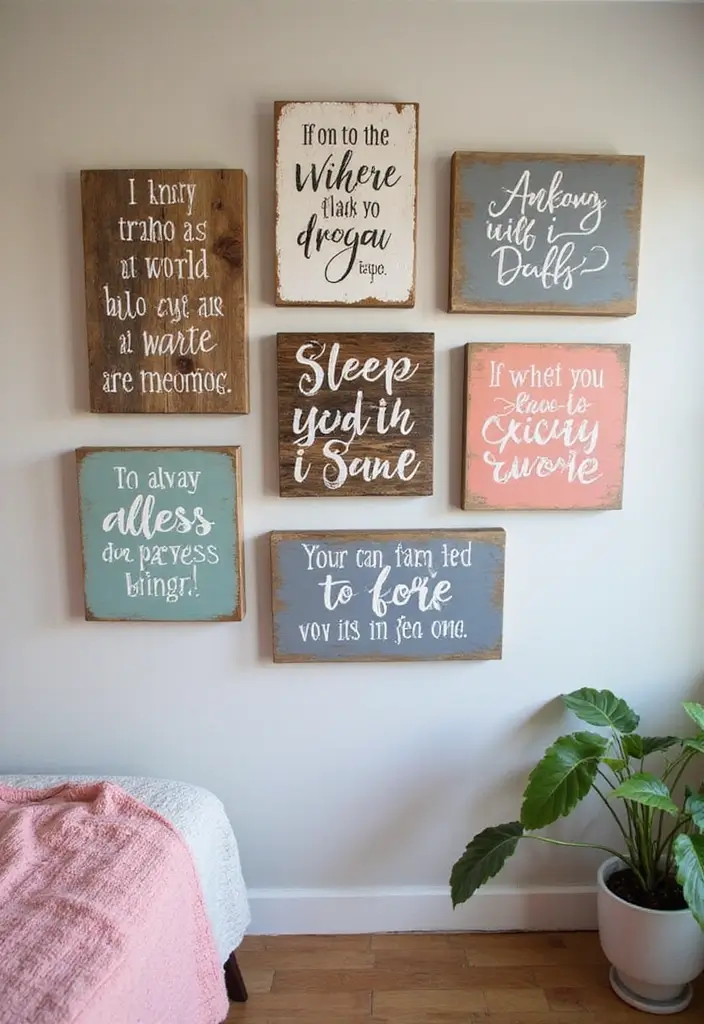
Create your own painted wood signs to add a personal touch to your room! These signs can showcase your favorite quotes, song lyrics, or affirmations. Use reclaimed wood for a rustic vibe, or try smooth wooden boards for a clean look. Choose colors that match your room’s palette—think soft pastels, bold hues, or classic white. Pinterest is full of inspiration for these trendy decor pieces, making them a favorite among teens looking to express themselves.
To get started, gather a few supplies. You’ll need wood, paint or permanent markers, and brushes or stencils. Sand the wood to make it smooth. This step is crucial for a polished finish. Then, paint or write your chosen text. You can use stencils for neat letters or go freehand for a more personal touch. Once you’re done, hang the signs on your wall or place them on a shelf where you can see them daily. This project is not only budget-friendly but also a fantastic way to motivate yourself every day.
Here are some tips to make your painted wood signs stand out:
• Choose reclaimed wood for a unique, rustic look
• Use bright, contrasting colors for eye-catching quotes
• Hang signs near your workspace for inspiration
• Add decorative elements like hearts or stars for fun
These signs can help make your space feel cozy and motivate you. They are a simple way to express your personality while brightening your room. Let your creativity shine!
15. DIY Mood Board
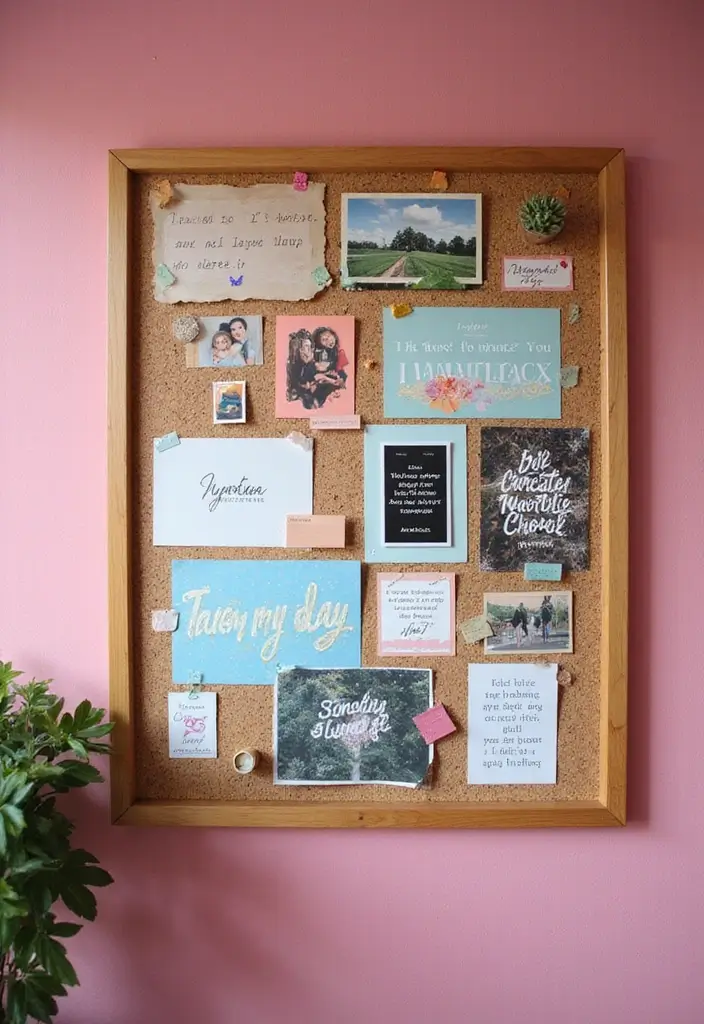
Transform your wall into a canvas of inspiration with a DIY mood board! This fun project not only adds style to your room but helps you visualize your dreams and goals every day. Imagine bright colors, motivational quotes, and images that spark joy—all in one place.
Start by gathering materials like a cork board or a large piece of poster board. You can find magazines, photos, or even printed images online that resonate with you. Pinterest is a treasure trove of ideas, showcasing the latest trends in mood board designs. Think of a mix of pastel colors combined with bold graphics for a modern touch, or go for a vintage vibe with sepia-toned pictures. Place your board where you can see it daily, like above your desk or near your bed.
Next, let’s dive into the steps. First, collect all your inspiring images and words. Think about what motivates you. Then, arrange them on the board in a way that feels right to you. You can overlap images or leave space—there’s no wrong way to do it! Once you’re happy with the layout, secure everything down using pins, glue, or tape.
This vibrant mood board will not only beautify your room but also serve as a daily reminder of what you aspire to achieve. It’s perfect for igniting creativity and keeping you focused on your dreams.
• Collect images and quotes that inspire you
• Arrange them creatively on your board
• Secure with pins, glue, or tape
• Display in a spot where you see it daily
16. Washi Tape Decor
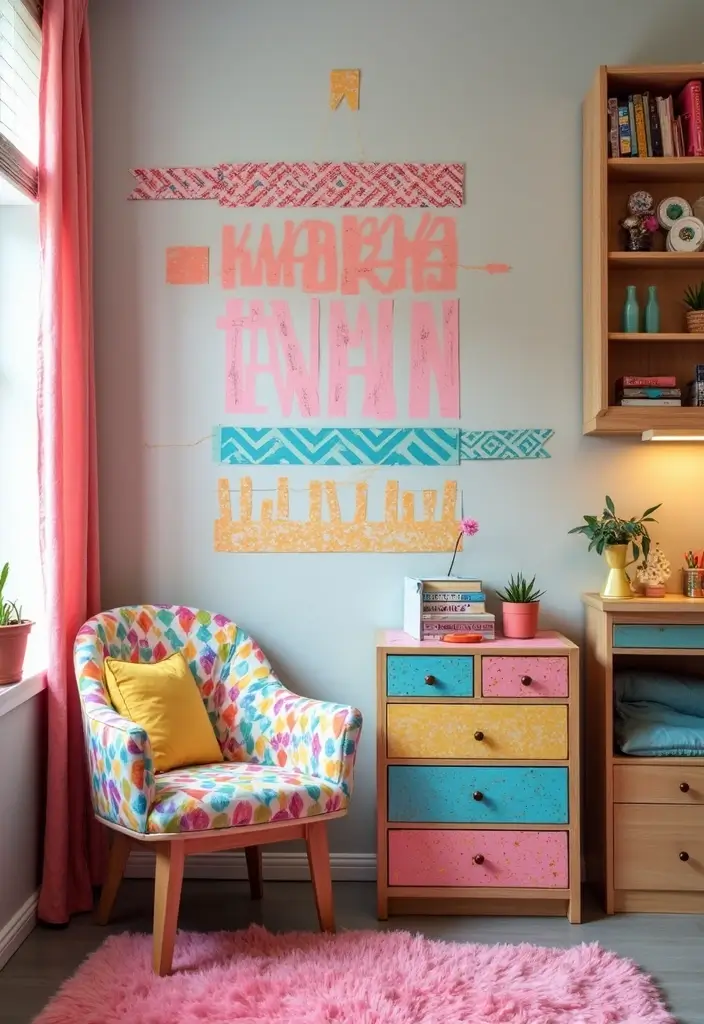
Washi tape is your secret weapon for brightening up your room! This colorful, adhesive tape lets you unleash your creativity in fun ways. You can find it in so many colors and patterns—from floral prints to bold stripes. Use it to decorate your walls, jazz up furniture, or even personalize your phone case. Pinterest is full of ideas showcasing washi tape art, and it’s easy to see why it’s a trending choice for teens.
To get started, gather a few rolls of your favorite washi tape. You’ll be amazed at how affordable they are, making this project perfect for any budget. Stick the tape in creative patterns, mix and match colors, or even create shapes like hearts or stars. Remember, this is a temporary decoration, so if you ever feel like changing things up, just peel it off and try something new! This flexibility makes washi tape a fun way to express your style while keeping your space fresh and inviting.
• Choose different colors and patterns to match your vibe
• Apply tape in fun geometric shapes on furniture
• Create a unique border on your wall for a pop of color
• Use washi tape to personalize everyday items like notebooks or phone cases
17. DIY Candle Holders
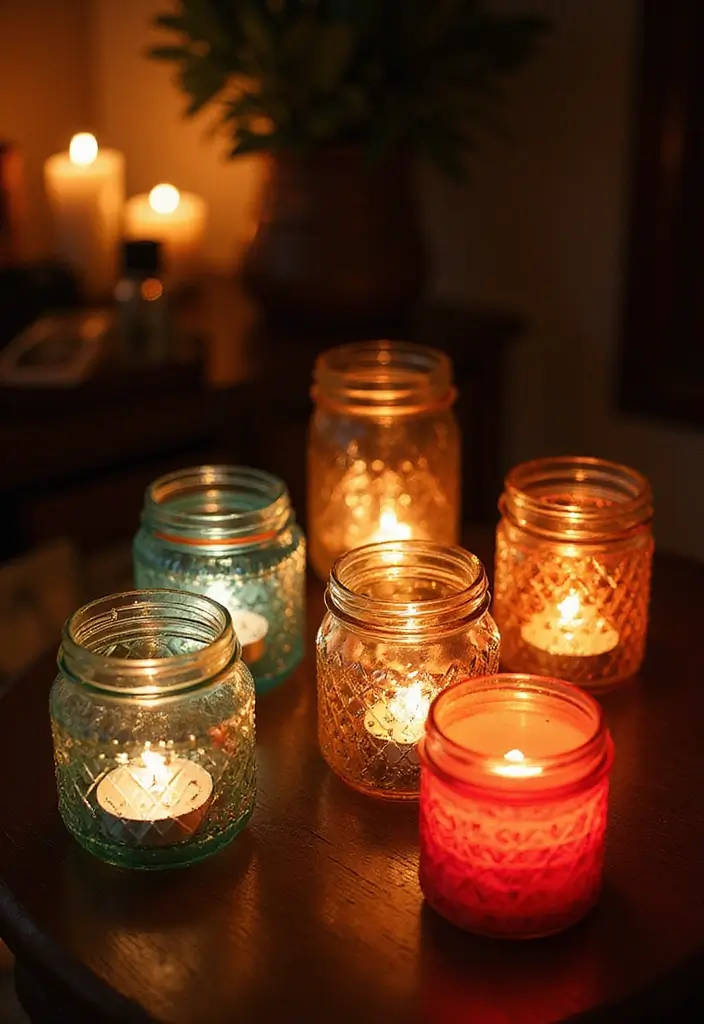
Create a cozy atmosphere in your room with charming DIY candle holders. These simple projects not only brighten your space but also add a personal touch. Imagine using colorful jars or rustic tin cans to hold soft, flickering candles. Shades of blue, pastel pinks, or even earthy tones work well, depending on your room’s vibe. Pinterest is full of inspiration for these projects, showcasing how candle holders can transform your space into a warm retreat.
Start this fun project by gathering your materials. Look around your home for empty glass jars or tin cans. Once you have them, clean them well to ensure a smooth finish. You can paint them in vibrant colors or wrap them with twine for a natural look. Use stickers or washi tape to create fun patterns. After decorating, place a candle inside, and watch how the light dances through your beautiful creations.
This DIY project is budget-friendly and eco-conscious, allowing you to repurpose items you already have. You can create a gallery of candle holders on your windowsill or bedside table, making your room feel inviting and stylish.
• Clean empty jars or cans before decorating
• Choose bright colors or natural materials for style
• Add twine, paint, or stickers for unique designs
• Place candles inside to create a warm ambiance
Making your own candle holders is not just about decor; it’s about expressing your creativity. Each piece tells a story and adds warmth, making your space truly yours. Enjoy the process and let your personality shine through!
18. DIY Decorative Bowls
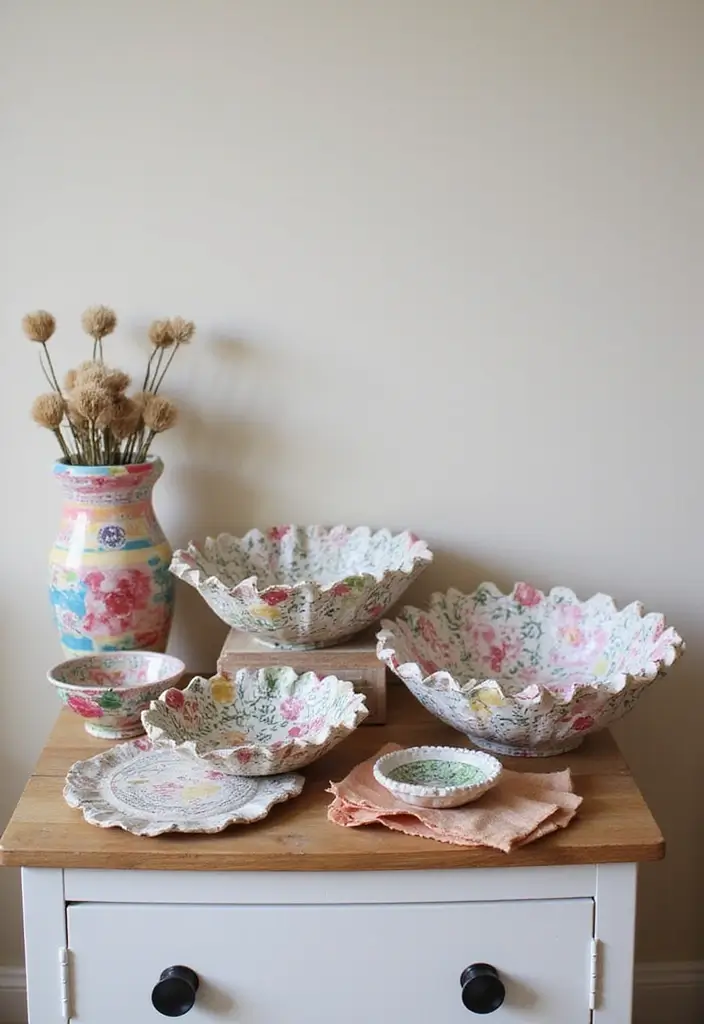
Brighten up your space with DIY decorative bowls that showcase your creativity! These bowls can add a pop of color and style to your room while also being practical. Use materials you already have at home, like old newspapers or leftover yarn, to create something unique. Pinterest is full of inspiration for these fun projects, showing how a simple bowl can transform your decor.
To get started, gather some eco-friendly materials. You’ll need old newspapers, fabric scraps, or colorful yarn, along with some Mod Podge or glue. A balloon will help you shape your bowl. This craft is budget-friendly and perfect for any teen looking to personalize their space. Once you finish, you’ll have a beautiful bowl that’s both functional and stylish, perfect for holding trinkets or snacks.
• Choose colorful newspapers or fabric for fun designs
• Inflate a balloon to your preferred bowl size
• Apply your materials with Mod Podge, layering for texture
• Let it dry completely before popping the balloon
These DIY bowls not only add charm but also allow you to express your personality. They are perfect for organizing small items or just as eye-catching decor on your desk or shelf. Enjoy the process of creating something truly yours!
19. DIY Fabric Wall Art
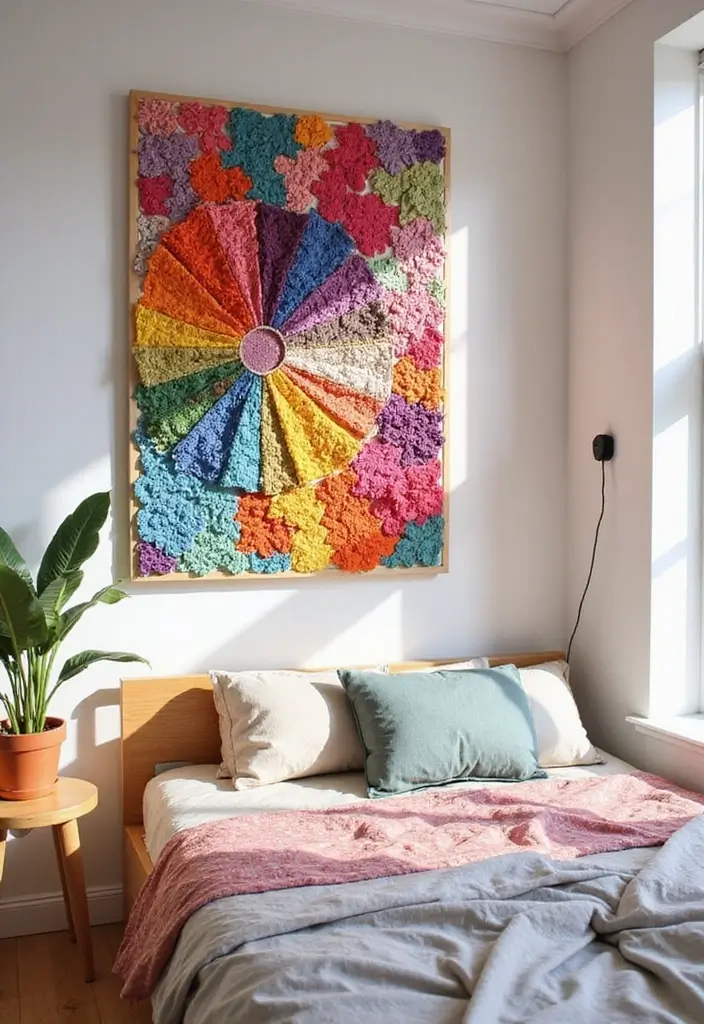
Brighten up your room with DIY fabric wall art! This fun project lets you transform ordinary fabric scraps into eye-catching masterpieces. You can play with different colors and textures to reflect your unique style. Imagine a vibrant mix of bold fabrics hanging on your wall, creating a cozy and inviting atmosphere. Pinterest is buzzing with these creative ideas, showing that fabric wall art is a trendy way to express yourself.
Getting started is simple and budget-friendly. Gather your leftover fabric pieces, and consider using a canvas or a stretched fabric frame as your base. You can often find these materials at thrift stores or craft shops without spending much. Arrange the fabric in a way that feels right to you—whether it’s a random collage or a planned geometric design. This easy project not only adds personality to your space but also makes it feel warm and inviting, perfect for hanging out with friends or relaxing after a long day.
• Gather fabric scraps in colors that inspire you.
• Choose a canvas or frame that fits your wall space.
• Arrange pieces in a pattern that makes you smile.
• Hang your art in a spot that gets noticed!
With just a few steps, you can create a stunning focal point in your room. Dive into this creative project, and let your personality shine through your fabric wall art!
20. DIY Personalized Calendar
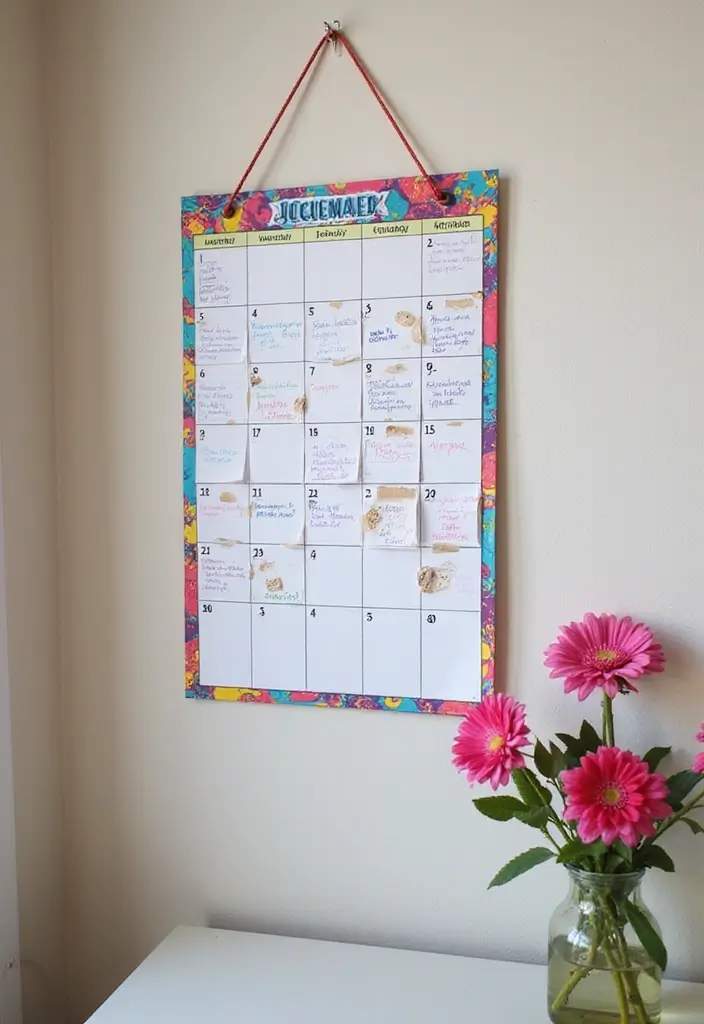
Create a unique and stylish space with a DIY personalized calendar! This project not only helps you stay organized but also adds a splash of creativity to your room. Imagine a colorful calendar hanging on your wall, filled with your favorite colors and designs. You could use pastels for a soft look or bright colors for a fun vibe. As seen in many teen room inspirations on Pinterest, a calendar can be both practical and a statement piece.
Start by gathering your supplies. You’ll need some cardstock or a blank calendar template. Choose markers or colored pencils in your favorite shades. To make it extra special, add stickers, washi tape, or other embellishments that reflect your personality. This calendar will not only help you track your activities but also brighten up your space, making it feel more like home.
Here’s how to get started with your personalized calendar:
• Choose a layout that works for you, whether it’s monthly or weekly.
• Use vibrant colors to mark important dates, like birthdays or events.
• Add stickers or drawings that represent your hobbies or interests.
• Hang it in a spot where you will see it daily, like above your desk or near your bed.
This DIY project is budget-friendly and allows you to express your creativity. It’s perfect for keeping you on track with school assignments, social events, or even just daily reminders. Plus, every time you look at it, you’ll smile at the personal touch you’ve added to your room. Enjoy crafting your own calendar, and let it be a bright reminder of your busy, exciting life!
21. Nature-Inspired Wall Decor
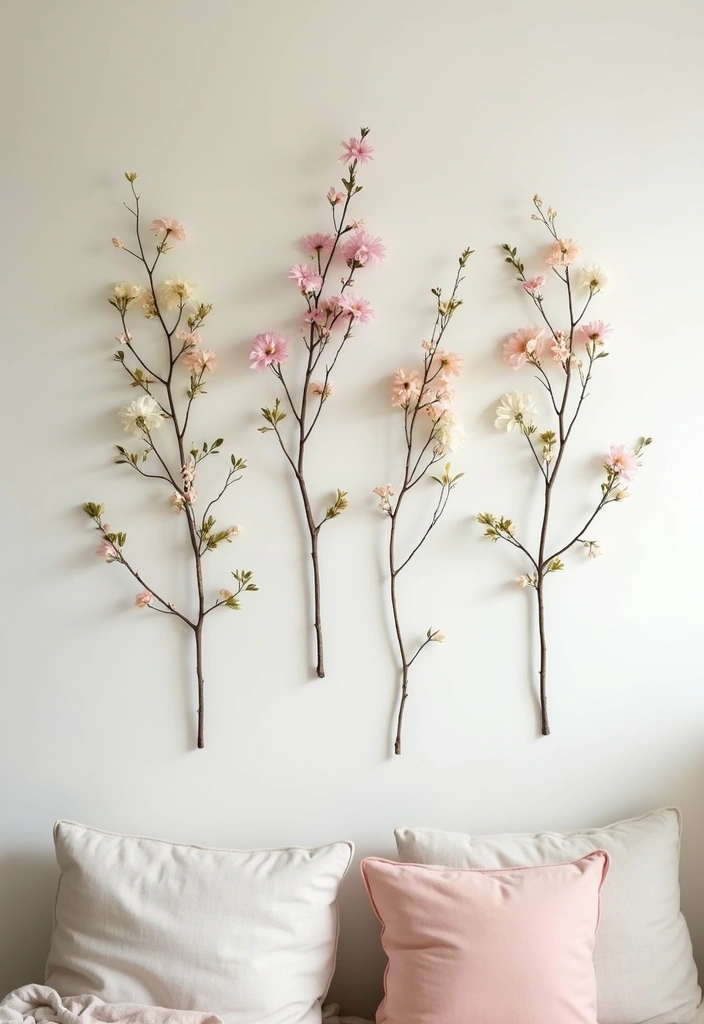
Bring a touch of nature into your room with stunning, nature-inspired wall decor! Using elements like twigs, leaves, and flowers, you can create a beautiful piece of art that connects your space with the great outdoors. Imagine a calming display of pressed flowers in soft pastels or striking branches painted in bright colors. This trend is all over Pinterest, inspiring many teens to add a fresh, organic vibe to their rooms.
To get started, gather natural items from your backyard or a nearby park. Look for interesting shapes or colors that catch your eye. You can use an old frame or a blank canvas as your base. Secure your natural pieces with twine or a strong adhesive. This project is budget-friendly and perfect for personalizing your space. The result will feel warm and inviting, making your room a cozy sanctuary.
• Collect twigs, leaves, or flowers from your surroundings
• Use a frame or canvas to display your artwork
• Secure your pieces with twine or glue for a neat finish
• Hang your creation in a bright spot to brighten your room
Creating nature-inspired wall decor makes your space feel lively and unique. Plus, you’ll promote sustainability by using items that might otherwise be overlooked. Enjoy a piece of nature indoors, and let your creativity shine!
22. DIY Personalized Mugs
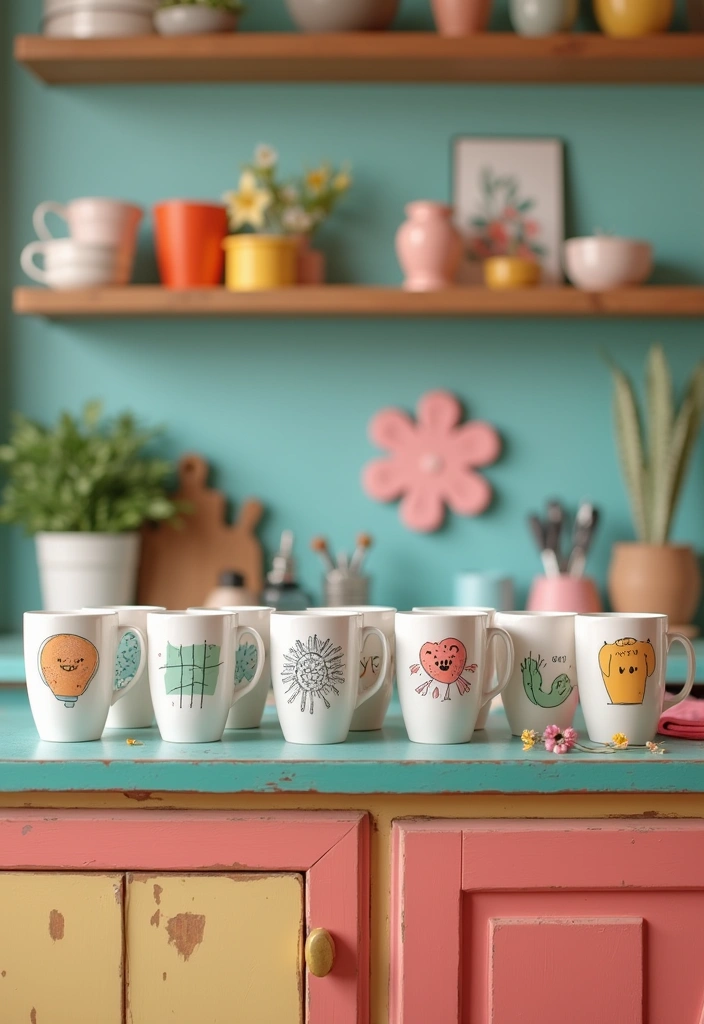
Make your mornings brighter with DIY personalized mugs! This fun project lets you express your creativity while adding a unique touch to your daily routine. Imagine sipping your favorite hot chocolate from a mug you designed yourself—how cool is that?
Start with plain ceramic mugs. You can find these at craft stores or even discount shops. Grab some colorful Sharpies or paint pens to bring your ideas to life. Think about bright colors or fun patterns that reflect your personality. Pinterest is full of inspiration, from cute doodles to motivational quotes. Making your mug adds character to your space and makes each sip enjoyable!
Ready to get started? Here’s how to create your personalized masterpiece. First, sketch your design directly on the mug using your Sharpies. If you want your art to last, bake the mugs in the oven at 350°F for 30 minutes to set the colors. This step is optional, but it helps keep your designs vibrant. Once they’re cool, use your mugs for coffee, tea, or even as decorative pieces on your shelf. They’ll not only be functional but also a great conversation starter!
• Choose plain ceramic mugs for a clean canvas
• Use Sharpies or paint pens for colorful designs
• Bake your mugs to make the designs permanent
• Display them proudly or gift them to friends
This project is budget-friendly and perfect for a cozy afternoon. Plus, it adds a personal touch to your room decor that friends will admire!
23. DIY Cozy Reading Nook
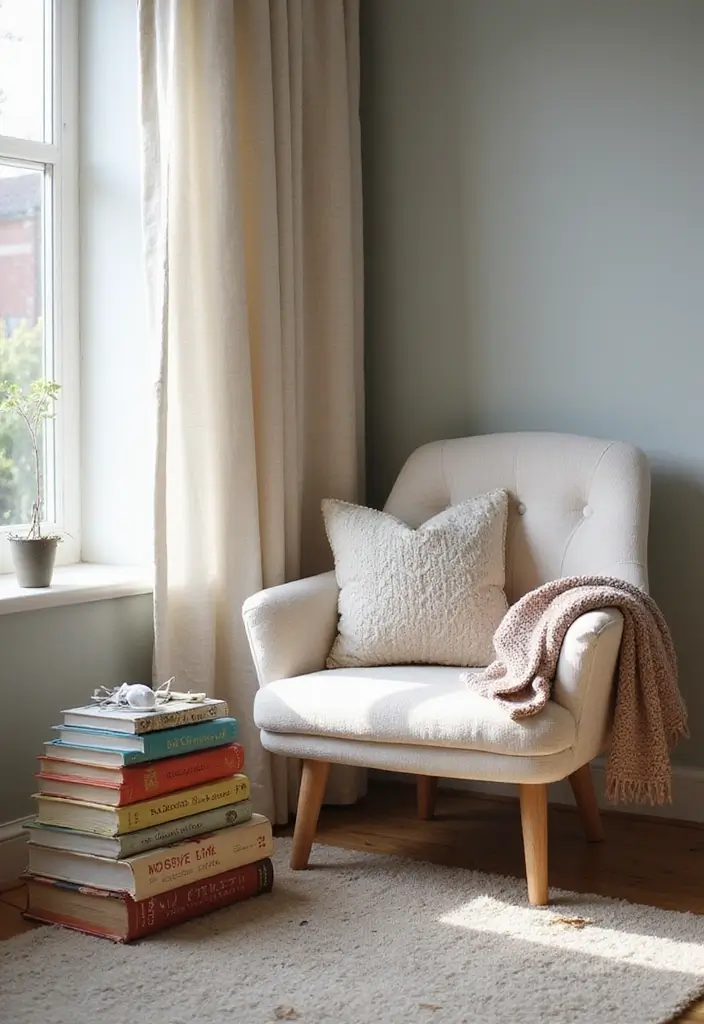
Create your own cozy reading nook right in your room! This little corner can become your personal retreat, perfect for diving into your favorite stories and escaping from the world. Imagine soft pillows, warm blankets, and books just waiting to be explored.
Choose a quiet spot in your room. A corner by a window works great, letting in natural light. You can mix and match colored cushions and a fluffy blanket to make it inviting. Pinterest is buzzing with ideas for reading nooks that combine comfort with style. Look for inspiration in soft pastels or bold patterns that reflect your personality.
Now, let’s talk about how to bring your nook to life. Find a comfy chair or a beanbag that invites you to sit for hours. You can use a small bookshelf or even a cute basket to keep your books organized and within reach. Keep it affordable by checking thrift stores, where you might find unique pieces that add character without breaking the bank.
This cozy nook will be a perfect spot for relaxation and will make your room feel more inviting. You’ll love curling up with a good book in your own special space!
• Choose a sunny corner for natural light.
• Add colorful cushions for comfort and style.
• Use a basket or shelf to store your books.
• Find unique pieces at thrift stores for charm.
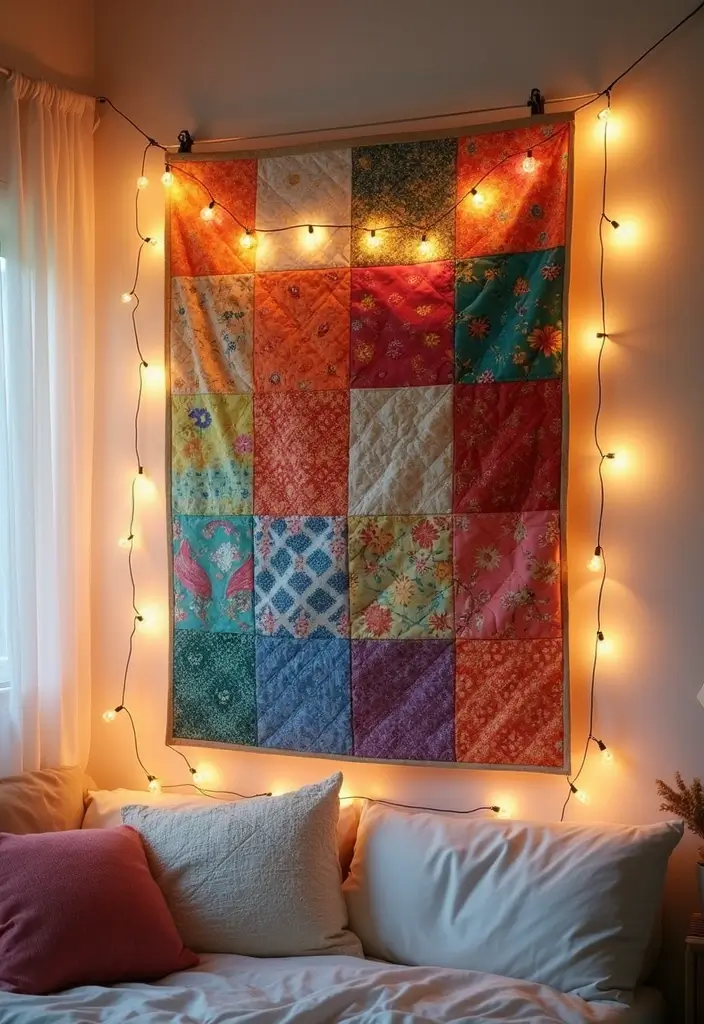
24. DIY Quilt or Throw
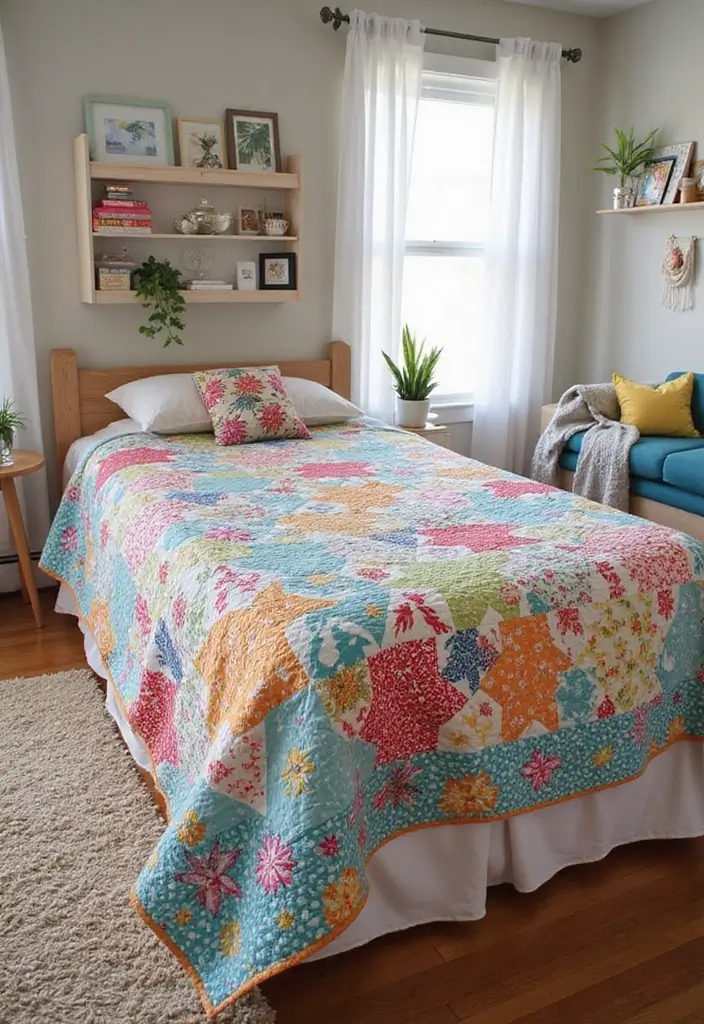
Create a cozy quilt or throw that reflects your style! This DIY project is not only a fun way to express your creativity but also a practical addition to your room. Imagine snuggling under a quilt made from your favorite fabric scraps, showcasing colors and patterns you love. Pinterest is buzzing with vibrant quilts featuring bold colors and playful designs, making them a trendy choice for teen room decor.
Getting started is easy and budget-friendly. You don’t need to break the bank; simply gather leftover fabric from old clothes or crafts. You can also find fabric scraps at thrift stores or online marketplaces. This project encourages sustainability and helps you develop your sewing skills. Plus, there’s something special about using materials that tell your story. Once complete, your quilt will not only keep you warm but also transform your space into a personal sanctuary.
• Cut fabric into squares or rectangles for a patchwork design
• Sew pieces together in a pattern that speaks to you
• Add batting for extra warmth and comfort if desired
• Display your quilt on your bed or hang it as wall art for a pop of color
25. DIY Fearless Wall Art
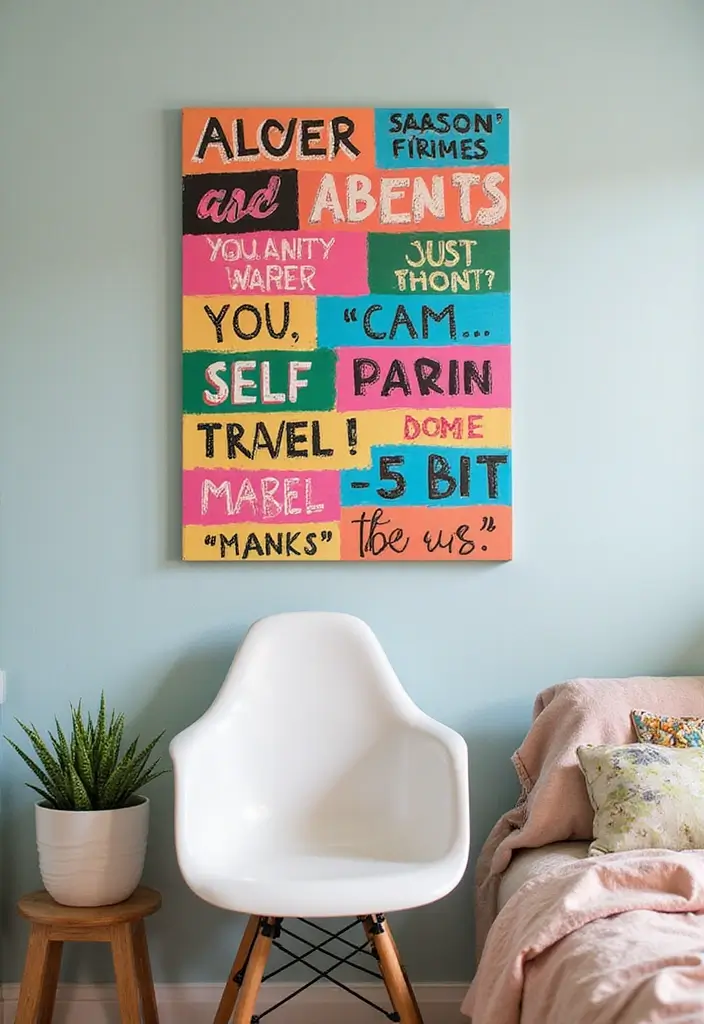
Are you ready to express your personality through art? Create stunning DIY fearless wall art that makes a statement in your room! This project not only adds a unique touch to your decor but also inspires you every day. Whether you choose vibrant colors or powerful words, your artwork will reflect your bold spirit.
Start by selecting a word or phrase that resonates with you. Think about what motivates or empowers you—words like “brave” or “dream big” can be perfect choices. Grab a canvas or sturdy paper, and use bright paints or markers to bring your vision to life. You can even check out Pinterest for ideas and color schemes that pop! Hang your masterpiece where you can see it daily. This will serve as a constant reminder of your strength and creativity, making your space feel truly yours.
Here are some practical tips to get started:
Use a canvas or thick paper for durability.
Choose bold colors that stand out and make an impact.
Pick a phrase that resonates with your journey.
Place it in a prominent spot to inspire you daily.
Creating fearless wall art is not only fun but also budget-friendly. You can find supplies at craft stores or even use materials you already have at home. This project connects with current trends in home decor, where personal touches and meaningful art are celebrated. Your room will feel more vibrant and encouraging, making it a perfect space for relaxation or study.
Conclusion
These 25 simple DIY room decor ideas prove that being creative and eco-friendly can go hand in hand. Whether you’re upcycling materials or using nature-inspired elements, there’s no limit to how you can personalize your space.
So pick a project that resonates with you and start transforming your room into a haven that reflects your personality and values. Happy crafting!
Frequently Asked Questions
What Are Some Easy Craft Projects for Teens to Decorate Their Rooms?
If you’re looking for some fun and creative ways to decorate your space, there are plenty of easy craft projects for teens! You can start with DIY wall art using old magazines or canvas. Another great idea is to create personalized photo collages or mood boards that reflect your style. Don’t forget to try making decorative pillows or upcycling furniture with paint or stencils for a unique touch! These projects are budget-friendly and can really elevate your room’s vibe.
How Can I Make Eco-Friendly DIY Room Decor for Teens?
Creating eco-friendly DIY room decor is not only fun but also a great way to contribute to sustainability! Use recycled materials like cardboard, glass jars, or fabric scraps to make items such as planters, wall hangings, or storage solutions. You can also repurpose old furniture with a fresh coat of paint or new knobs. Incorporating plants into your decor not only beautifies your space but also improves air quality. Plus, you’ll feel great knowing you’re doing your part for the planet!
What Are Some Budget-Friendly Room Decor Ideas for Teens?
Decorating your room on a budget is totally doable with some creative ideas! Think about thrift shopping for unique items or swapping decor with friends for a fresh look. You can also make DIY wall art or string lights to add ambiance without breaking the bank. Another idea is to use removable wall decals that are affordable and easy to change as your style evolves. This way, you can have a stylish space that reflects your personality without overspending!
What Are Some Fun Room Makeovers for Teenagers?
If you’re considering a room makeover, think of themes that resonate with you! A bohemian vibe can be achieved with colorful textiles and plants, while a minimalist look can be created with simple decor and neutral colors. Add personal touches like photos or artwork to make it uniquely yours. You can also experiment with different lighting—fairy lights or a funky lamp can change the mood of your room instantly. The key is to have fun and let your creativity shine!
How Do I Choose the Right Colors and Themes for My Teen Room Decor?
Choosing the right colors and themes for your teen room decor can be an exciting journey! Start by thinking about what colors make you feel happy and energized. Consider themes like beach, vintage, or artistic based on your interests. Use color palettes from magazines or online resources to find combinations that work well together. Don’t forget to incorporate personal elements like your favorite quotes or artwork to make your space truly feel like home. Trust your instincts and have fun with it!